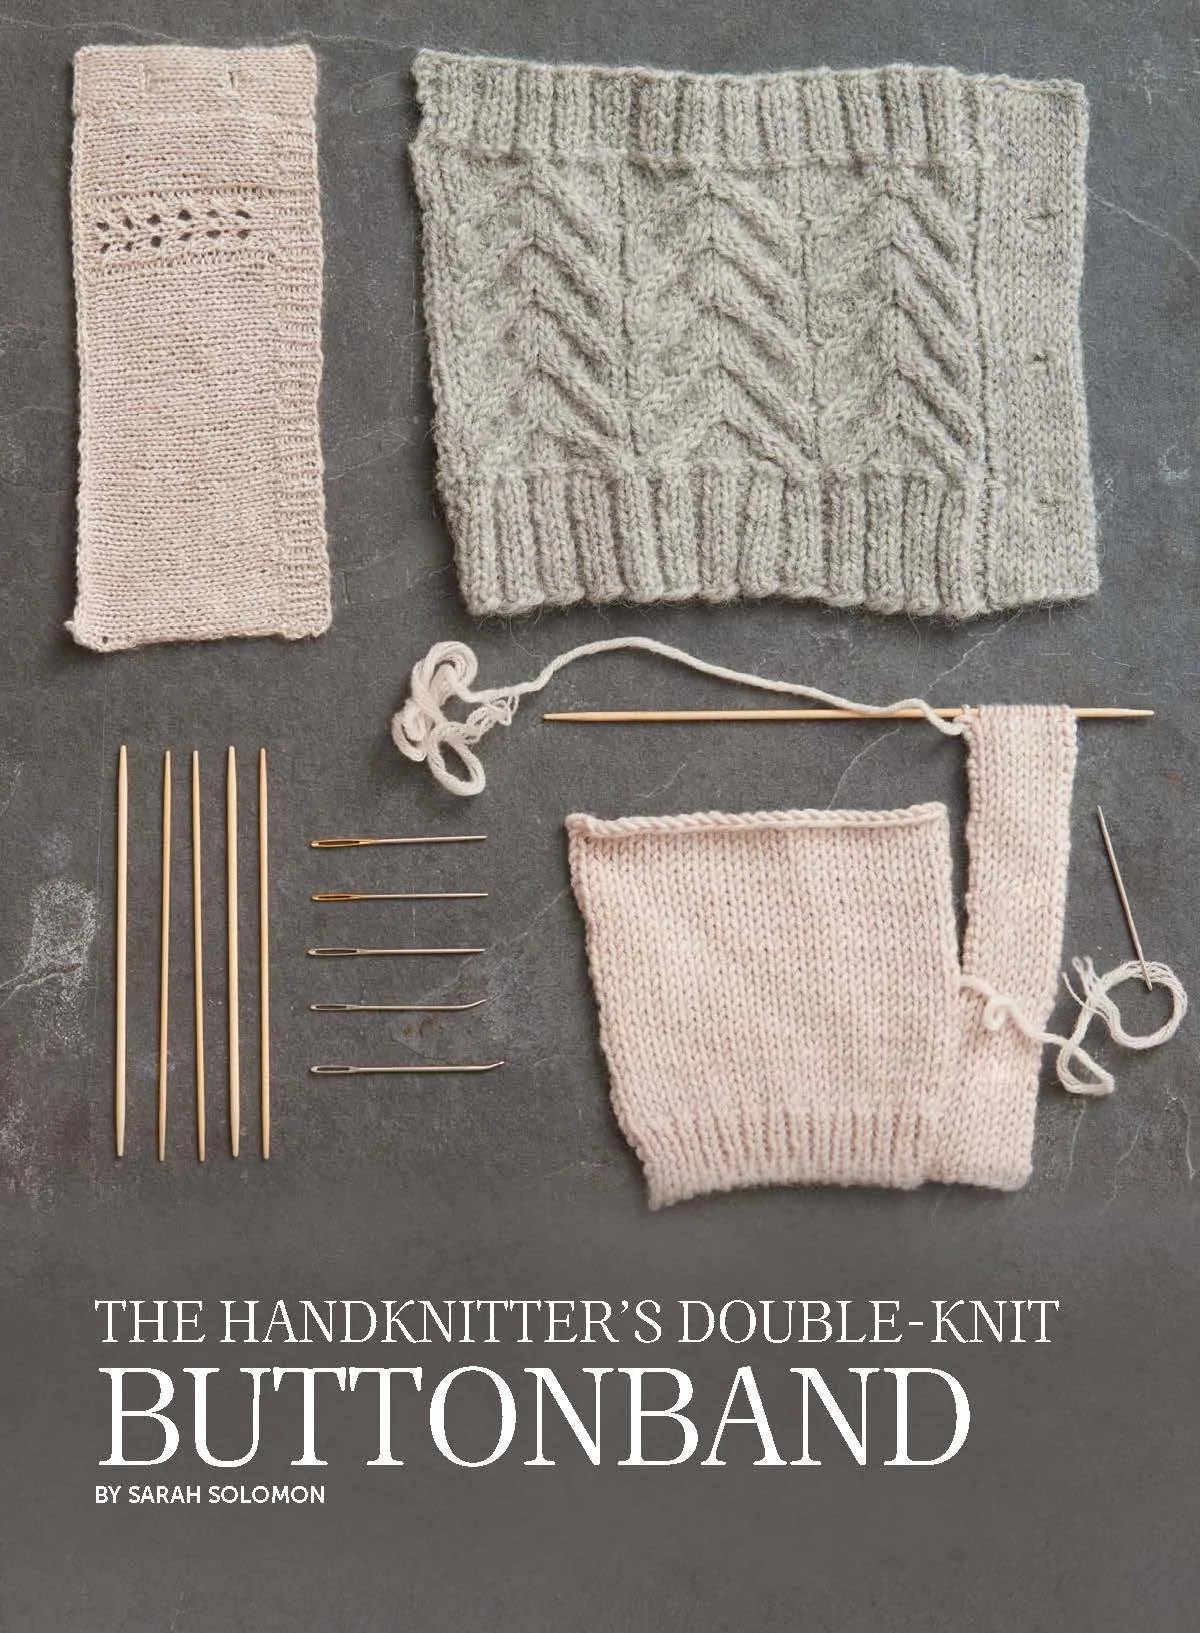
TUTORIAL: DOUBLE-KNIT BUTTONBAND

UPDATE: Three patterns now include full instructions for double-knit bands if you would like line by line instructions of how to apply the band to a specific sweater. All of the bands are slightly different in width but all are picked up and attached through knitting rather than sewing.
A Pastoral Sweater: Long-tail cast-on; horizontal buttonholes
Wild Almond Long-tail cast-on; horizontal buttonholes
Hornbaek Cardigan Tubular cast-on with waste yarn; vertical buttonholes; joined at center back neck with either grafting or Modified Three-Needle Bind Off
This technique was first published in the Fall/Winter 2016 issue of knit.wear magazine. Very special thanks to Meghan Babin, editor extraordinaire, for making this tutorial possible.
What follows is a basic recipe and photo tutorial for a sturdy, elegant, double-faced stockinette buttonband and a matching self-reinforced buttonhole. This band can be applied to most cardigans (crew-neck or v-neck) and works at a wide variety of gauges. Since this band is applied after your sweater is finished there is no need to match a specific gauge or stitch pick up ratio.
When I knitted my first cardigan, I followed the directions for the buttonband carefully, experimenting with different needle sizes and types of buttonholes. But despite my best efforts, I ended up with a droopy band and sagging buttonholes. I was so dismayed that I never wore the cardigan. So I started searching around for a more stable type of buttonband. Nothing I could find was quite what I was looking for, so I made a list of the attributes I thought the buttonband should have and set out to make one that would meet the following criteria:
… It could be added after the sweater was blocked and assembled.
… It would be sturdy and stable, even in yarns made of drapey or inelastic fibers.
… It would avoid the uncertainty of achieving a particular gauge.
… It would have self-finishing buttonholes.
… It would require only basic knitting skills and no special tools.
The buttonband “recipe” you find here is the result of many, many experiments. I wanted to make a buttonband and buttonholes that would last as long as the sweater. I haven’t had quite enough time to test that theory, but I can say that the bands I have made so far have worn steadfastly and beautifully. I take pleasure in them every time I put on the garments they adorn.
There are as many types of knitters as there are types of yarn, each with their own preferences and skill set. Although techniques work differently in every pair of hands, I tried to develop a pattern that would be accessible to most knitters. While creating this recipe, I felt the intrepid spirit of Elizabeth Zimmermann at my side. Her philosophy made me feel that I had both the right and the ability to “unvent” something. I hope you will feel the same. I encourage you to use this recipe as a jumping-off point for your own “unventions.”
We’ll begin with an overview of how the buttonband is worked, followed by specific instructions for each part. If certain aspects seem vague or inexact, it’s simply because an exact result is not required. So relax and make something that looks good to your eye and feels good in your hands. I’ve provided the directions with as much detail as possible because this process will be new to you. After you’ve done it once, you will see that you don’t have to slavishly follow directions—the process is fairly straightforward. If you prefer, try adding a buttonband to one of your swatches to get the hang of it before using it with a full garment. For instructions within the context of a full garment pattern, see the Doresu Cardigan on Ravelry or on page 63 of knit.wear Fall/Winter 2016.

OVERVIEW
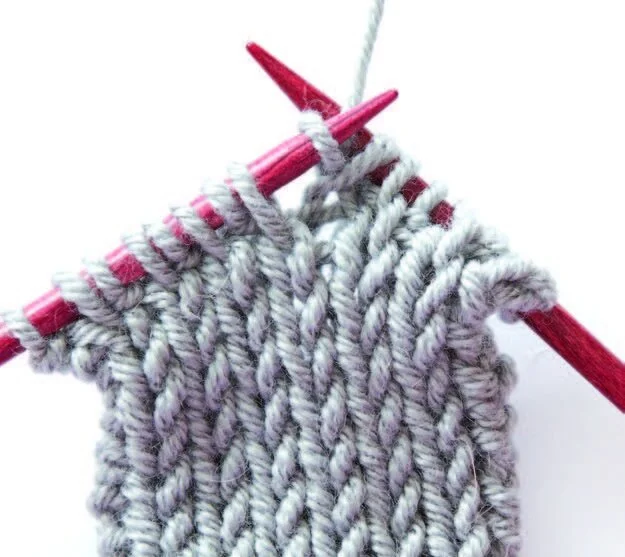
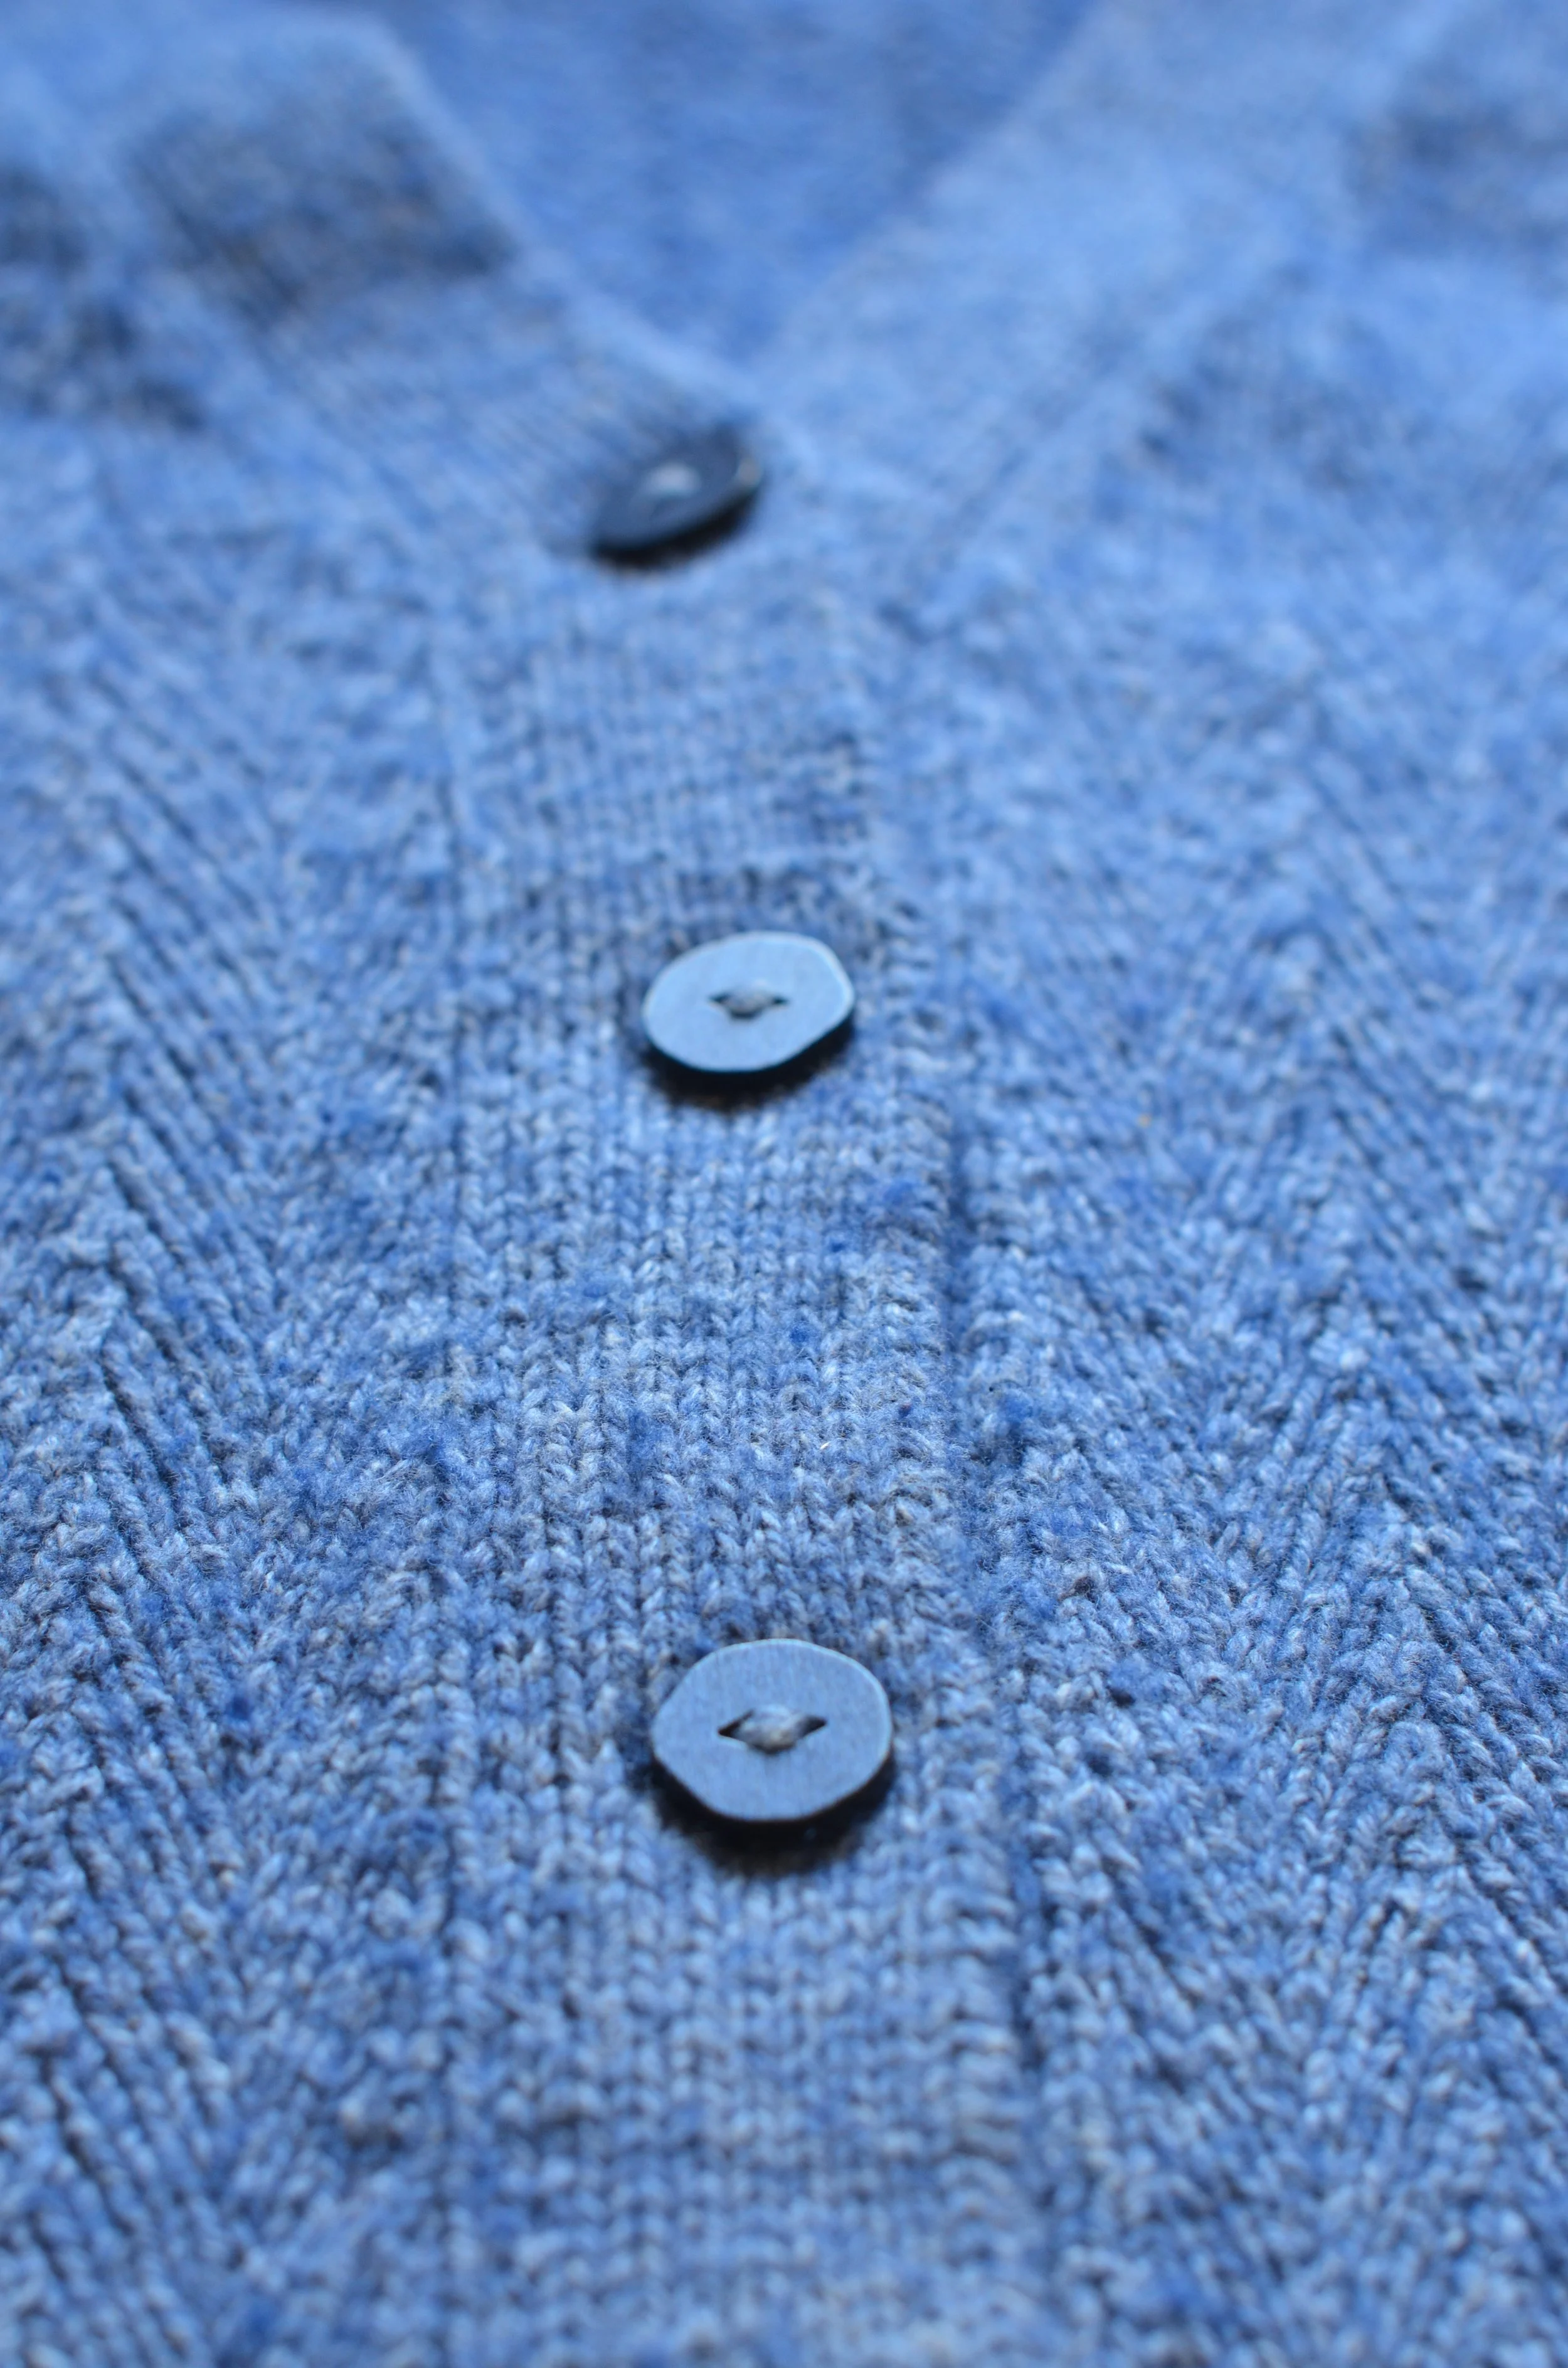
The double-knit buttonband is worked on a set of double-pointed needles several sizes smaller than the gauge needle of the sweater. In double knitting, stitches are worked to produce a dense fabric that has a stockinette face on both the right and wrong sides. The thickness of the fabric helps support the weight of the buttons and prevents distortion. The buttonholes worked into the double knitting are sturdy and do not stretch out with use.
You work the buttonband after the sweater is blocked and assembled so that you can determine the finished length of the fronts. The buttonband is worked vertically and sewn to the cardigan fronts. The recipe is suitable for crew necks, funnel necks, and (with slight adjustment) V-necks.
HOW TO MAKE AND ATTACH THE BUTTONBAND
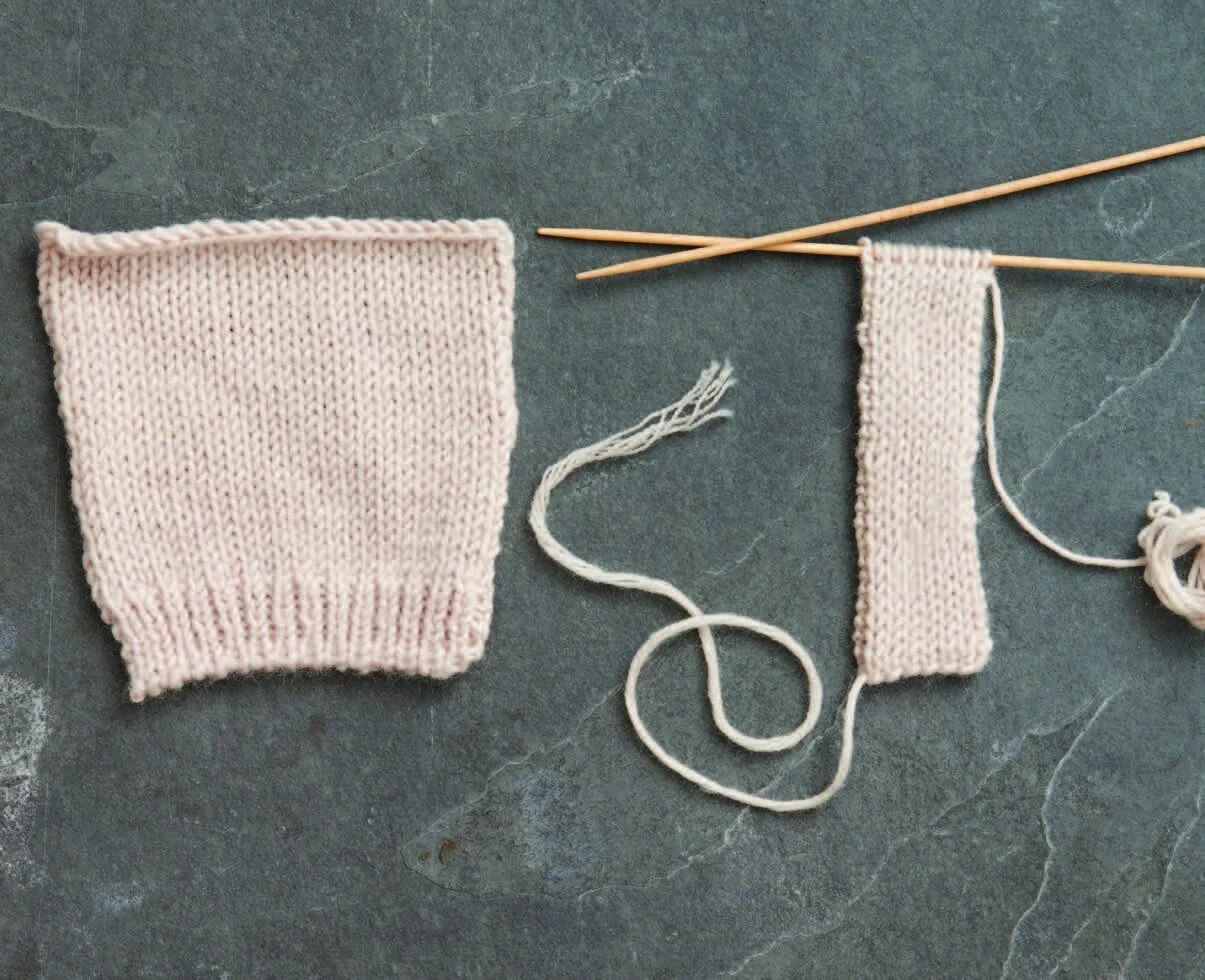
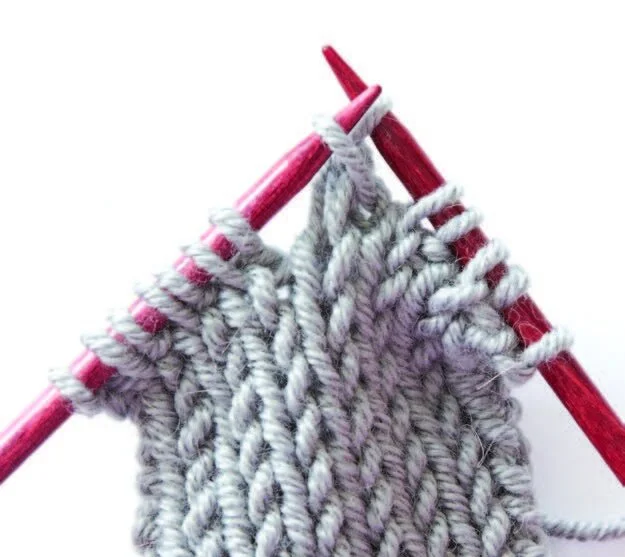
Once the sweater has been blocked and assembled, measure and record the length of the cardigan fronts. You work the button side of the band first
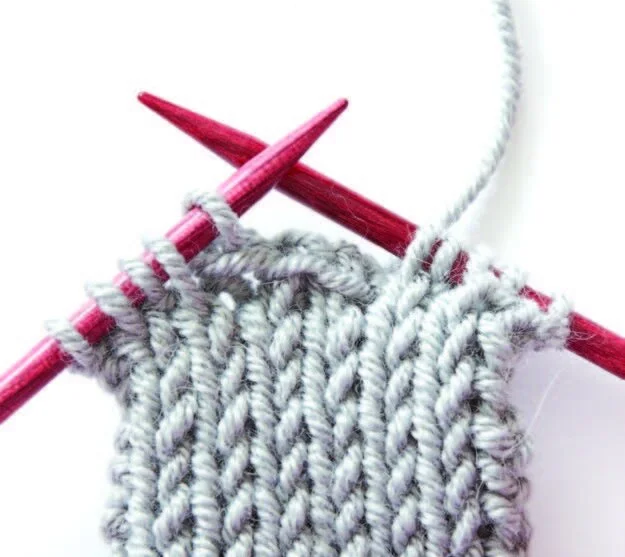
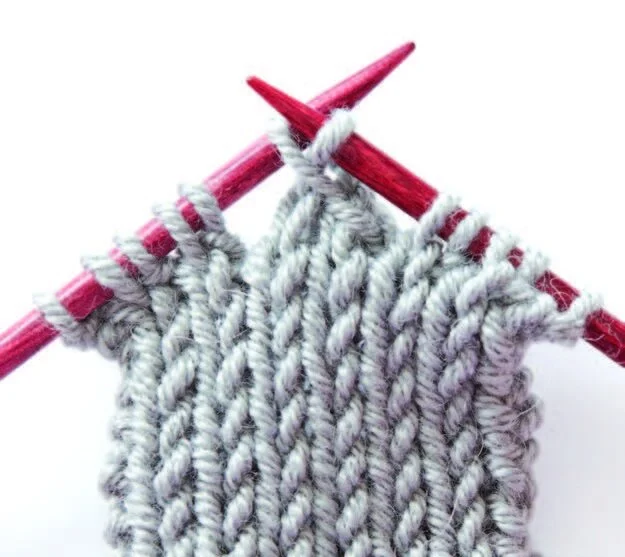
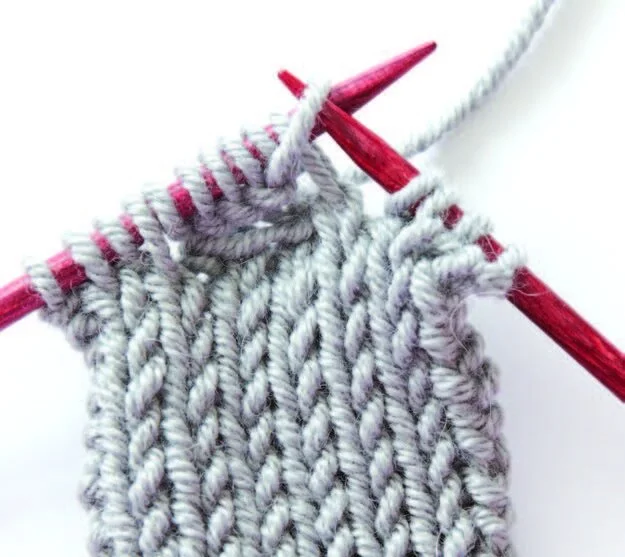
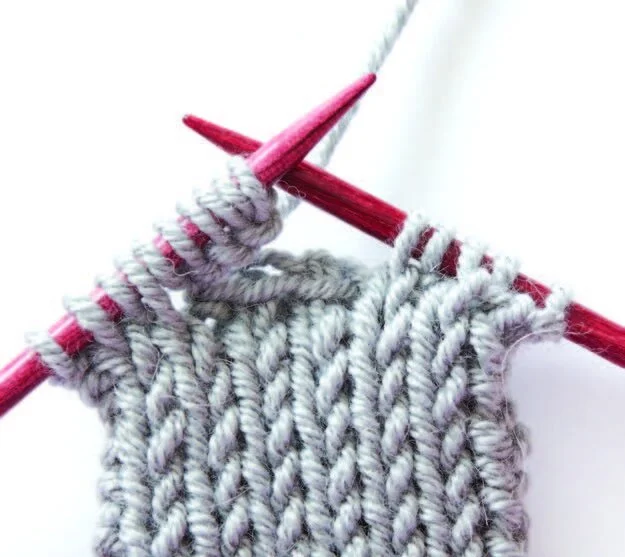
so that you can accurately calculate the buttonhole placement. After casting on, work the band in double knitting until it is roughly 1″ (2.5 cm) longer than the recorded length. Keep stitches live on a stitch holder or spare double-pointed needle at the end of the band in case you need to adjust the length. I find it easiest to get a good fit if I work the band slightly longer than necessary and ravel any additional length after I’ve sewn most of the band to the front (Figures 1, 2, and 3).


Wet-block the buttonband by immersing it in water with a no-rinse wool wash for at least 15 minutes. Squeeze out excess water, then wrap the band in a towel and press to remove as much water as possible. Pin the band, slightly stretched, to a blocking board or towel. When it’s completely dry, unpin the band and let it relax for several hours to its final dimensions. Compare the relaxed band measurement to the cardigan front measurement. If the band is too short, add length before proceeding. Double knitting and wet-blocking result in a stable fabric that has already experienced any likely growth in length, so the band is at its finished length before it is attached to the sweater.
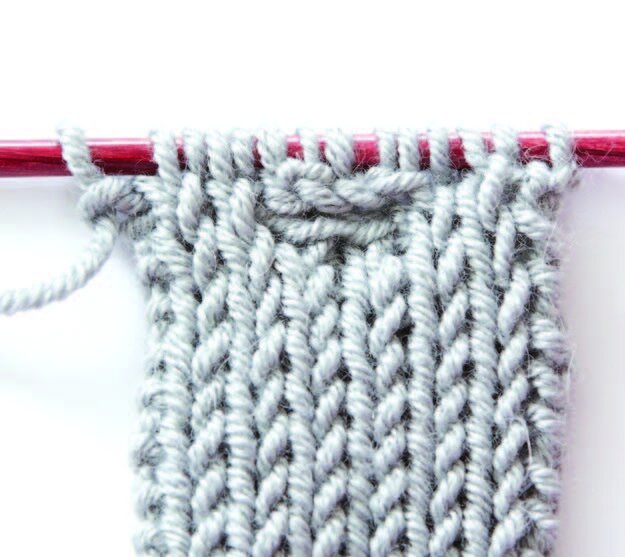
Pin the band to the appropriate side of the cardigan and sew it to the garment selvedge from the bottom edge to the top using mattress stitch (Figure 4).

figure 4
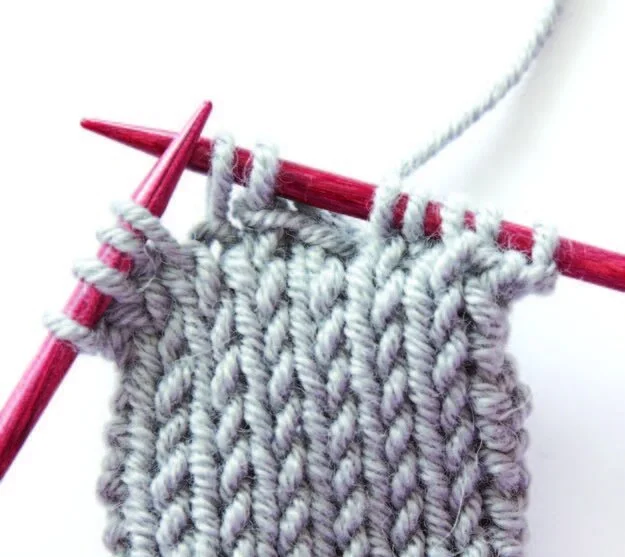
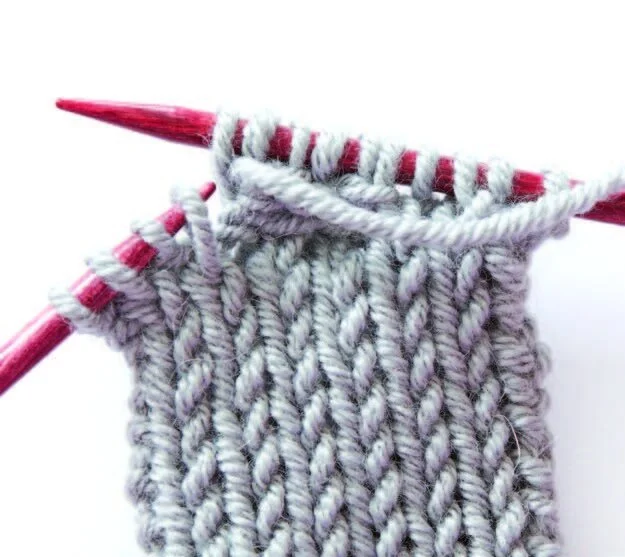
When you are nearly finished sewing, you will be able to see if there is any excess length in the band. If there is, the extra length can be raveled and bound off to match the length of the sweater front (Figures 5 and 6). [See Bind Off Instructions below] In addition, the mattress- stitch seam will prevent both the band and the cardigan front from stretching lengthwise over time.


After the band is attached, you can take the gauge of the double knitting and determine how many rows there are per inch of fabric. Then you can determine the buttonhole placement either visually or mathematically. (Each buttonhole is worked within a single row.) For the visual approach, simply lay the buttons out on the band to see where you want them, mark the locations with coilless safety pins, and count the number of rows between each button. For the mathematical approach, place the top and bottom buttons where you would like them, then either measure the distance between them or count the number of rows. If you are measuring length, divide the measurement by one less than the number of buttons you would like to use, then multiply this number by the double-knitting row gauge to determine the number of rows between each buttonhole. If you are counting rows, count the total number of rows between the top and bottom button and divide by one less than the number of buttons you would like to use. Doing so will give you the number of rows between each pair of button holes. (See Keeping Track of Rows in Double Knitting, below, for more information.)
Cast on for the buttonhole band, working the self-finishing double-knit buttonholes (see instructions below) at the intervals you determined. Wet- block this band as for the buttonband, then sew it to the other side of the cardigan front with mattress stitch.
DOUBLE-KNIT BUTTONBAND INSTRUCTIONS
Note: The buttonband will be on the left front for women’s garments and on the right front for men’s garments. The buttonhole band will be on the right front for women’s garments and on the left front for men’s garments.
The band you are creating has a total of 14 stitches: six pairs of double-knitting stitches and 2 selvedge stitches. The single selvedge stitches give the band structure at the edges and make it easier to sew. The double-knitting stitches provide a fabric with two faces; you are only working half of the double- knitting stitches on each row. Therefore, it takes two passes of the stitches to add a single row of length. Working the band over 14 stitches generally results in a width of 1–1½” (2.5–3.8 cm). If you wish to increase the width of the band, you need to increase in increments of 2 stitches (a pair of double knitting stitches). To keep the buttonhole centered as it currently is, increase the stitch count in increments of 4 stitches to add two additional pairs of double-knitting stitches at a time.
THE STRUCTURE OF THE BAND LOOKS LIKE THIS:
p [k:sl | k:sl | k:sl | k:sl | k:sl | k:sl] k 14-st band; 6 pairs of double-knitting sts and 2 selvedge sts
Or for those of you who prefer a chart, like this:
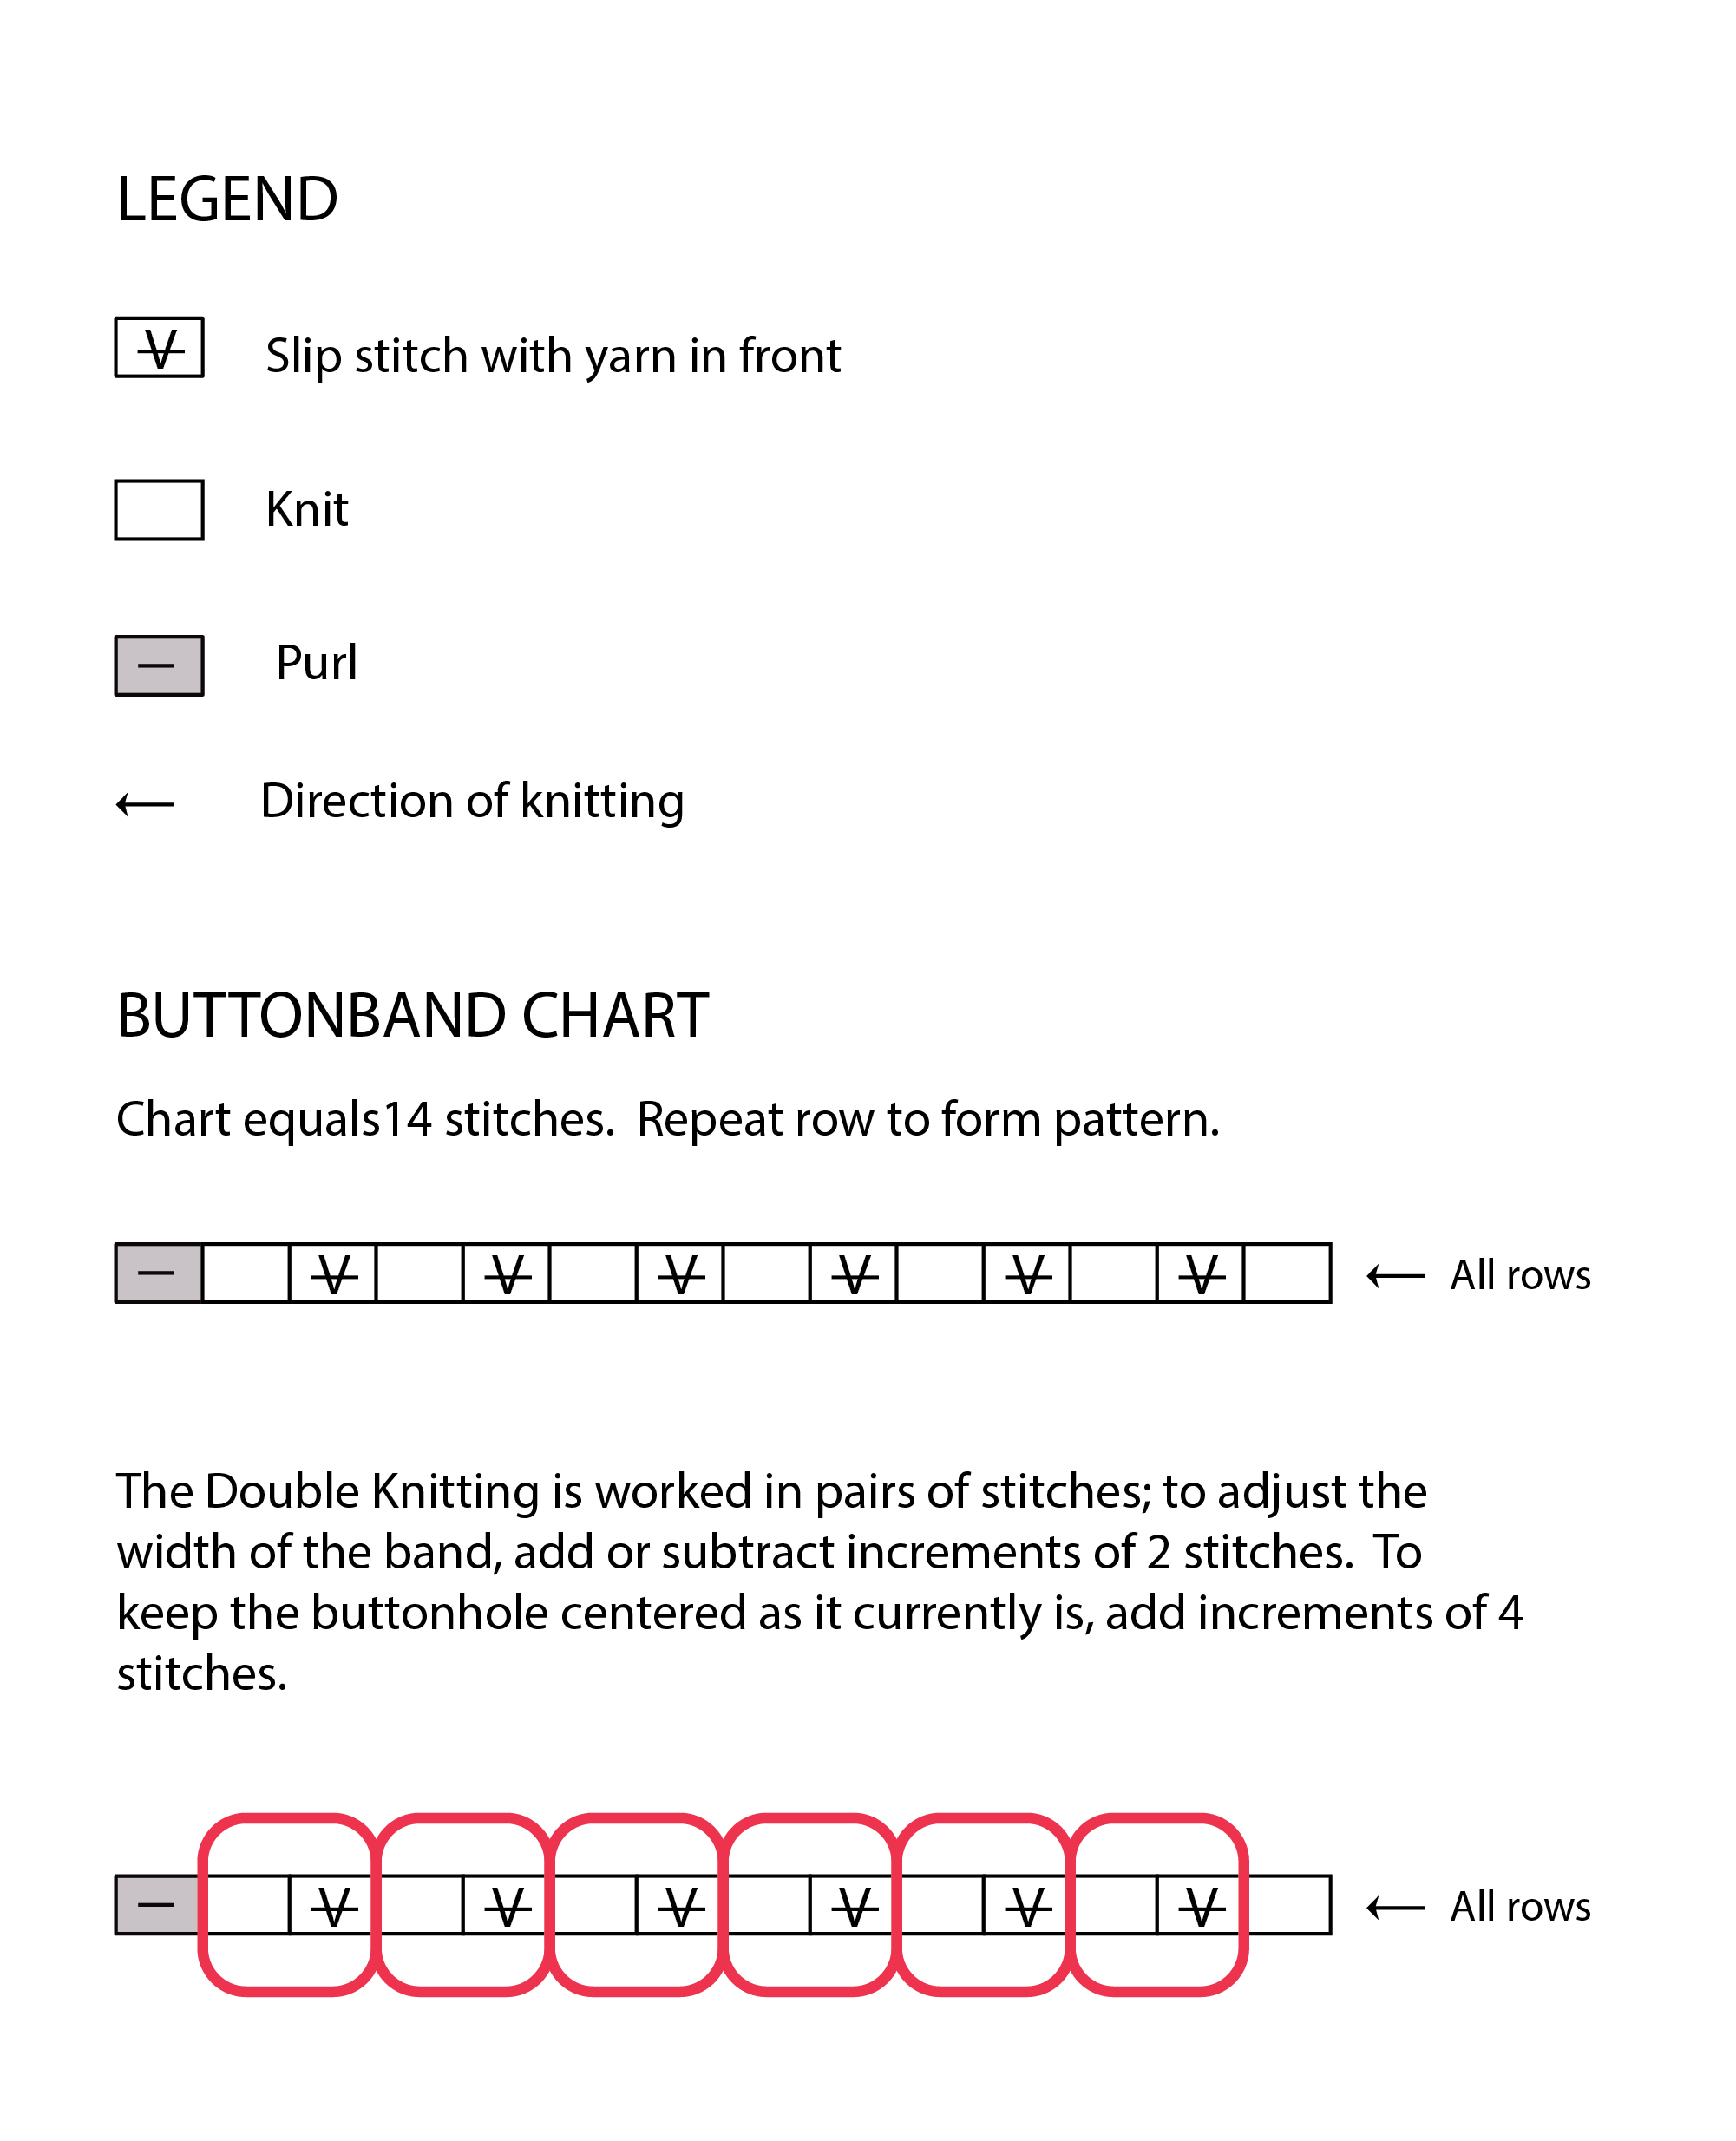
Work the band using two double-pointed needles four or five sizes smaller than your gauge needle. To prevent the bottom edge from flaring, you may want to cast on using a needle one size smaller than your band needle. In general, for yarns ranging from worsted weight to sportweight, I use a U.S. 2 (2.75 mm) needle for the double knitting. For fingering or laceweight yarn, I use between a U.S.1½ (2.5 mm) and a U.S. 0 (2 mm) needle. Needle size will vary based on the texture and makeup of the yarn, but exact gauge is not important; you just want to achieve a dense fabric that you like.
Using the long-tail method, CO 14 stitches.
ROW 1 K1, [slip 1 purlwise with yarn in front, k1] 6 times, p1. Repeat Row 1 for pattern.
The right and wrong sides of the band will be identical; only the cast-on row will look different, so choose your right and wrong side based on which edge you prefer to have visible. (You can also use a different cast-on if you prefer; cable cast-on can sometimes be a good choice).
Once you have knit the first band, blocked it and sewn it most of the way up the front of your sweatter, unravel any additional length in the band, return the band stitches to your needle and bind off as follows:
DOUBLE KNITTING BAND BIND OFF
K1, [k2tog, pass 2nd st over first] 6 times, k1, pass 2nd st over first.
If you are working a different number of band stitches the principle to follow is this; you are working a normal bind off but you will knit pairs of double-knitting stitches together as you do so.
I’ve knitted this band in a variety of yarn weights ranging from lace to worsted. Because I prefer a narrow band, I usually use a 14-stitch band regardless of the weight of the yarn. However, feel free to adjust the width as desired. If you are substituting this band in a pattern that calls for another type of buttonband, make a small sample so you can tell how many stitches you will need to achieve the width of the band called for in the pattern.
A note for V-neck cardigans: to work the two bands to the length of the center back neck, sew them down most of the way and join the two bands together before sewing the last inch or so to the center back neck. You can join the two bands by grafting, by using a three– needle bind-off, or by binding each band off separately and sewing them together with mattress stitch.
KEEPING TRACK OF ROWS IN DOUBLE KNITTING
Remember that as you are working double knitting, every row you count on the fabric consists of two passes of the buttonband pattern. It is helpful to put a pin around a stitch on the buttonhole row to facilitate counting rows for future buttonhole placement. Because it takes two passes of the stitches to work one row of double knitting, it is simpler to consider the buttonhole row as Row 1 of an even-numbered group of rows; for example, a 24–row section consists of 48 double-knitting rows. Therefore, after the buttonhole row, you will work the one-row pattern 47 more times. Doing so completes one 24–row section.
You will begin the next 24–row section with a buttonhole row and so on.
Double-Knit Buttonhole Instructions
Directions given are for a 3-stitch buttonhole which works well with the 14-stitch band works. If you have made a wider band and would like a wider buttonhole, work to the desired point for the buttonhole, follow Steps 1 and 2, then repeat Step 3 over pairs of stitches as needed. In Step 6, make sure to cast on enough stitches to compensate for those removed in Step 3.
The 3-stitch buttonhole is worked all in one row. Work to the right-side row where the buttonhole will be placed, then proceed as follows.
STEP 1
(RS) K1, [sl 1 pwise wyf, k1] 2 times, RLI into the bump of the next purl st
RLI: Right Lifted Increase: Knit into the back of the stitch (in the “purl bump”) in the row directly below the stitch on the left needle.
STEP 2
K2tog, pass inc’d st over—1 st BO, 7 sts rem on left needle.
STEP 3
K2tog, pass 2nd st on right needle over—1 st BO; 5 sts rem on left needle.
STEP 4
Sl 1 pwise wyb, pass 2nd st on right needle over first st—1 st BO.
STEP 5
Transfer first st on right needle to left needle.
STEP 6
Using the cable method, CO 5 sts onto left needle—15 sts total (on both needles).
STEP 7
Transfer first st on right needle to left needle, pass last cable COstover it, then return st to right needle—1 st BO; 14 sts rem.
STEP 8
Tighten up working yarn, then [sl 1 pwise wyf, k1] 2 times over cable CO sts, sl 1 pwise wyf—4 sts rem on left needle.
STEP 9
K1, sl 1 pwise wyf, k1, p1—buttonhole row complete.
Turn work and resume 1-row pattern over 14 stitches.
In the end, you will have a beautiful, stable, built-to-last buttonband with matching buttonholes.
I hope you enjoyed this tutorial. This is something I searched high and low for when I was a new knitter and it feels good to have transformed if from notebook scrawl to a proper set of instructions. Happy Knitting!
