TUTORIAL: HOW TO BACKSTITCH A COLLAR

As I mentioned in the last post, one of the techniques used in my Lady Yak pattern is knitting a separate collar and attaching it to the neckline using backstitch. Written directions for this method are included in the pattern but since it’s a technique I use frequently and it’s difficult to visualize if you’ve never done it, I thought it would be useful to create a photo tutorial.
First, I’d like to explain why one would use this technique. In the case of Lady Yak, attaching a collar this way allows you to use a tubular cast on for your collar edge. “But why do I need to do that?” you ask incredulously. “There’s a sewn tubular bind off that matches a tubular cast on–why not use that?” Well, there IS a sewn tubular bind off, an ingenious technique which I have sometimes used with great success. And other times not. Whether it’s just me or it’s related to the behavior of different yarns, I do not find the sewn tubular bind off to have a consistently attractive result for all projects. I find that it’s difficult to achieve even tension and, especially with an inelastic fiber like the yak/merino used in the pattern, I find that an undesirable amount of spreading can occur in the bind off. But there’s no need to be flustered by that, so long as you have a suitable technique in your arsenal.
Enter the backstitched collar. I first read about this technique in Katarina Buss’s Big Book of Knitting where she uses backstitch to attach both collars and facings. This method allows you to use a tubular cast on for what will be the exposed edge of your collar, creating a firm, and to my mind, more consistent edge, and the backstitch itself creates a very pretty detail where the collar meets the body. In the case of Lady Yak, which has a fold-over collar that will cover the neckline, the detail of the stitching itself will not be seen (which makes it a good project to practice on), but I have used it in other sweaters where the backstitch detail is clearly visible and I find the effect very pleasing.

To see how backstitch creates that distinctive, beaded line of stitches, let’s look at how it’s formed. Here is a very clear illustration of the movement your needle takes when working backstitch and you can see the decorative effect it has in embroidery.
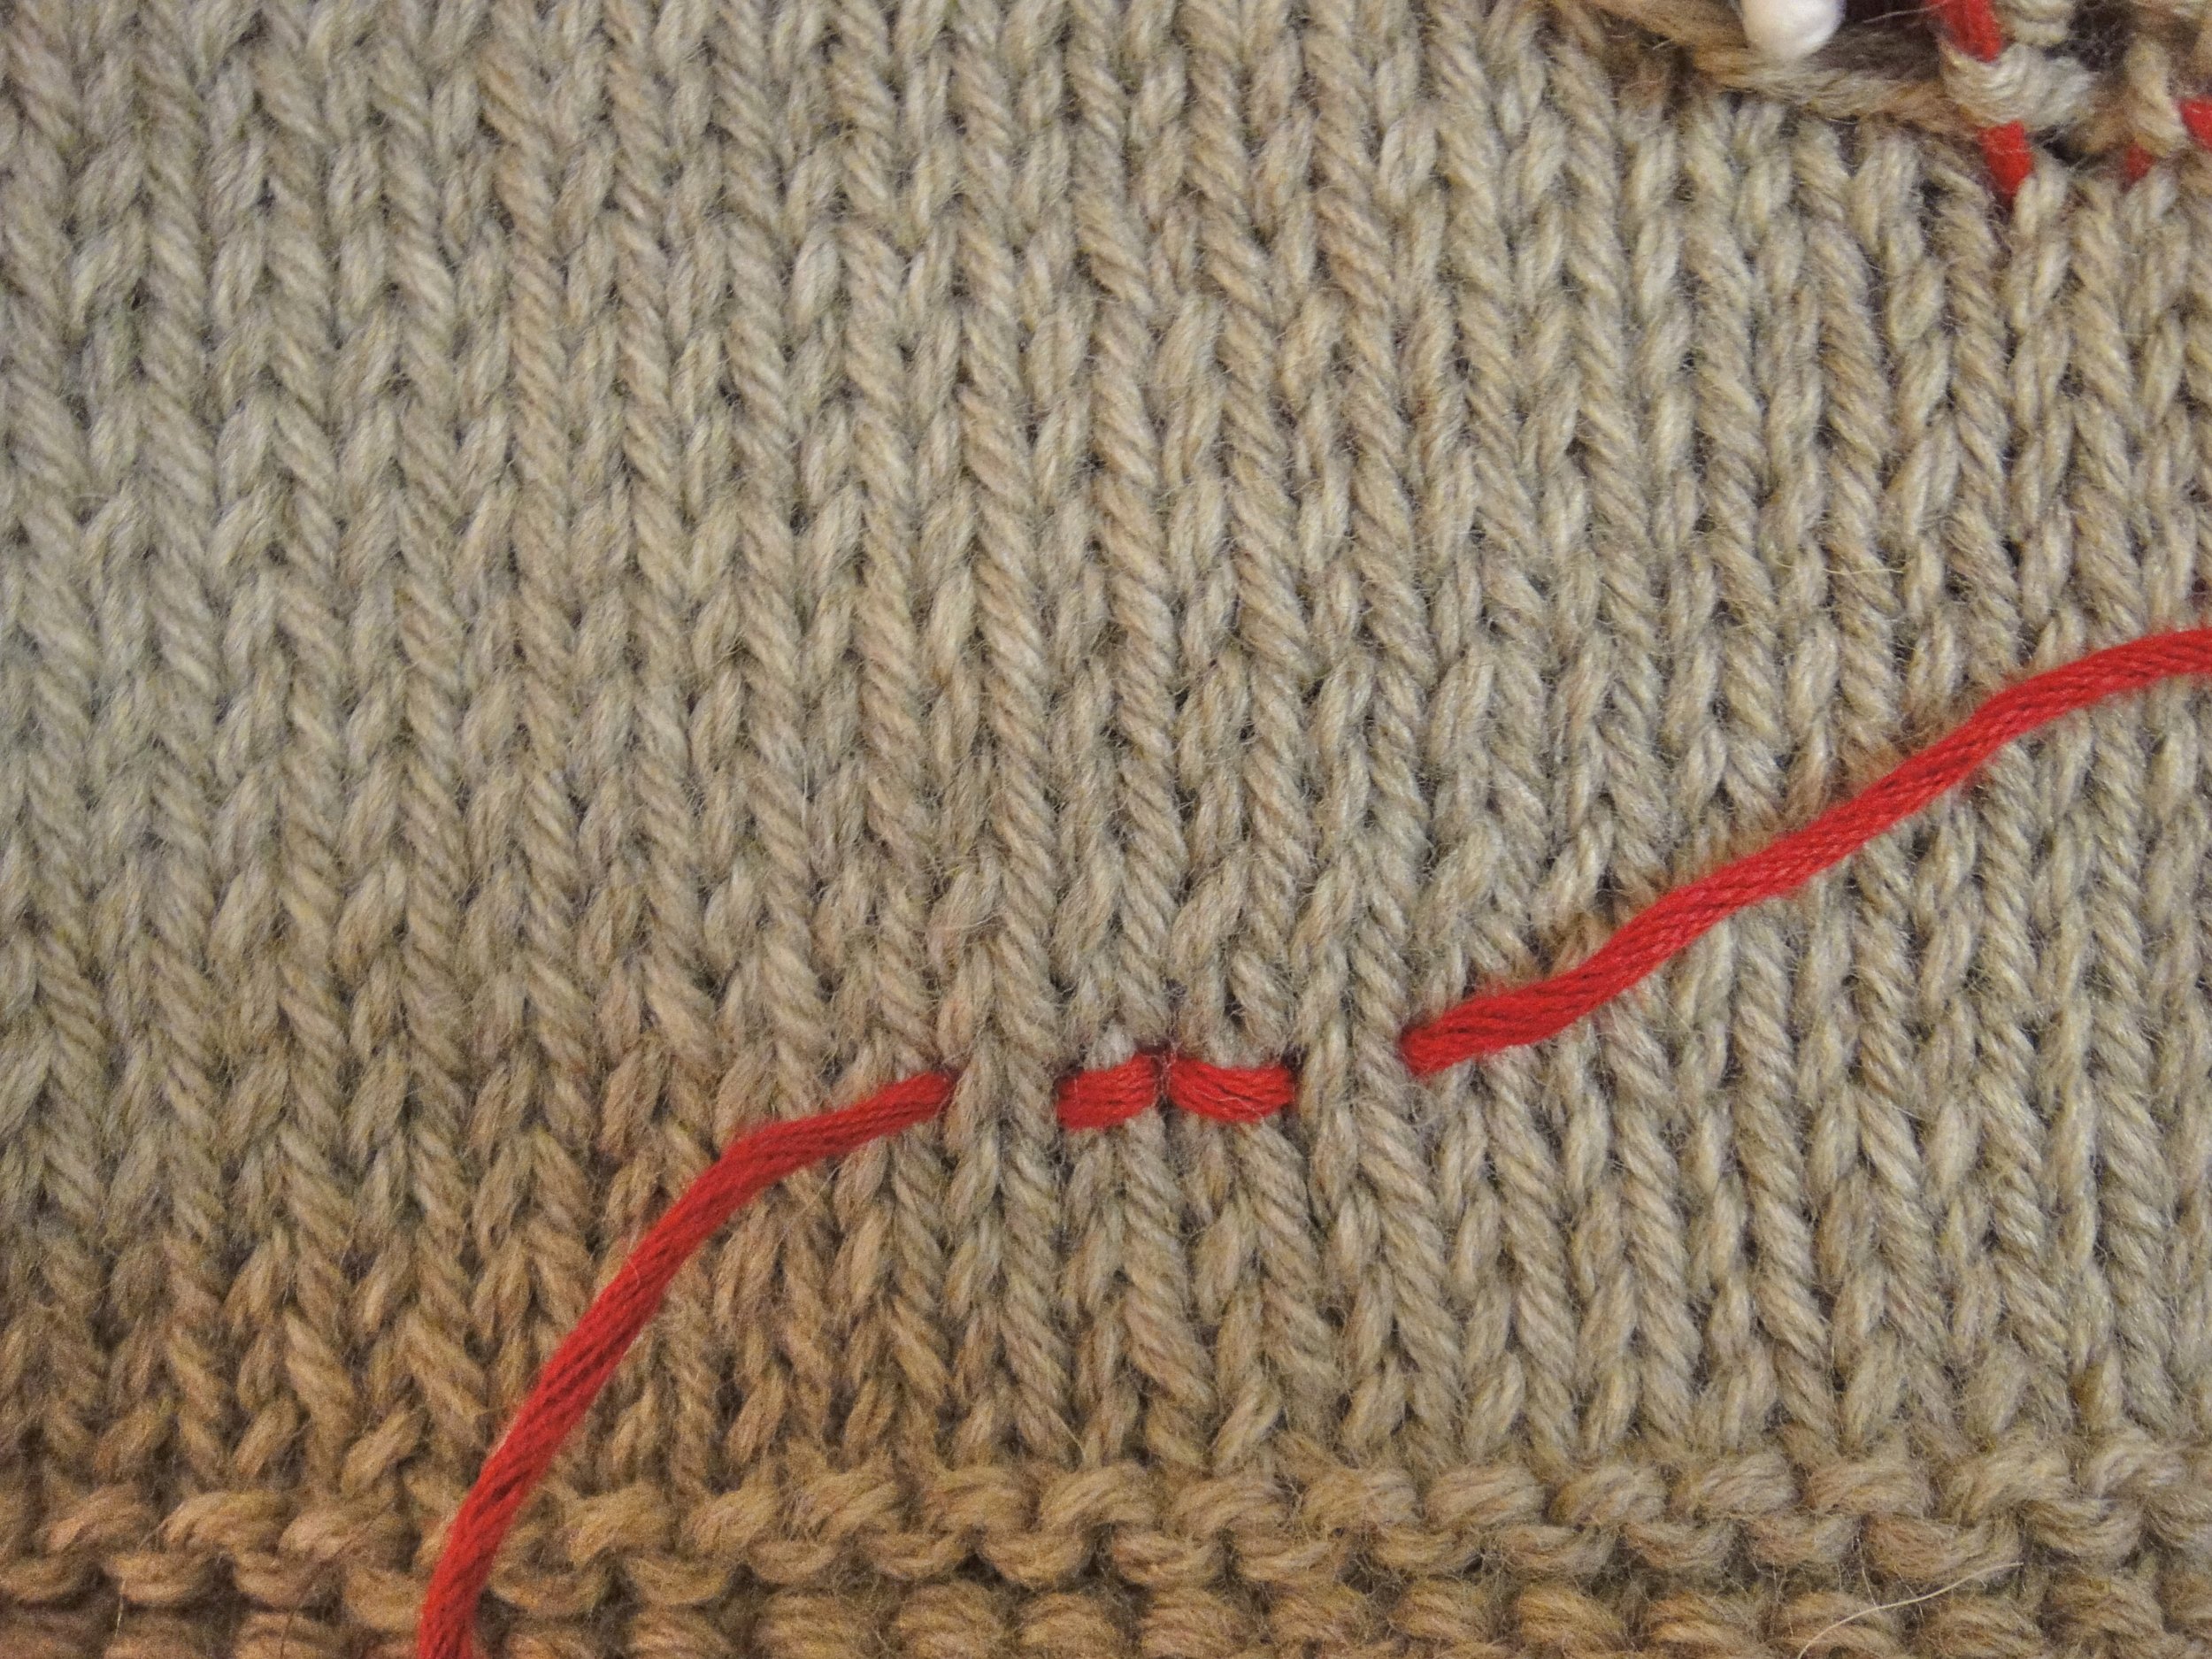
This is what backstitch would look like on a piece of knitted fabric.
When working with hand knits you can use backstitch to sew almost any seam for which you would use mattress stitch. It is commonly called for in the finishing instructions of Rowan patterns, and I learned by taking a finishing class with Shirley Paden that she uses it for almost all of the structural seams of her sample garments. When used for construction seams (side seams, shoulders, armholes, etc.), backstitch differs from mattress in one fundamental respect; mattress stitch is worked with the right sides of the fabric facing you, whereas backstitch is worked with the wrong side of the fabric facing you and the right sides of the pieces you are joining facing one another. The collar example in this tutorial will not be done this way as we are using the backstitch partially as a decorative element and it will be worked with the right sides of the fabric facing. Don’t worry, I’ll remind you when we actually get to our sample.
But first, back to my case for using backstitch to attach a collar. The other advantage of this method is that it allows a good deal of flexibility in the number of stitches you use in your collar and how you space them along the neckline. I like dense, luxurious collars that contain a lot of stitches and since the backstitch method allows you to ease your collar into place around the neckline, you can simply cast on the size collar you want without having to worry about changing needles sizes or incorporating increases as you might in a picked-up collar.
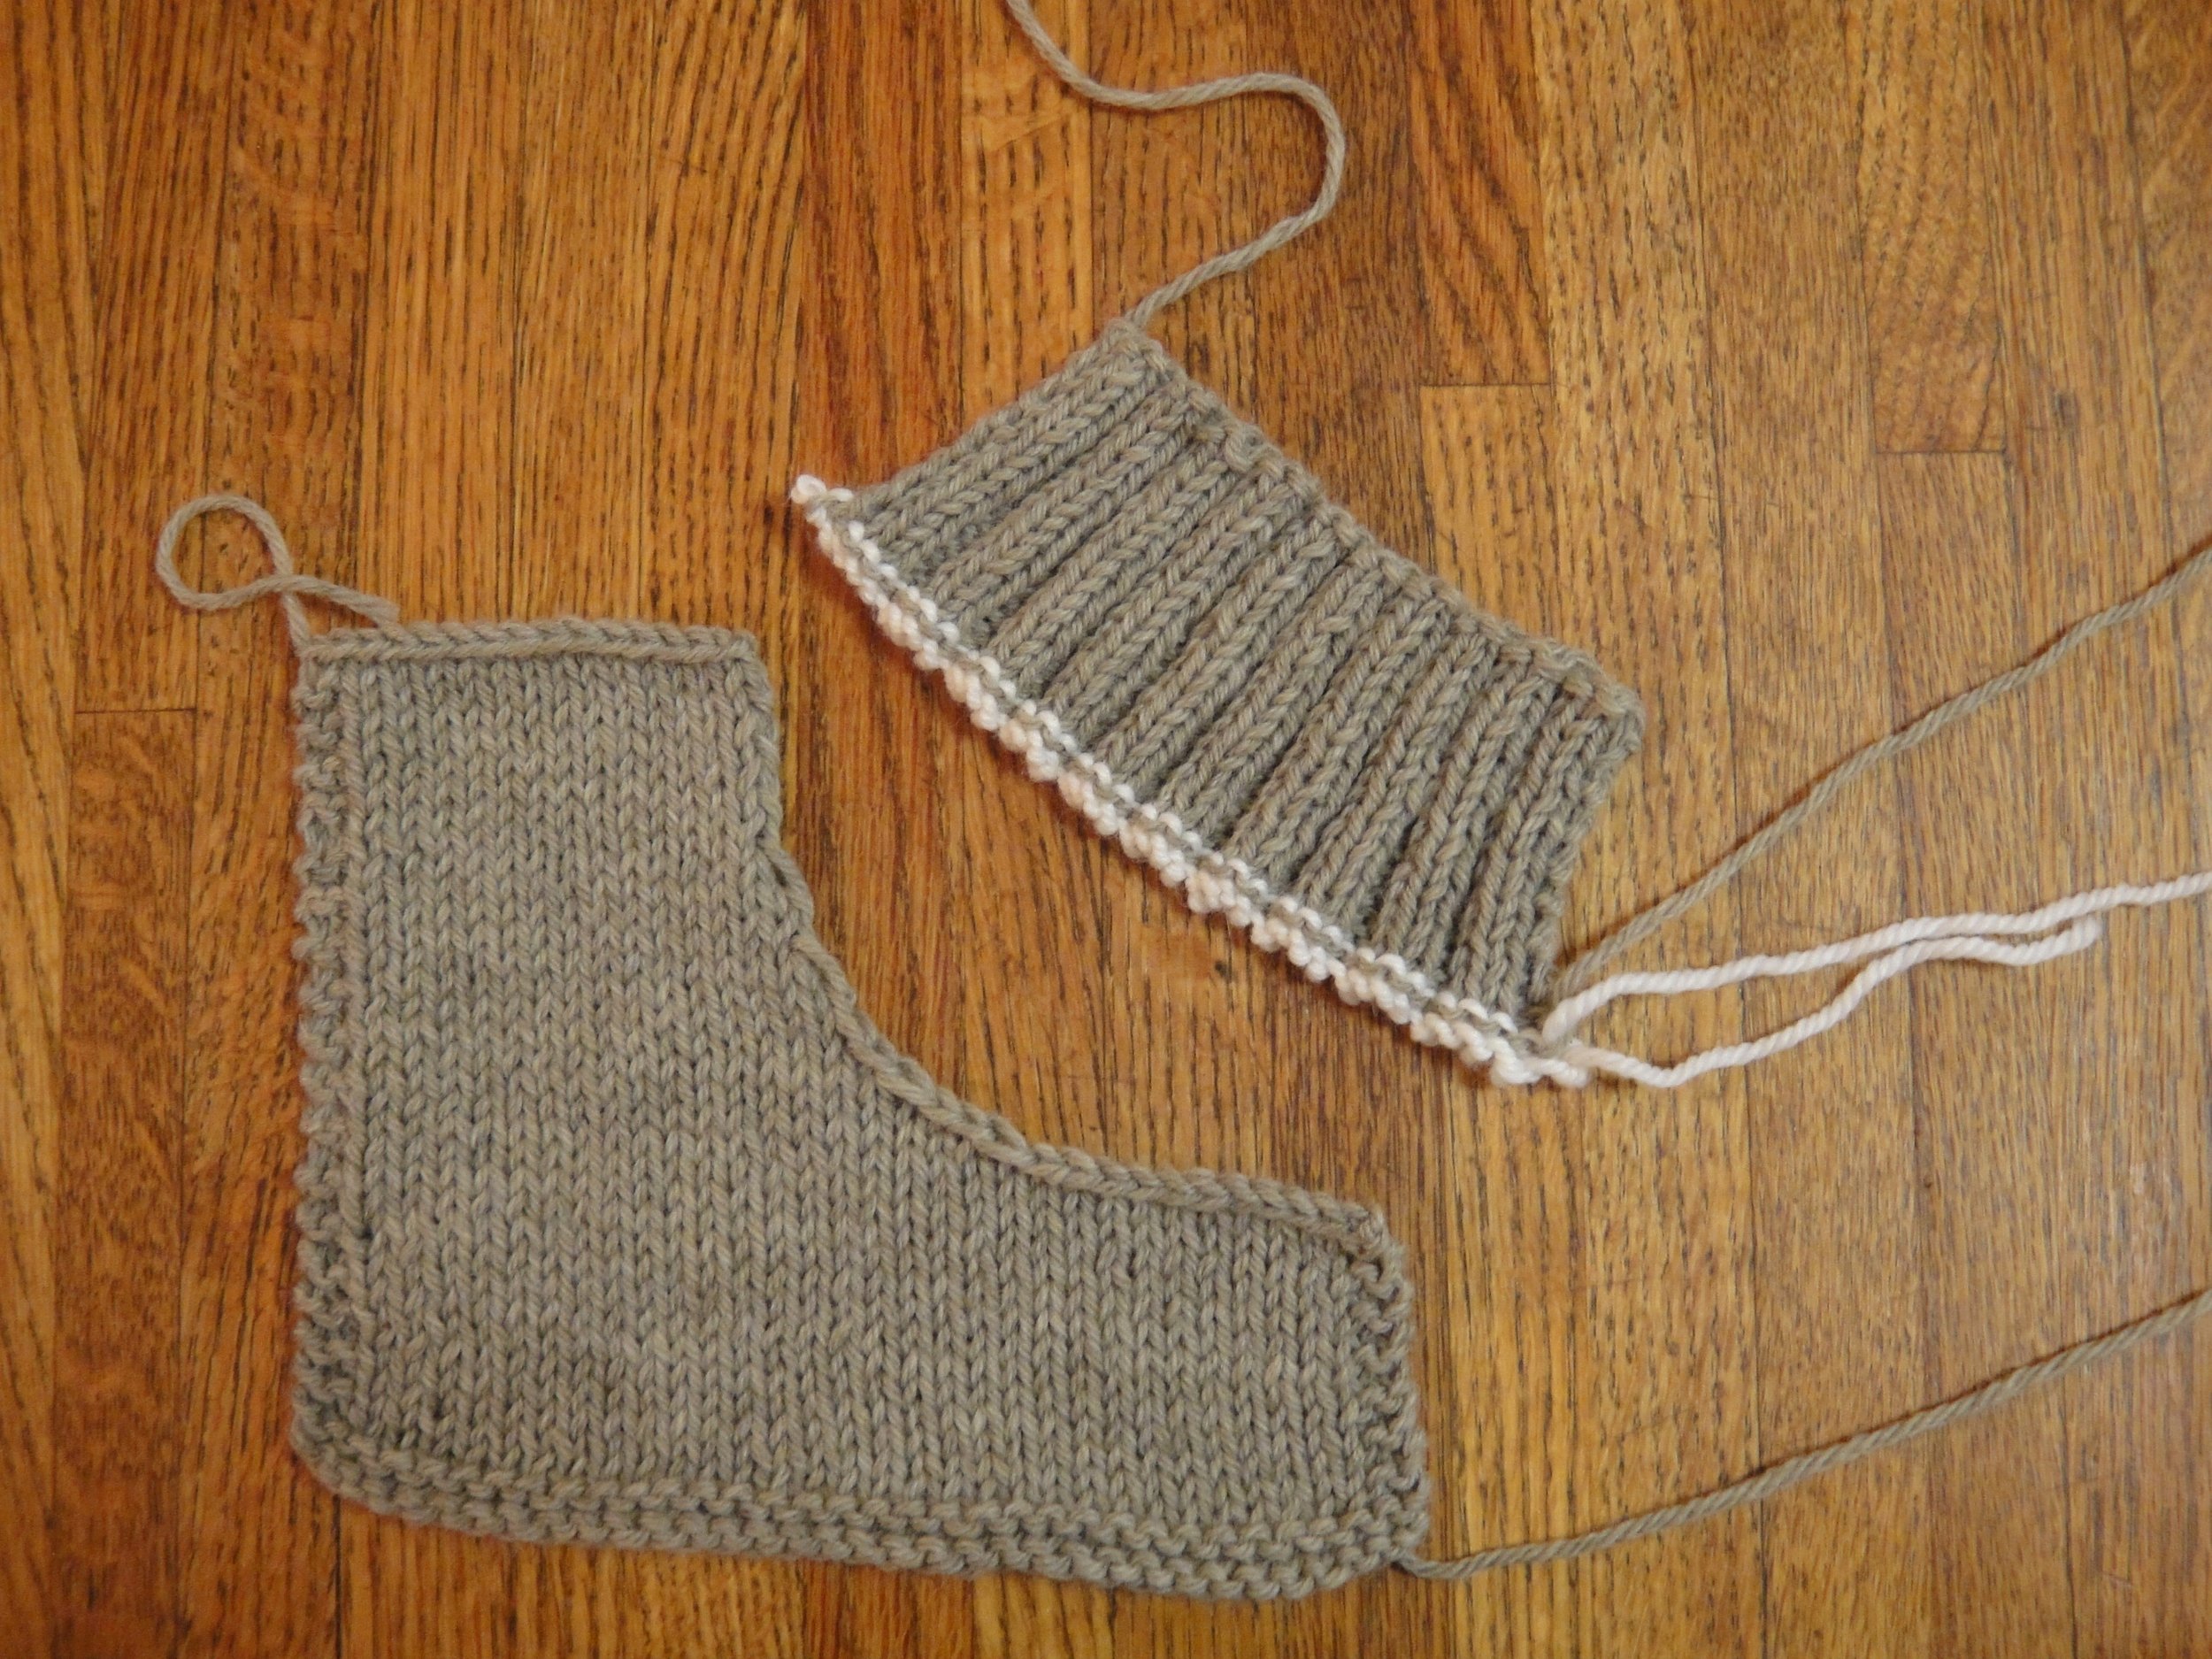
To understand why this is, let’s look at the starting point for the method. If you’d like to make a sample like the one I use here, you will need a small amount of yarn and a length of waste yarn in a contrasting color. It can also be useful to use a contrasting yarn when practicing the backstitch for the first time as it will make the path of your stitches stand out more distinctly. The collar sample is shown in worsted weight yarn and is 42 stitches wide in 2×2 rib. The sample neckline piece is 34 stitches wide.

The Lady Yak pattern will direct you to cast on a number of collar stitches and to work in rib to the length indicated, ending after a WS row. Leaving a short tail of the main yarn, join a length of contrasting color waste yarn and work 2 rows of stockinette stitch. Cut waste yarn, leaving another short tail. At this point your sweater will be completely assembled and your pieces will look like this:

Now that the live stitches are secured with waste yarn, remove your work from the needle. Let’s switch over to our sample pieces and get a closer look. Notice how the collar piece looks at rest and then observe how much the waste yarn edge can be stretched around the neckline. This is what allows for the method of easing I mentioned before. Depending on what your project requires, you can spread those live stitches out or squish them together.
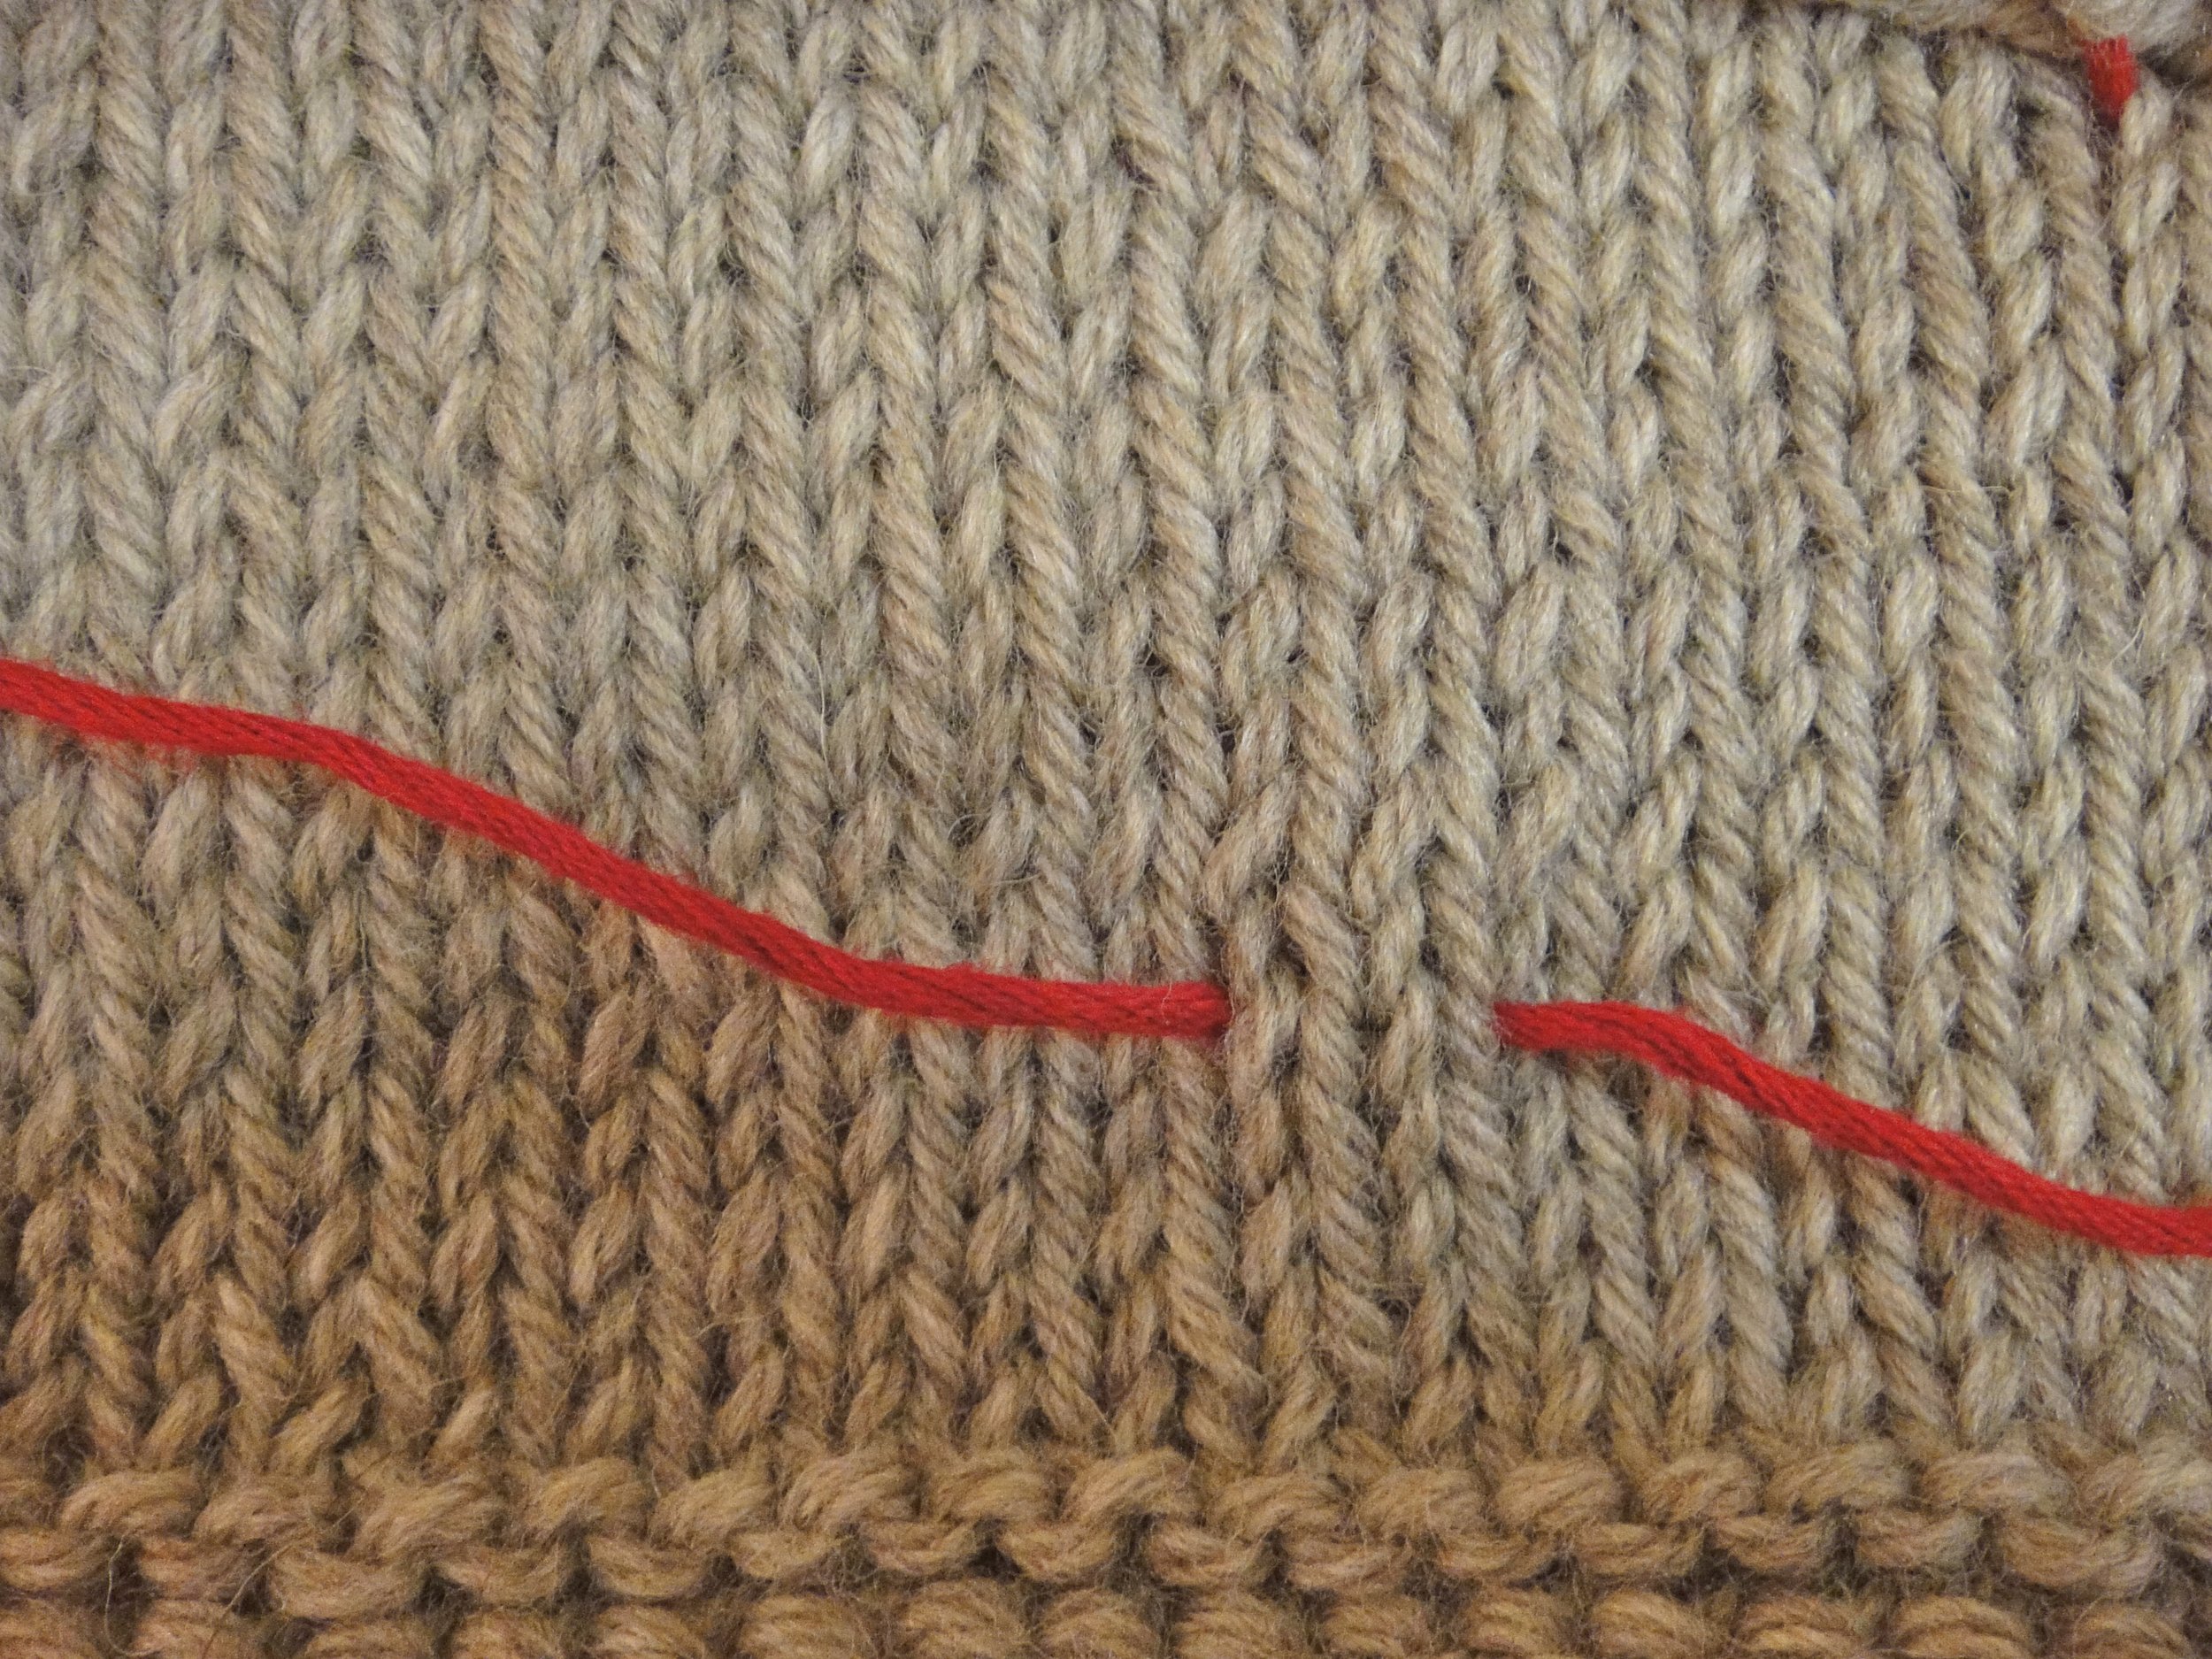
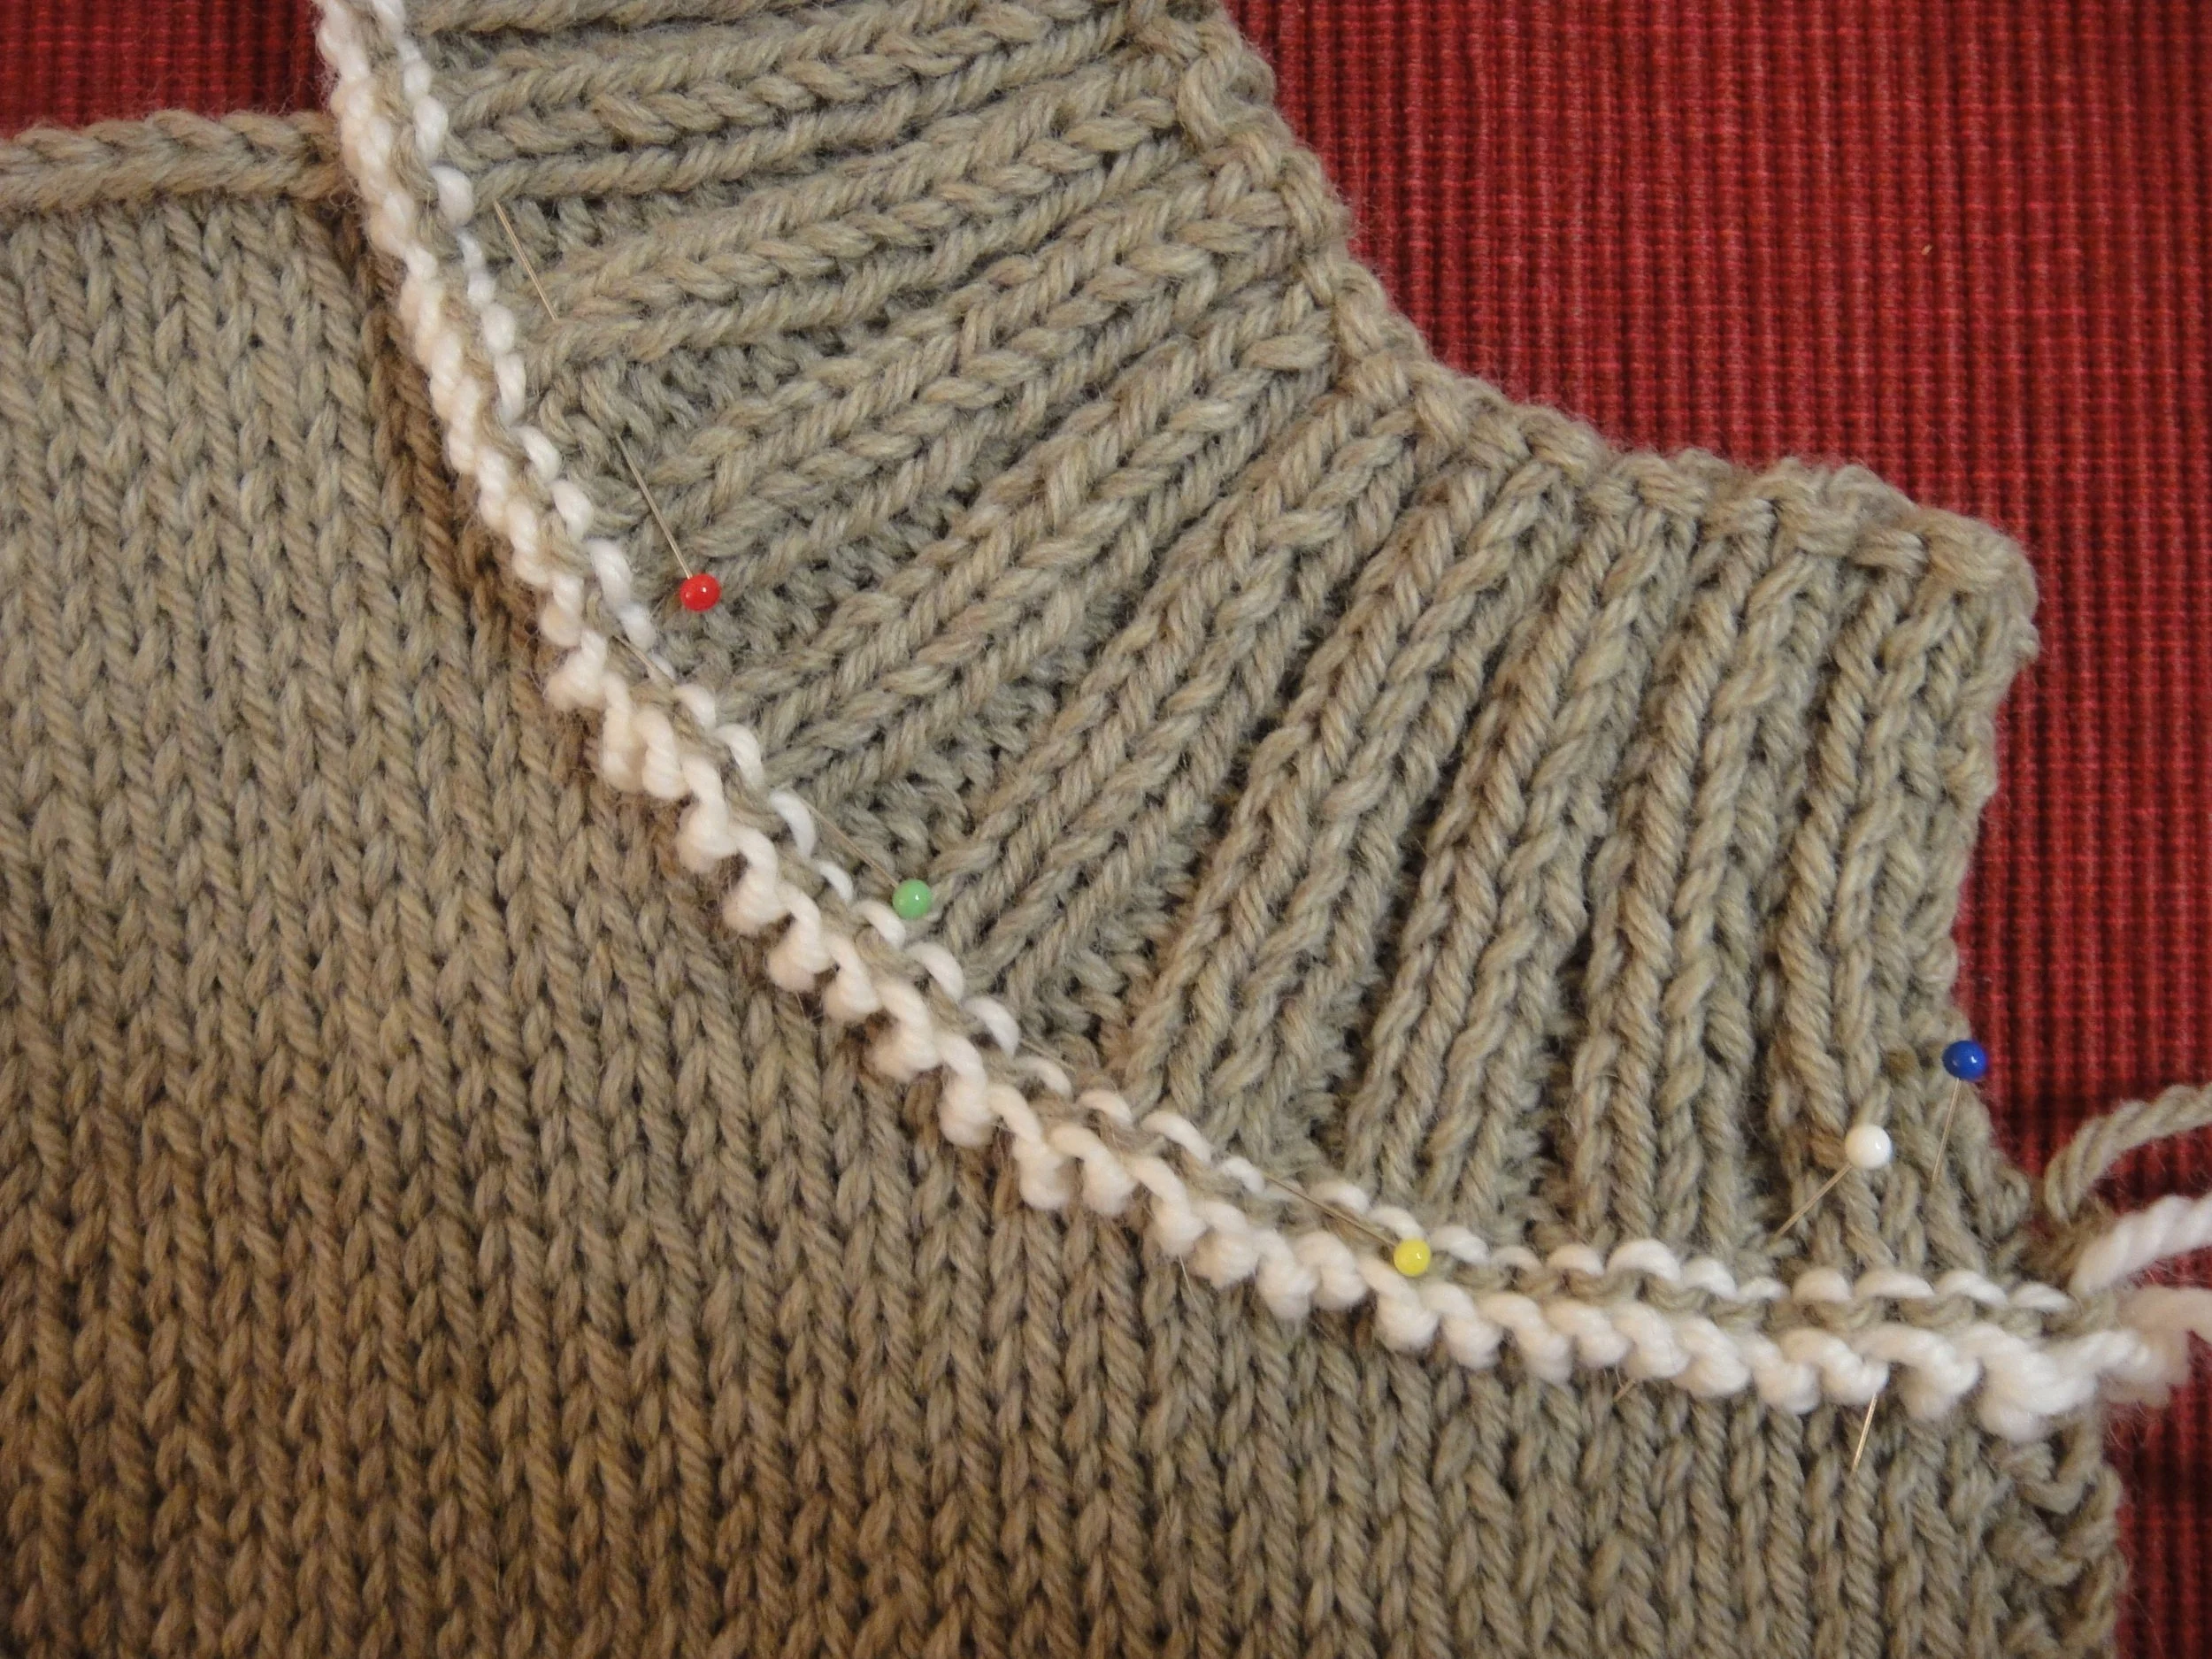
See how the two tails of the waste yarn are both at the same edge of the collar stitches? When you tug on one tail then the other it allows you to securely expose live stitches a few at a time as you backstitch around the collar. The picture below shows how this works–but before we actually remove any stitches, we need to pin the collar to the neckline.

Pull on waste yarn tails to expose live stitches.
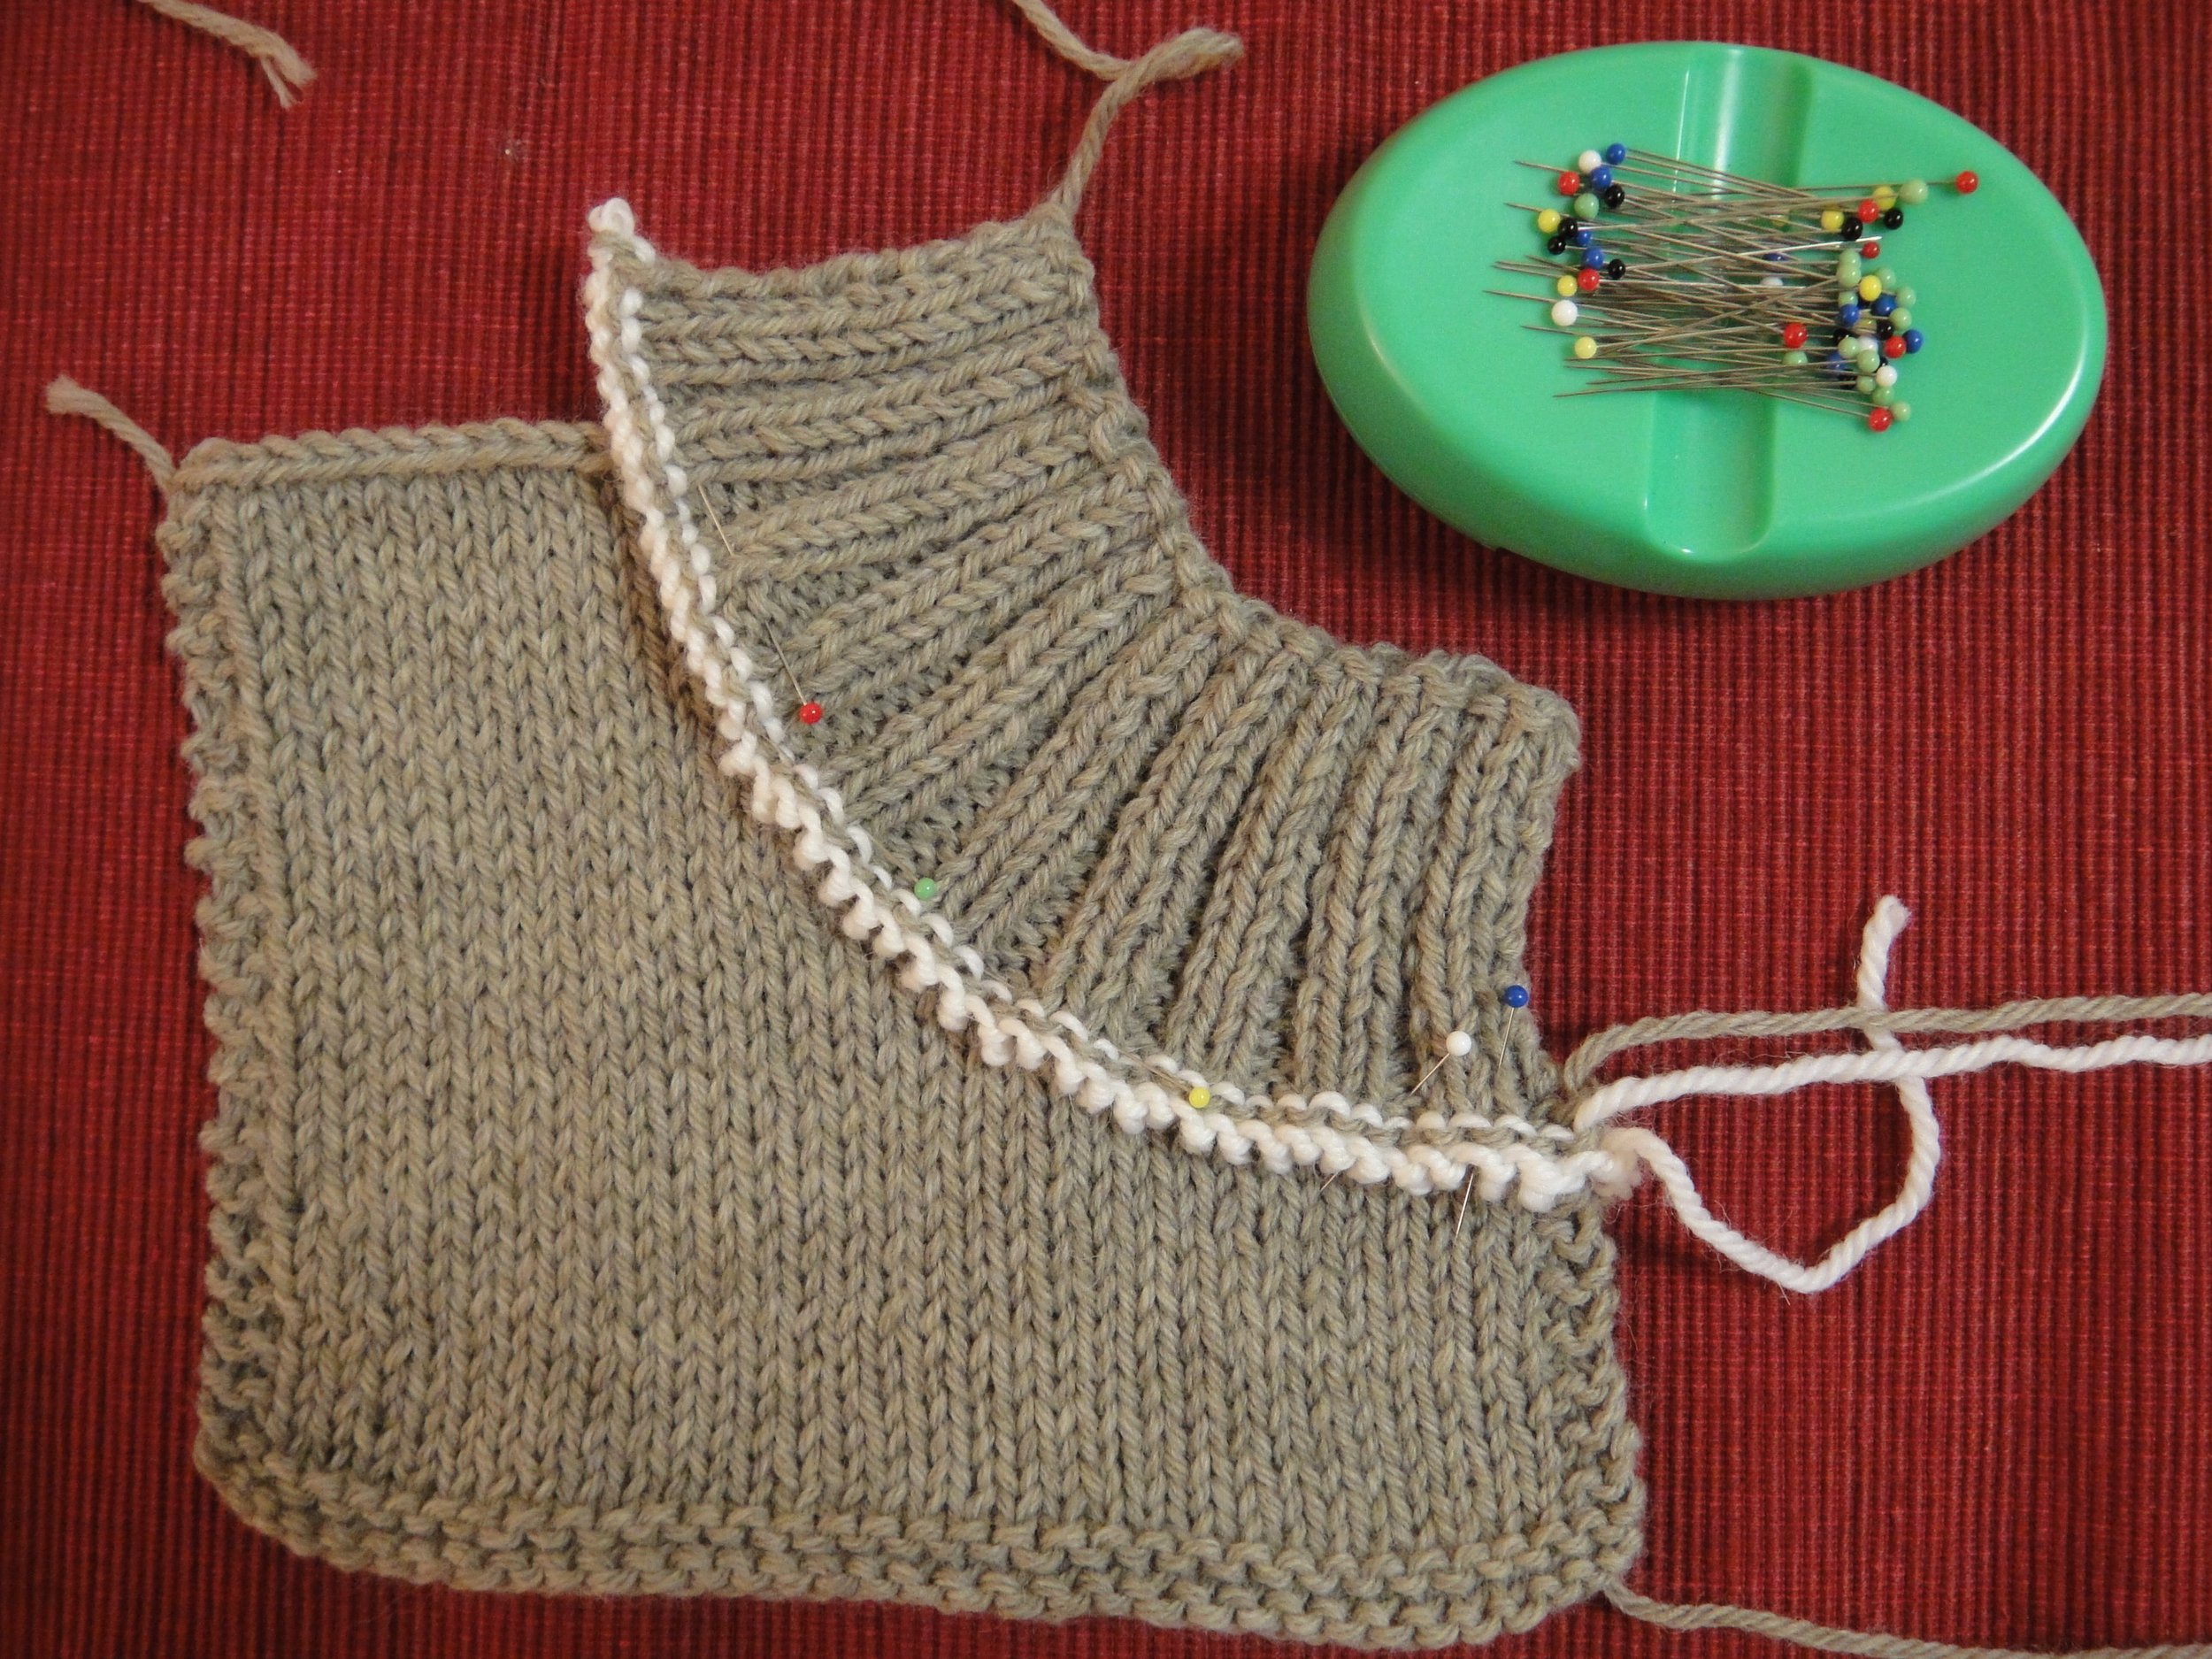
Pinning: In this example you will be working with both the RS of the collar and the RS of the sweater facing you, with the waste yarn tails at the right edge of the collar, ready to be removed during the backstitch process, which moves from right to left. (Note: In Lady Yak, because the collar is intended to fold over, you will work as directed in the pattern, with the WS of the collar facing the RS of the body)
Lay the collar so that the waste yarn stitches overlap the neckline edge of the sweater and the cast-on edge of the collar points away from the sweater body. Using straight pins or coil-less safety pins, pin the live collar stitches to the neckline on the right side being sure to pin through the collar stitches only so that the waste yarn remains easy to remove.
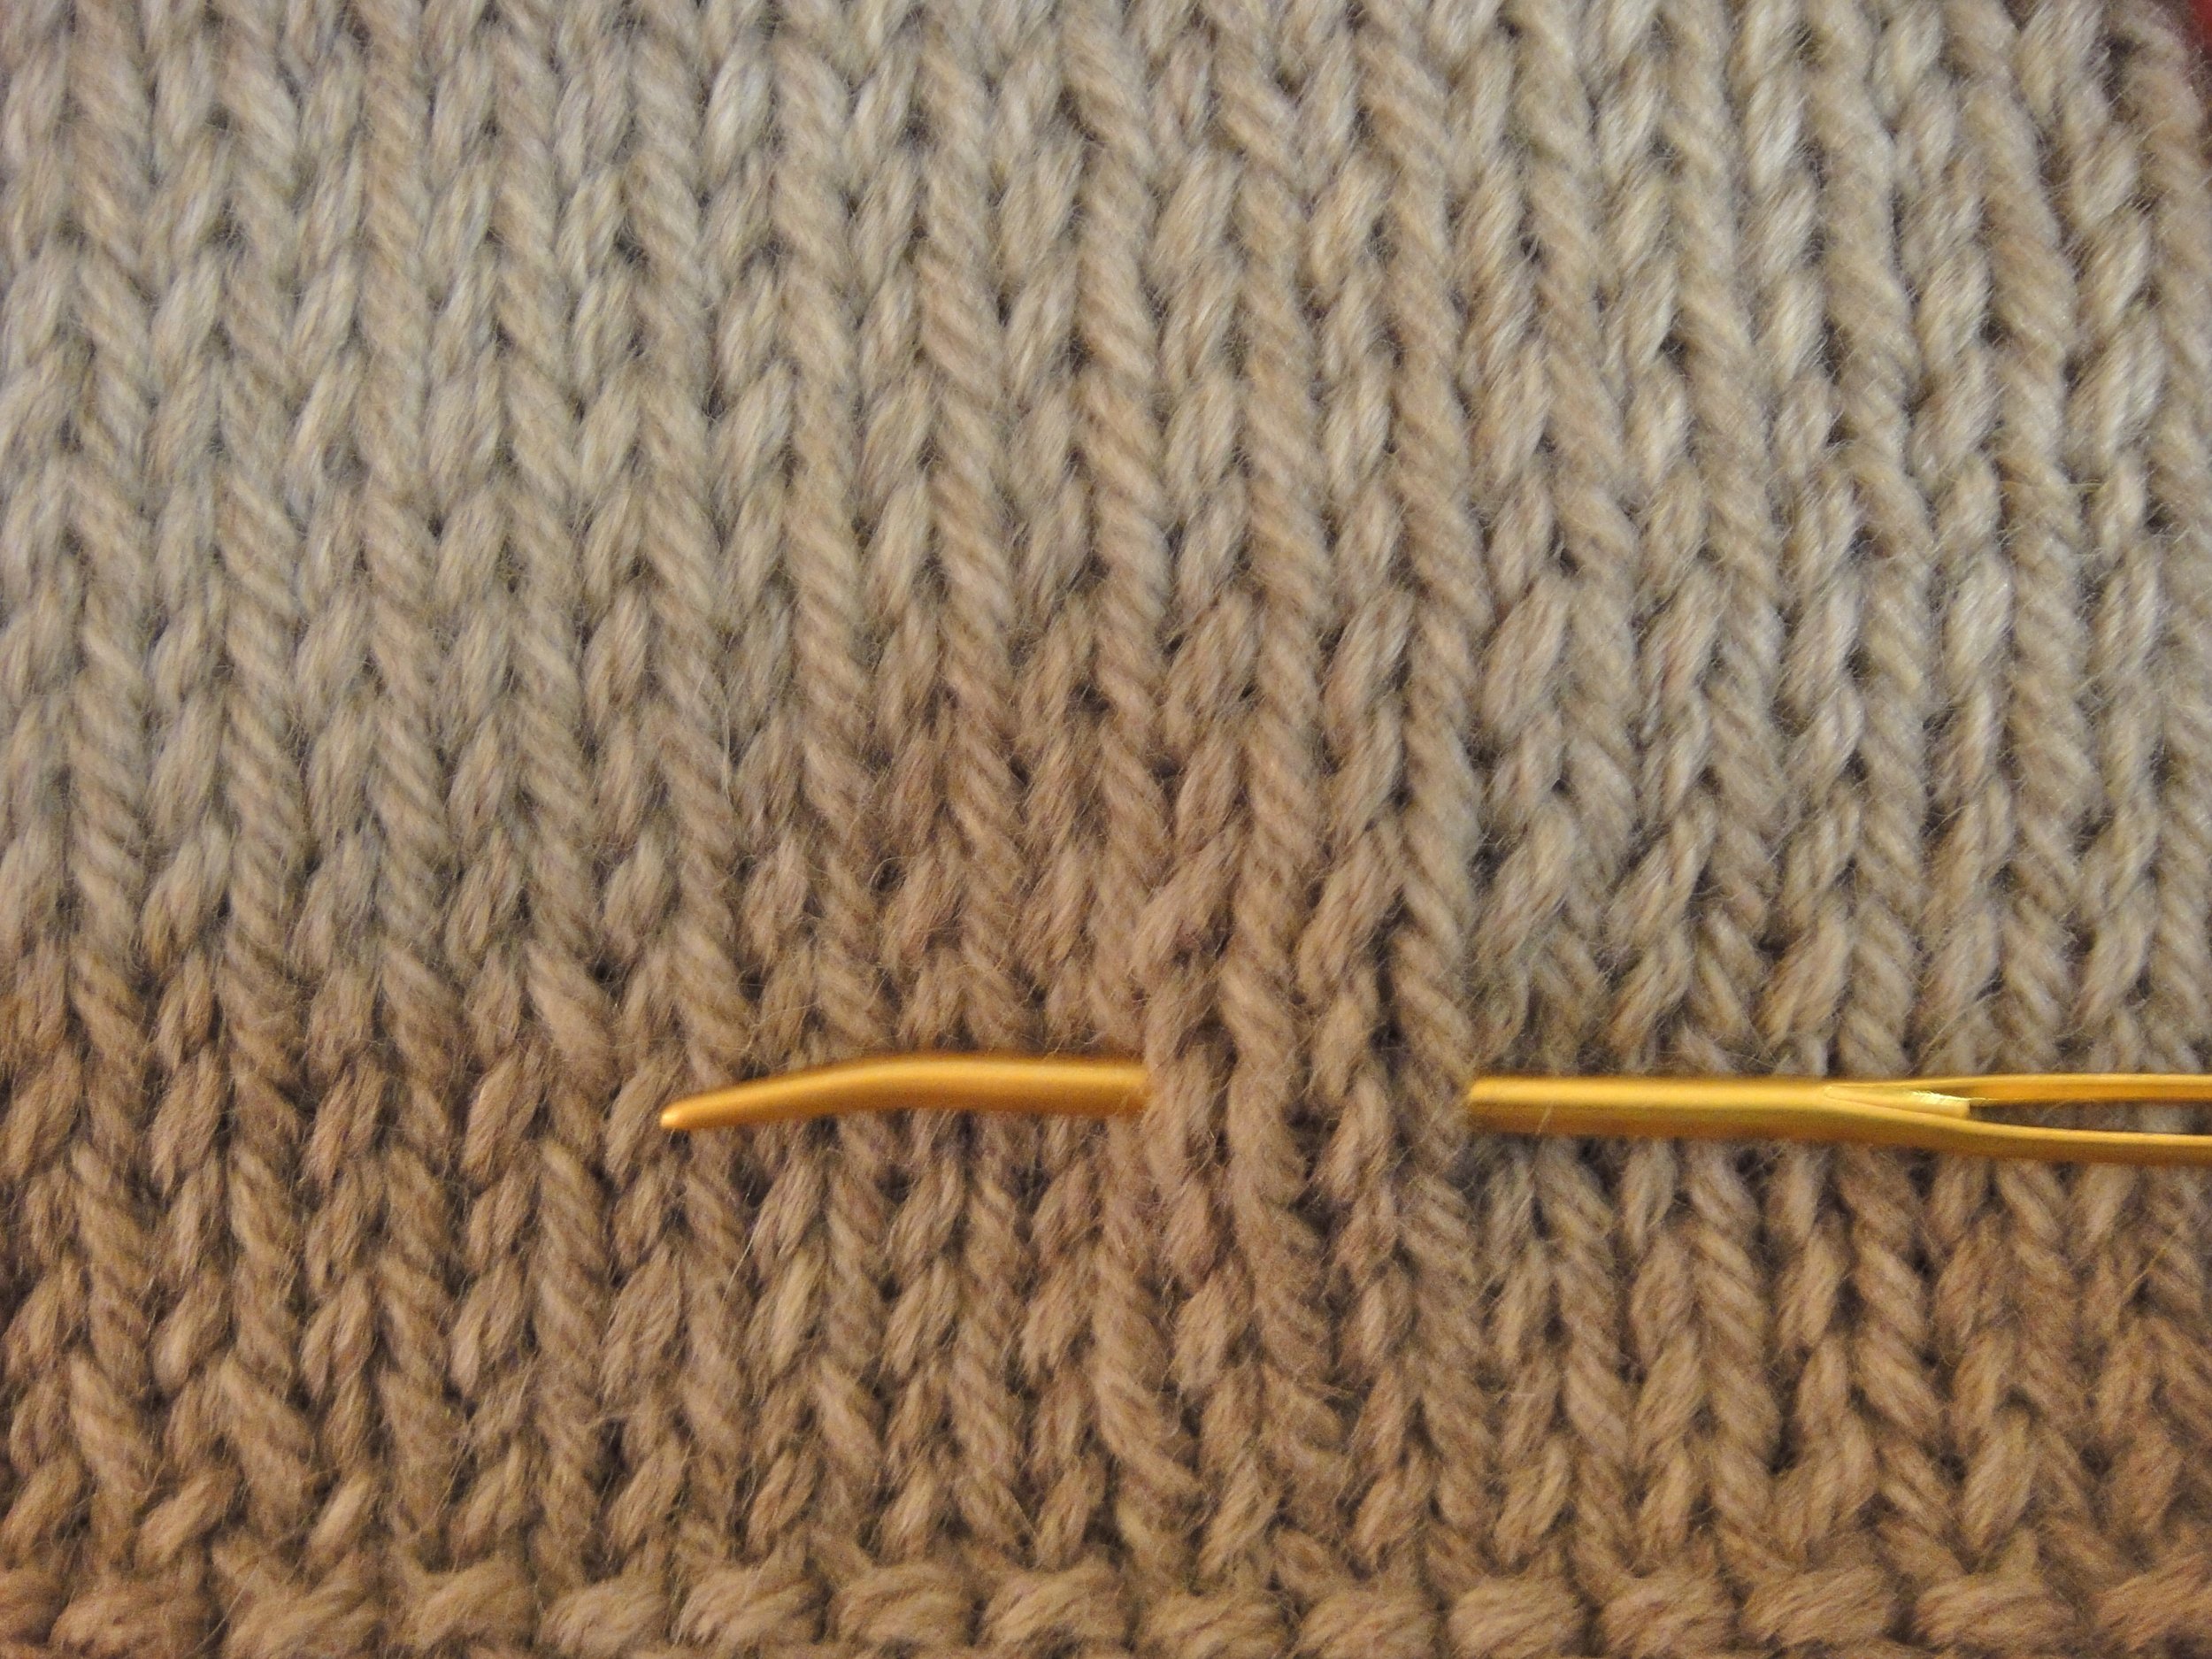
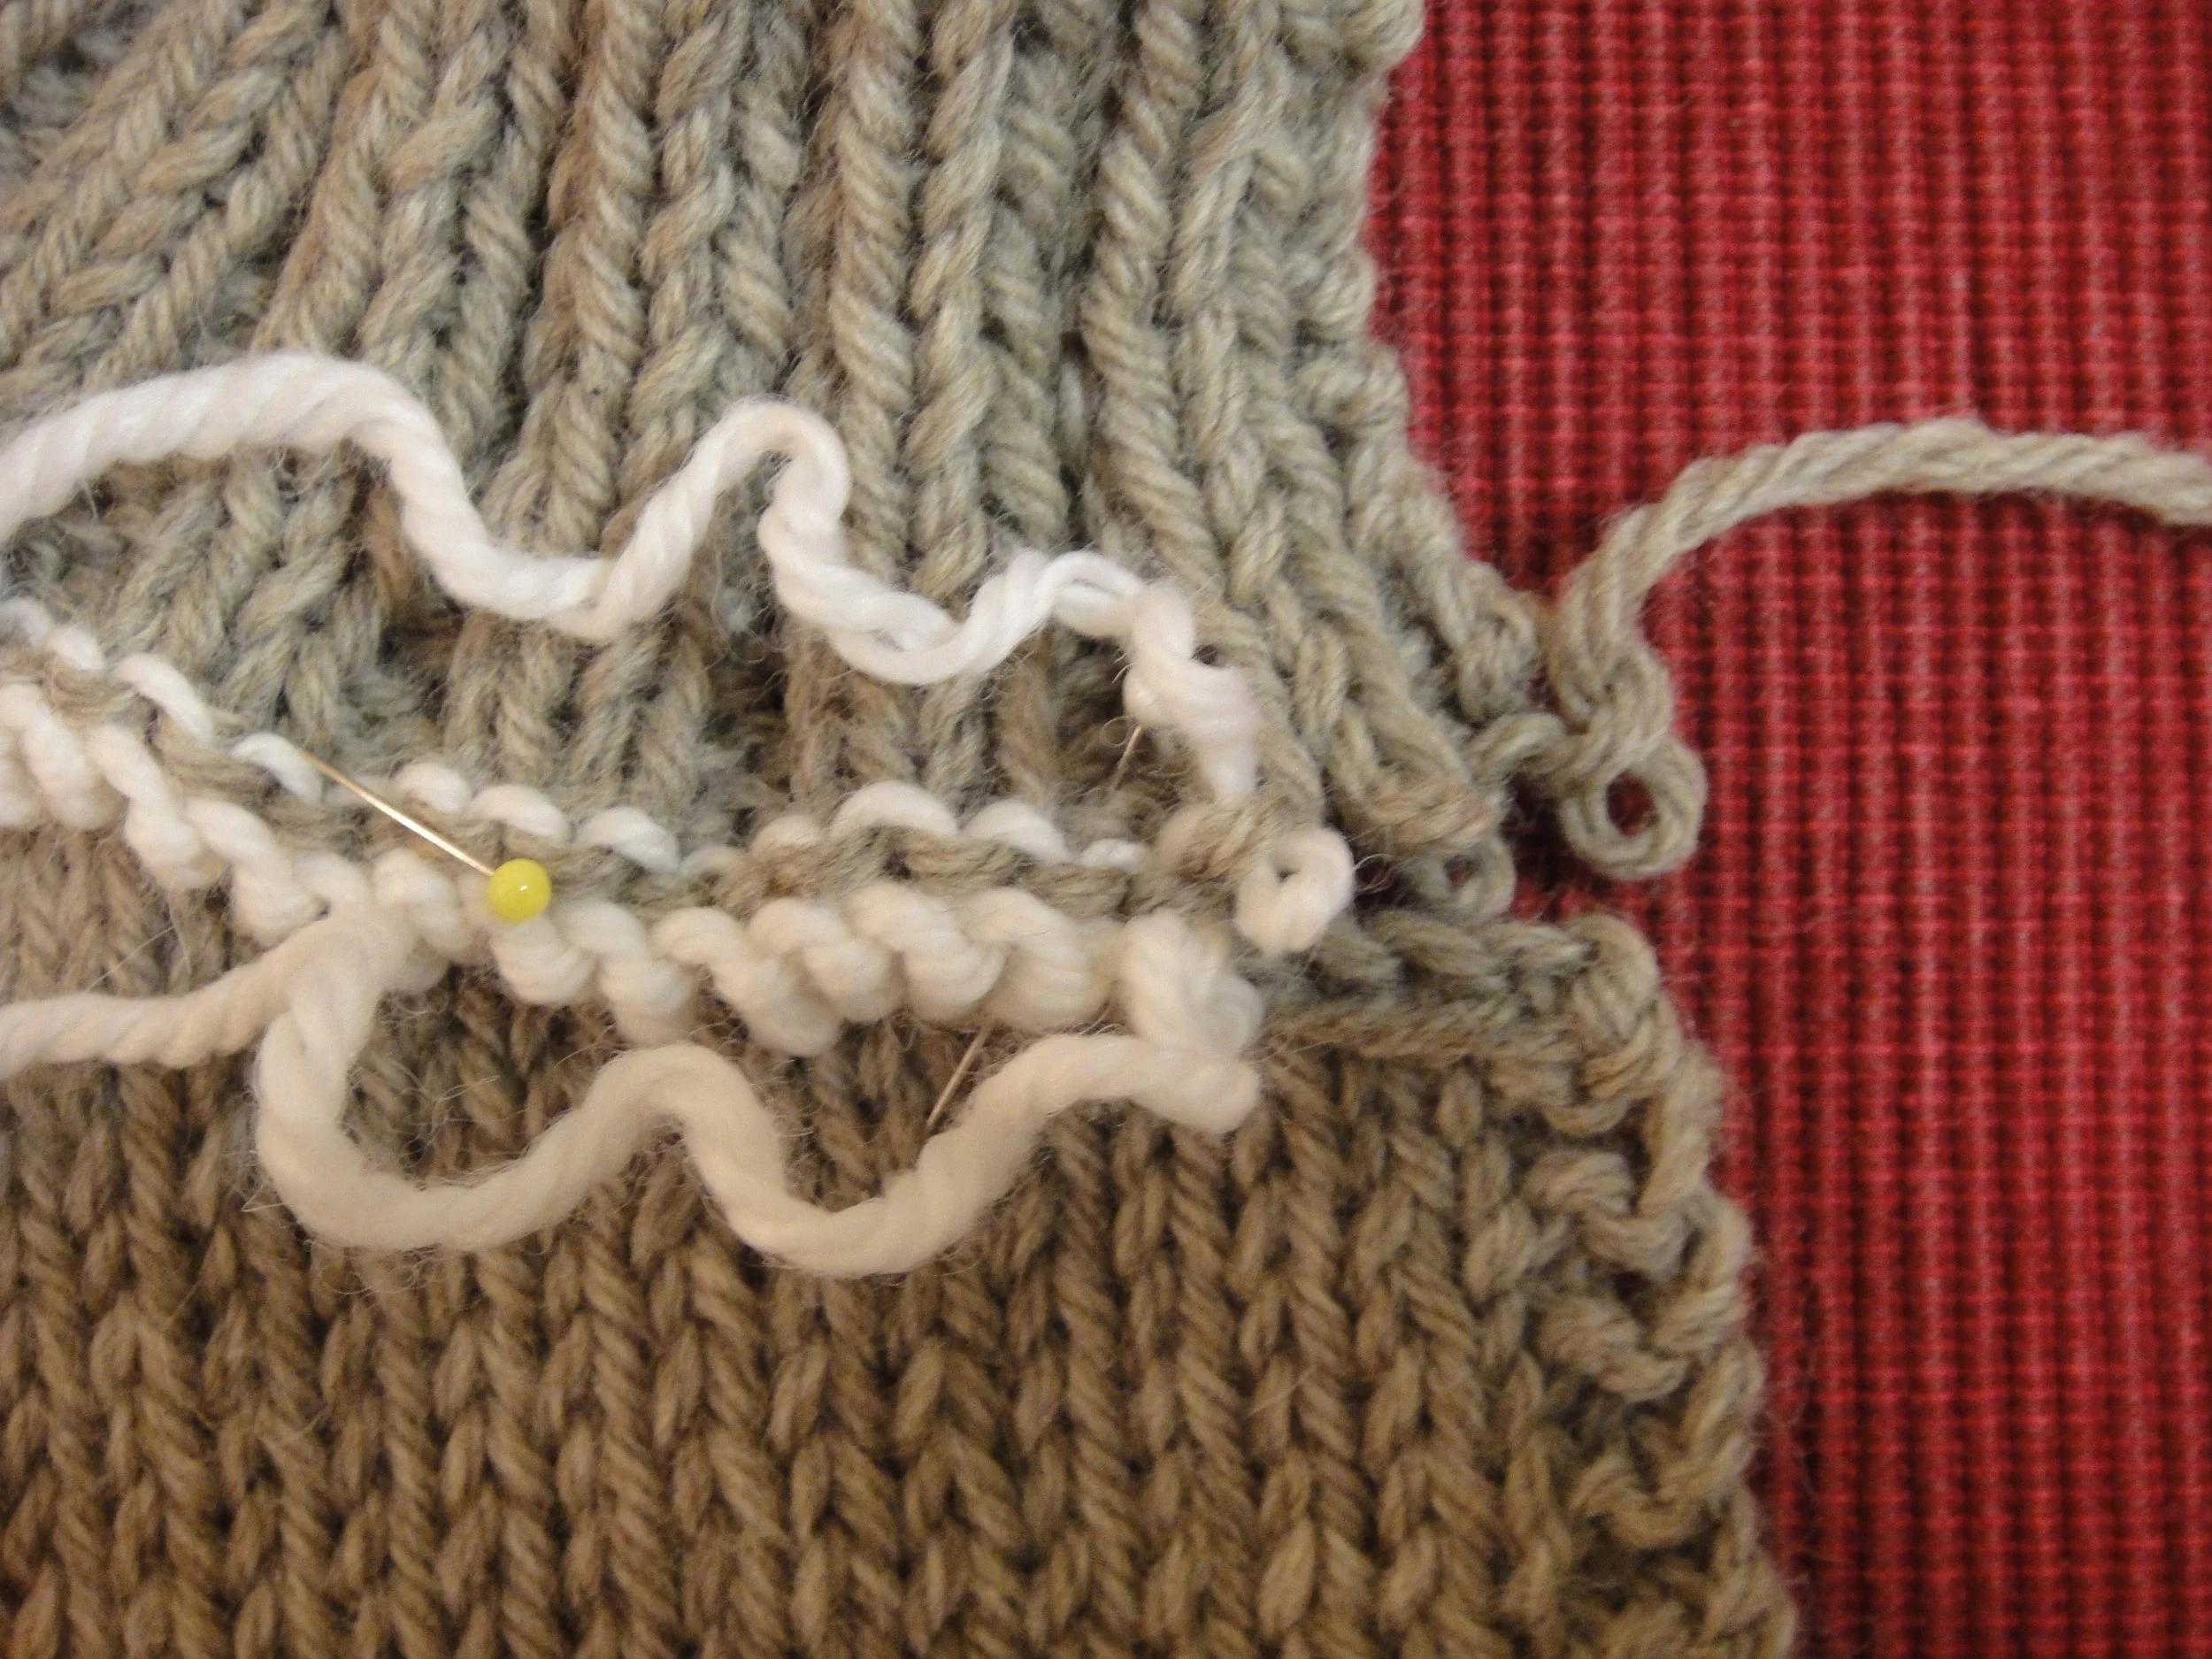
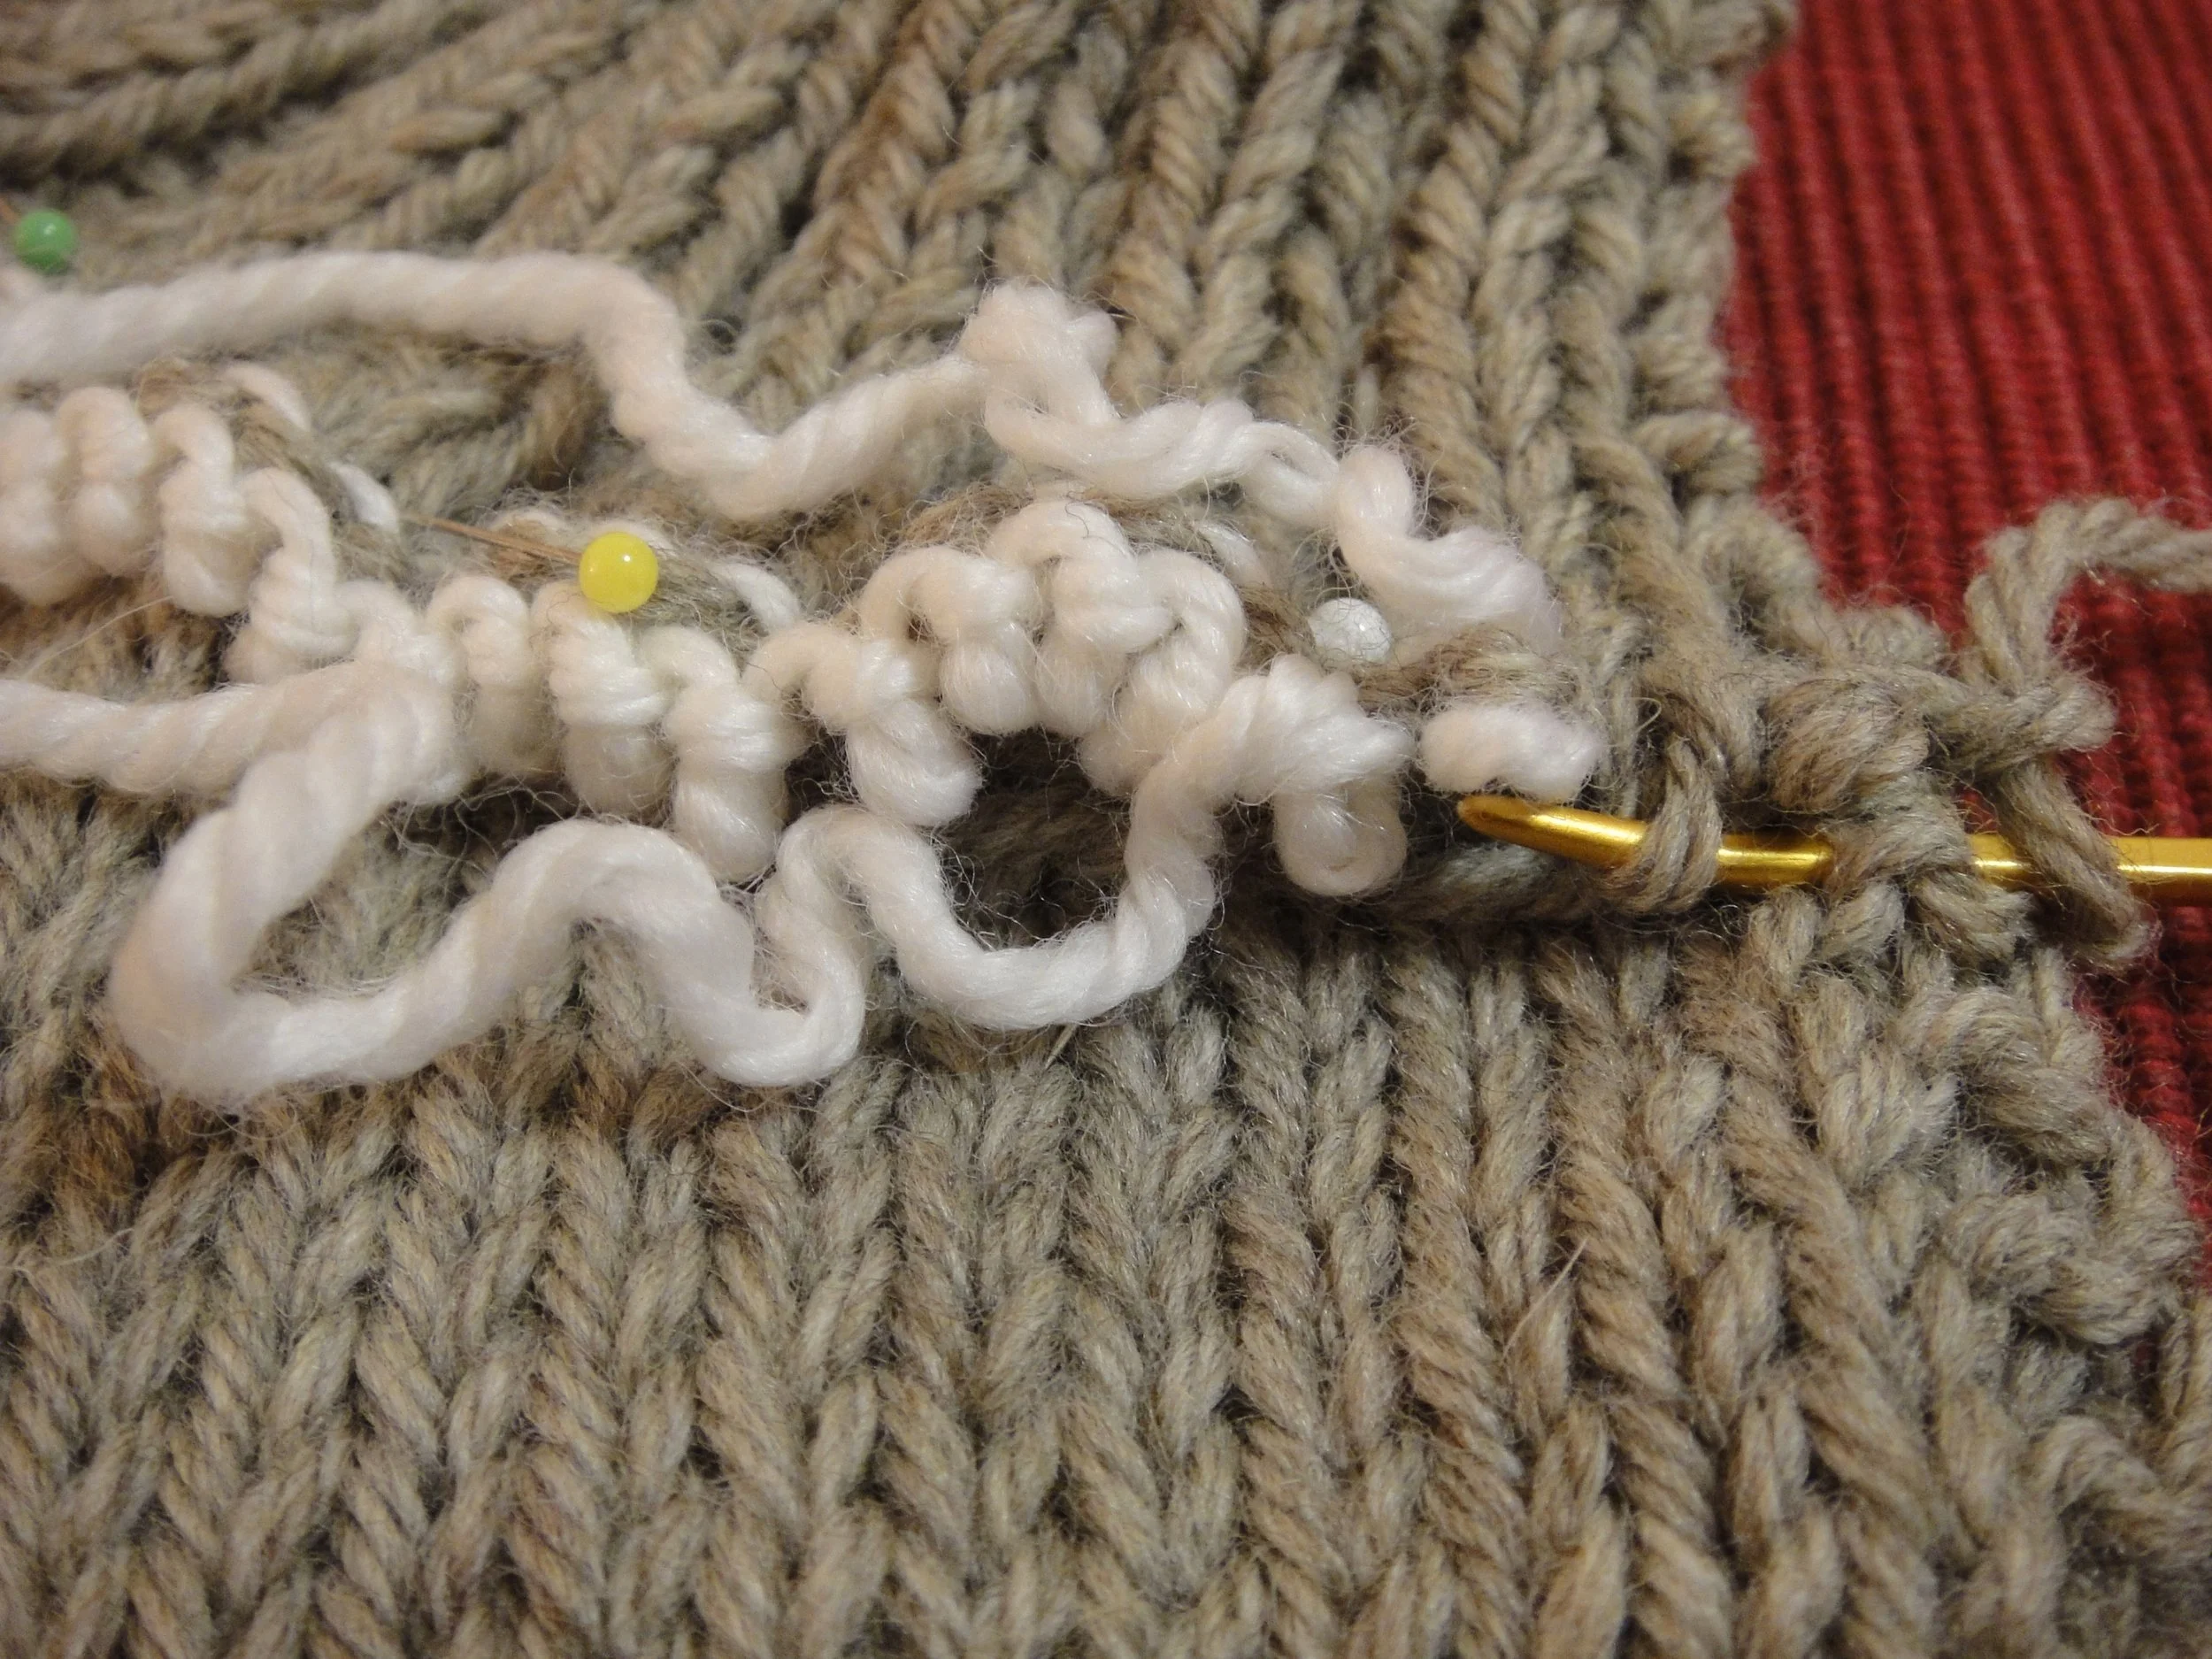
Thread a tapestry needle with a length of yarn. Pulling on first one tail of waste yarn then the other, remove both rows of waste yarn from five or six collar stitches at a time, removing pins as needed. (I like to remove a number of stitches at a time to work on but if you’re feeling nervous you can just remove the waste yarn from 3 stitches to begin the collar and thereafter from one stitch at a time.)
In the basic backstitch link above you saw the path the needle took when working through fabric. In our application, the needle will travel from right to left, just as in traditional backstitch, but the needle will go down and come up through specific live stitches. This can be tricky to grasp at first but you will quickly develop a rhythm to the needle movement.
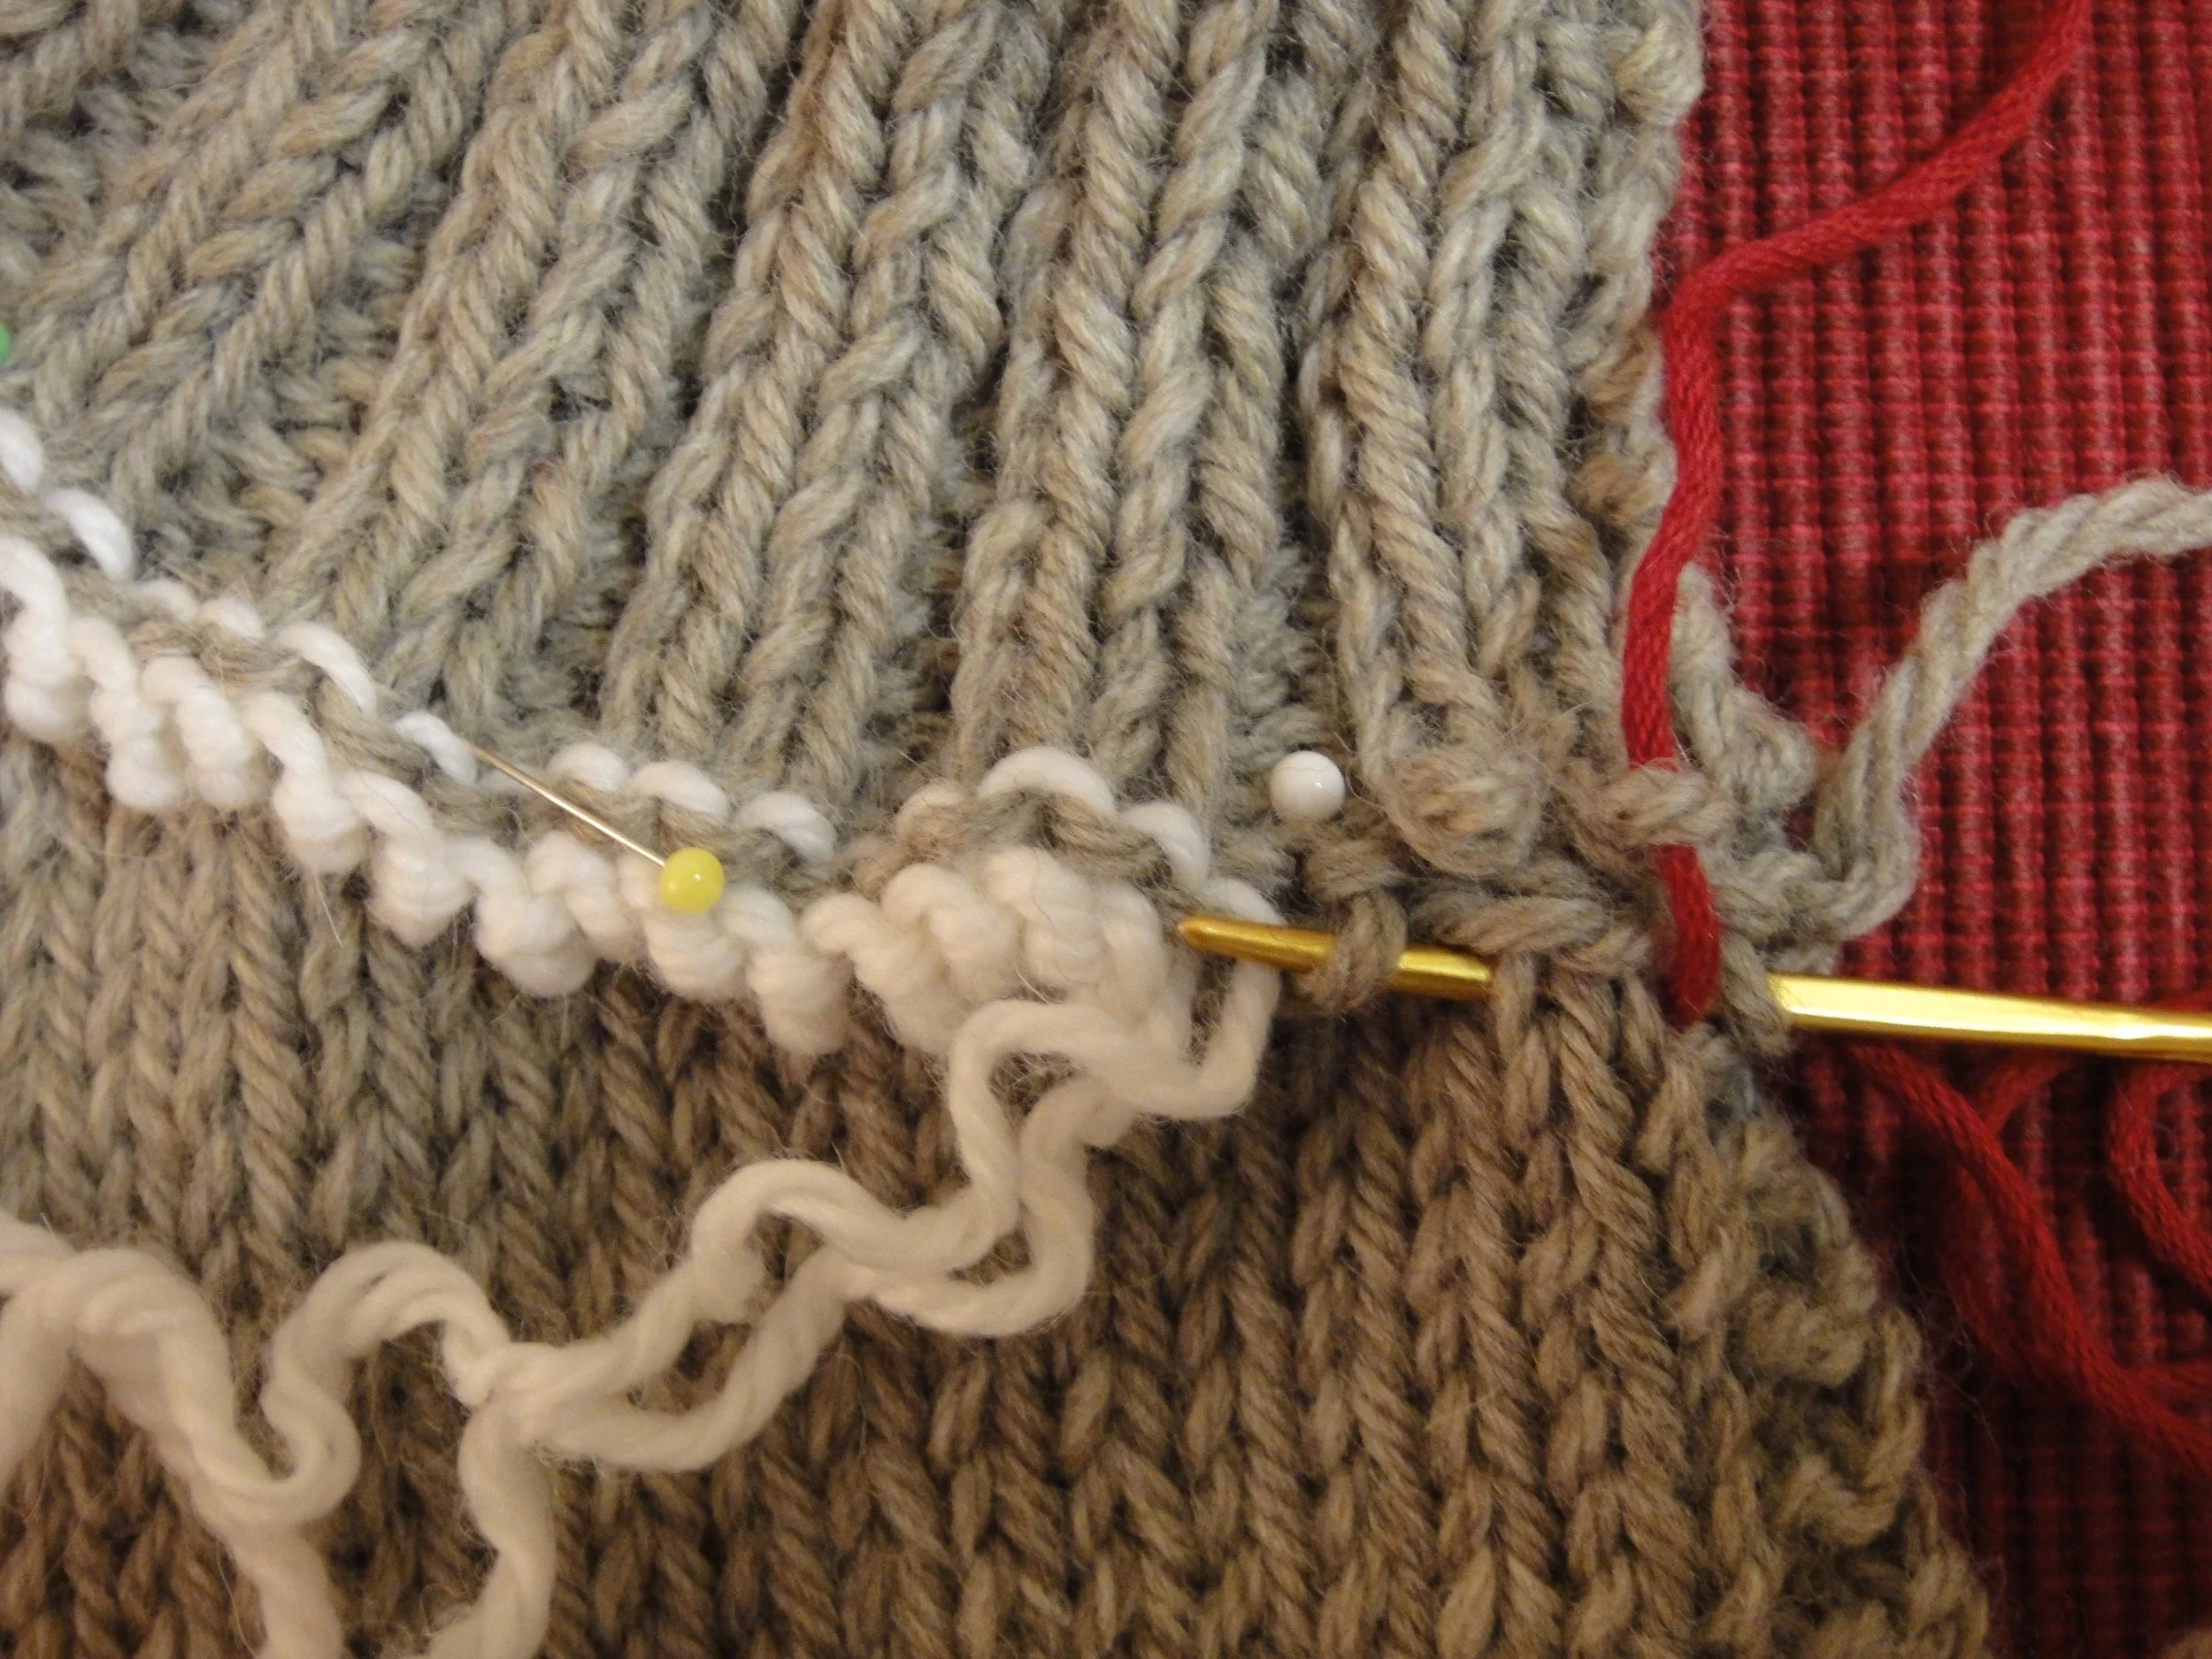
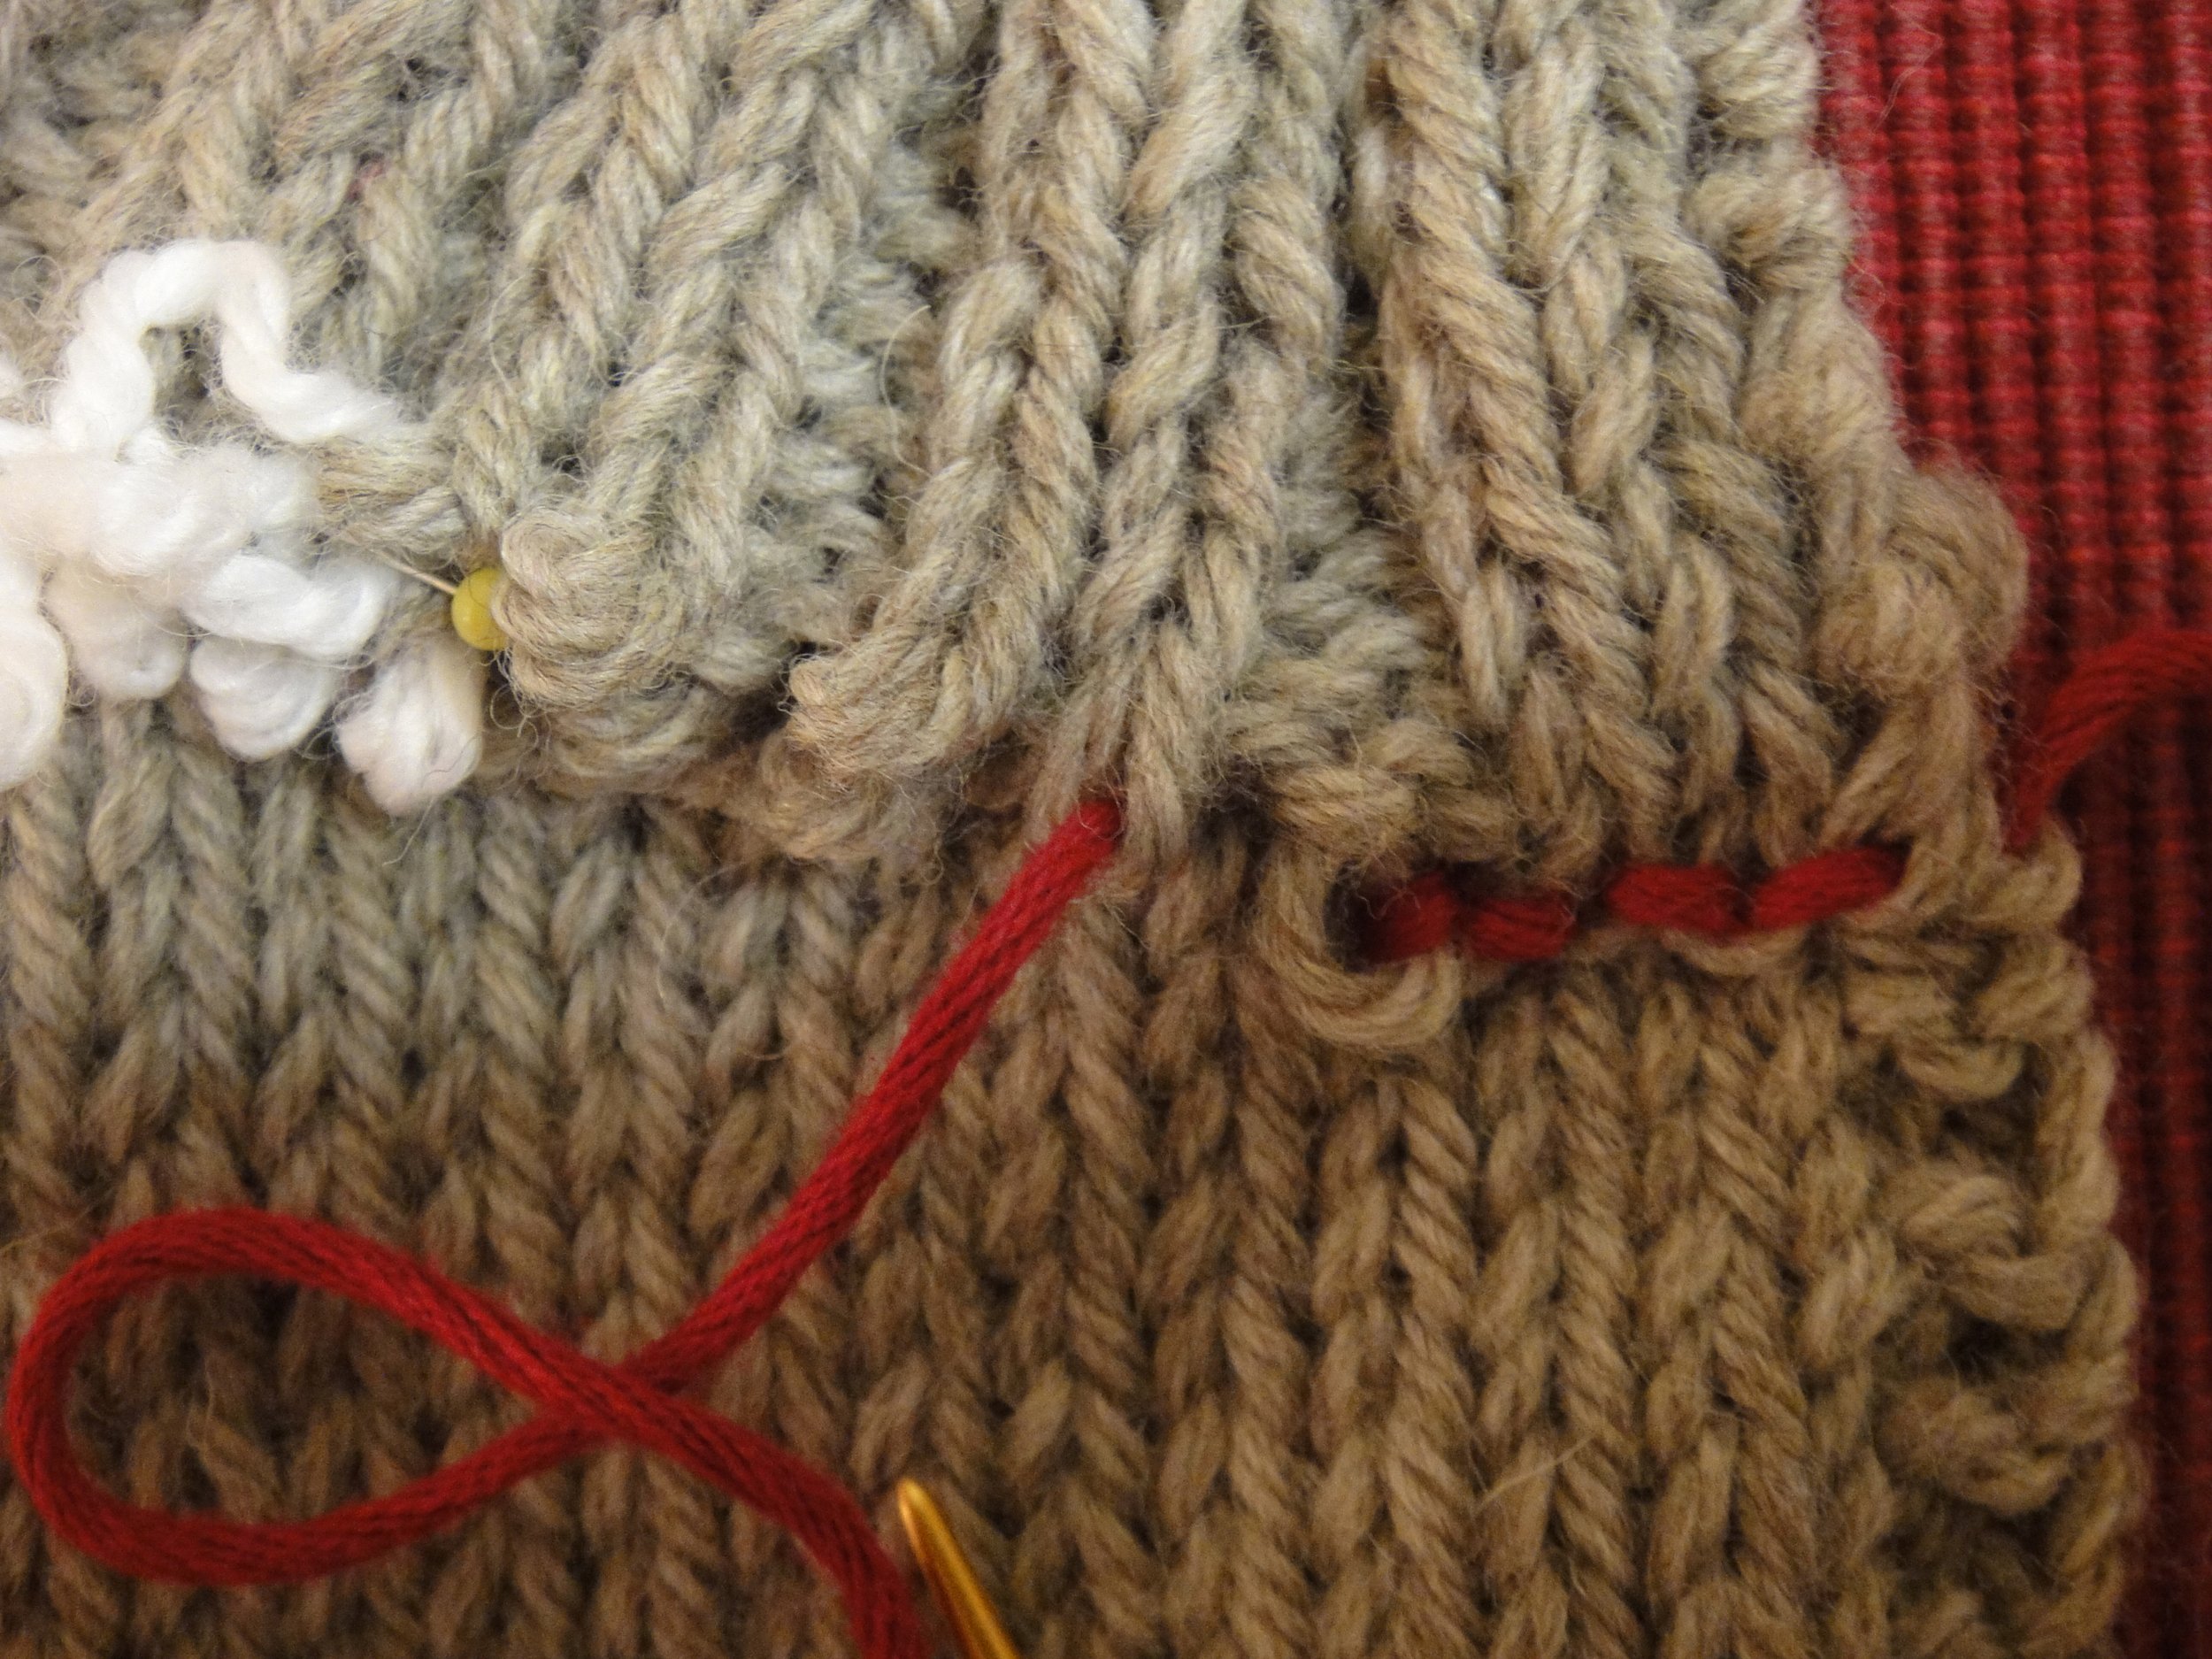
The basic movement proceeds from right to left, moving the needle down then up: The tapestry needle will first go down through a live collar stitch and through a neckline stitch, then come up through a neckline stitch and a live collar stitch two stitches to the left. Next, bring the needle down through the collar and neckline one stitch to the right of where you you just came up, then bring the needle up two stitches to the left of where you went down. Then repeat the motion around the collar: Down one to the right; up two to the left. Although it is a down and up motion, your needle will remain largely horizontal as you can see below. In this method of attaching the collar you will enter each live stitch of the collar and each corresponding stitch on the neckline twice, similar to the way you would if working kitchener stitch.
Here it is in more detail.
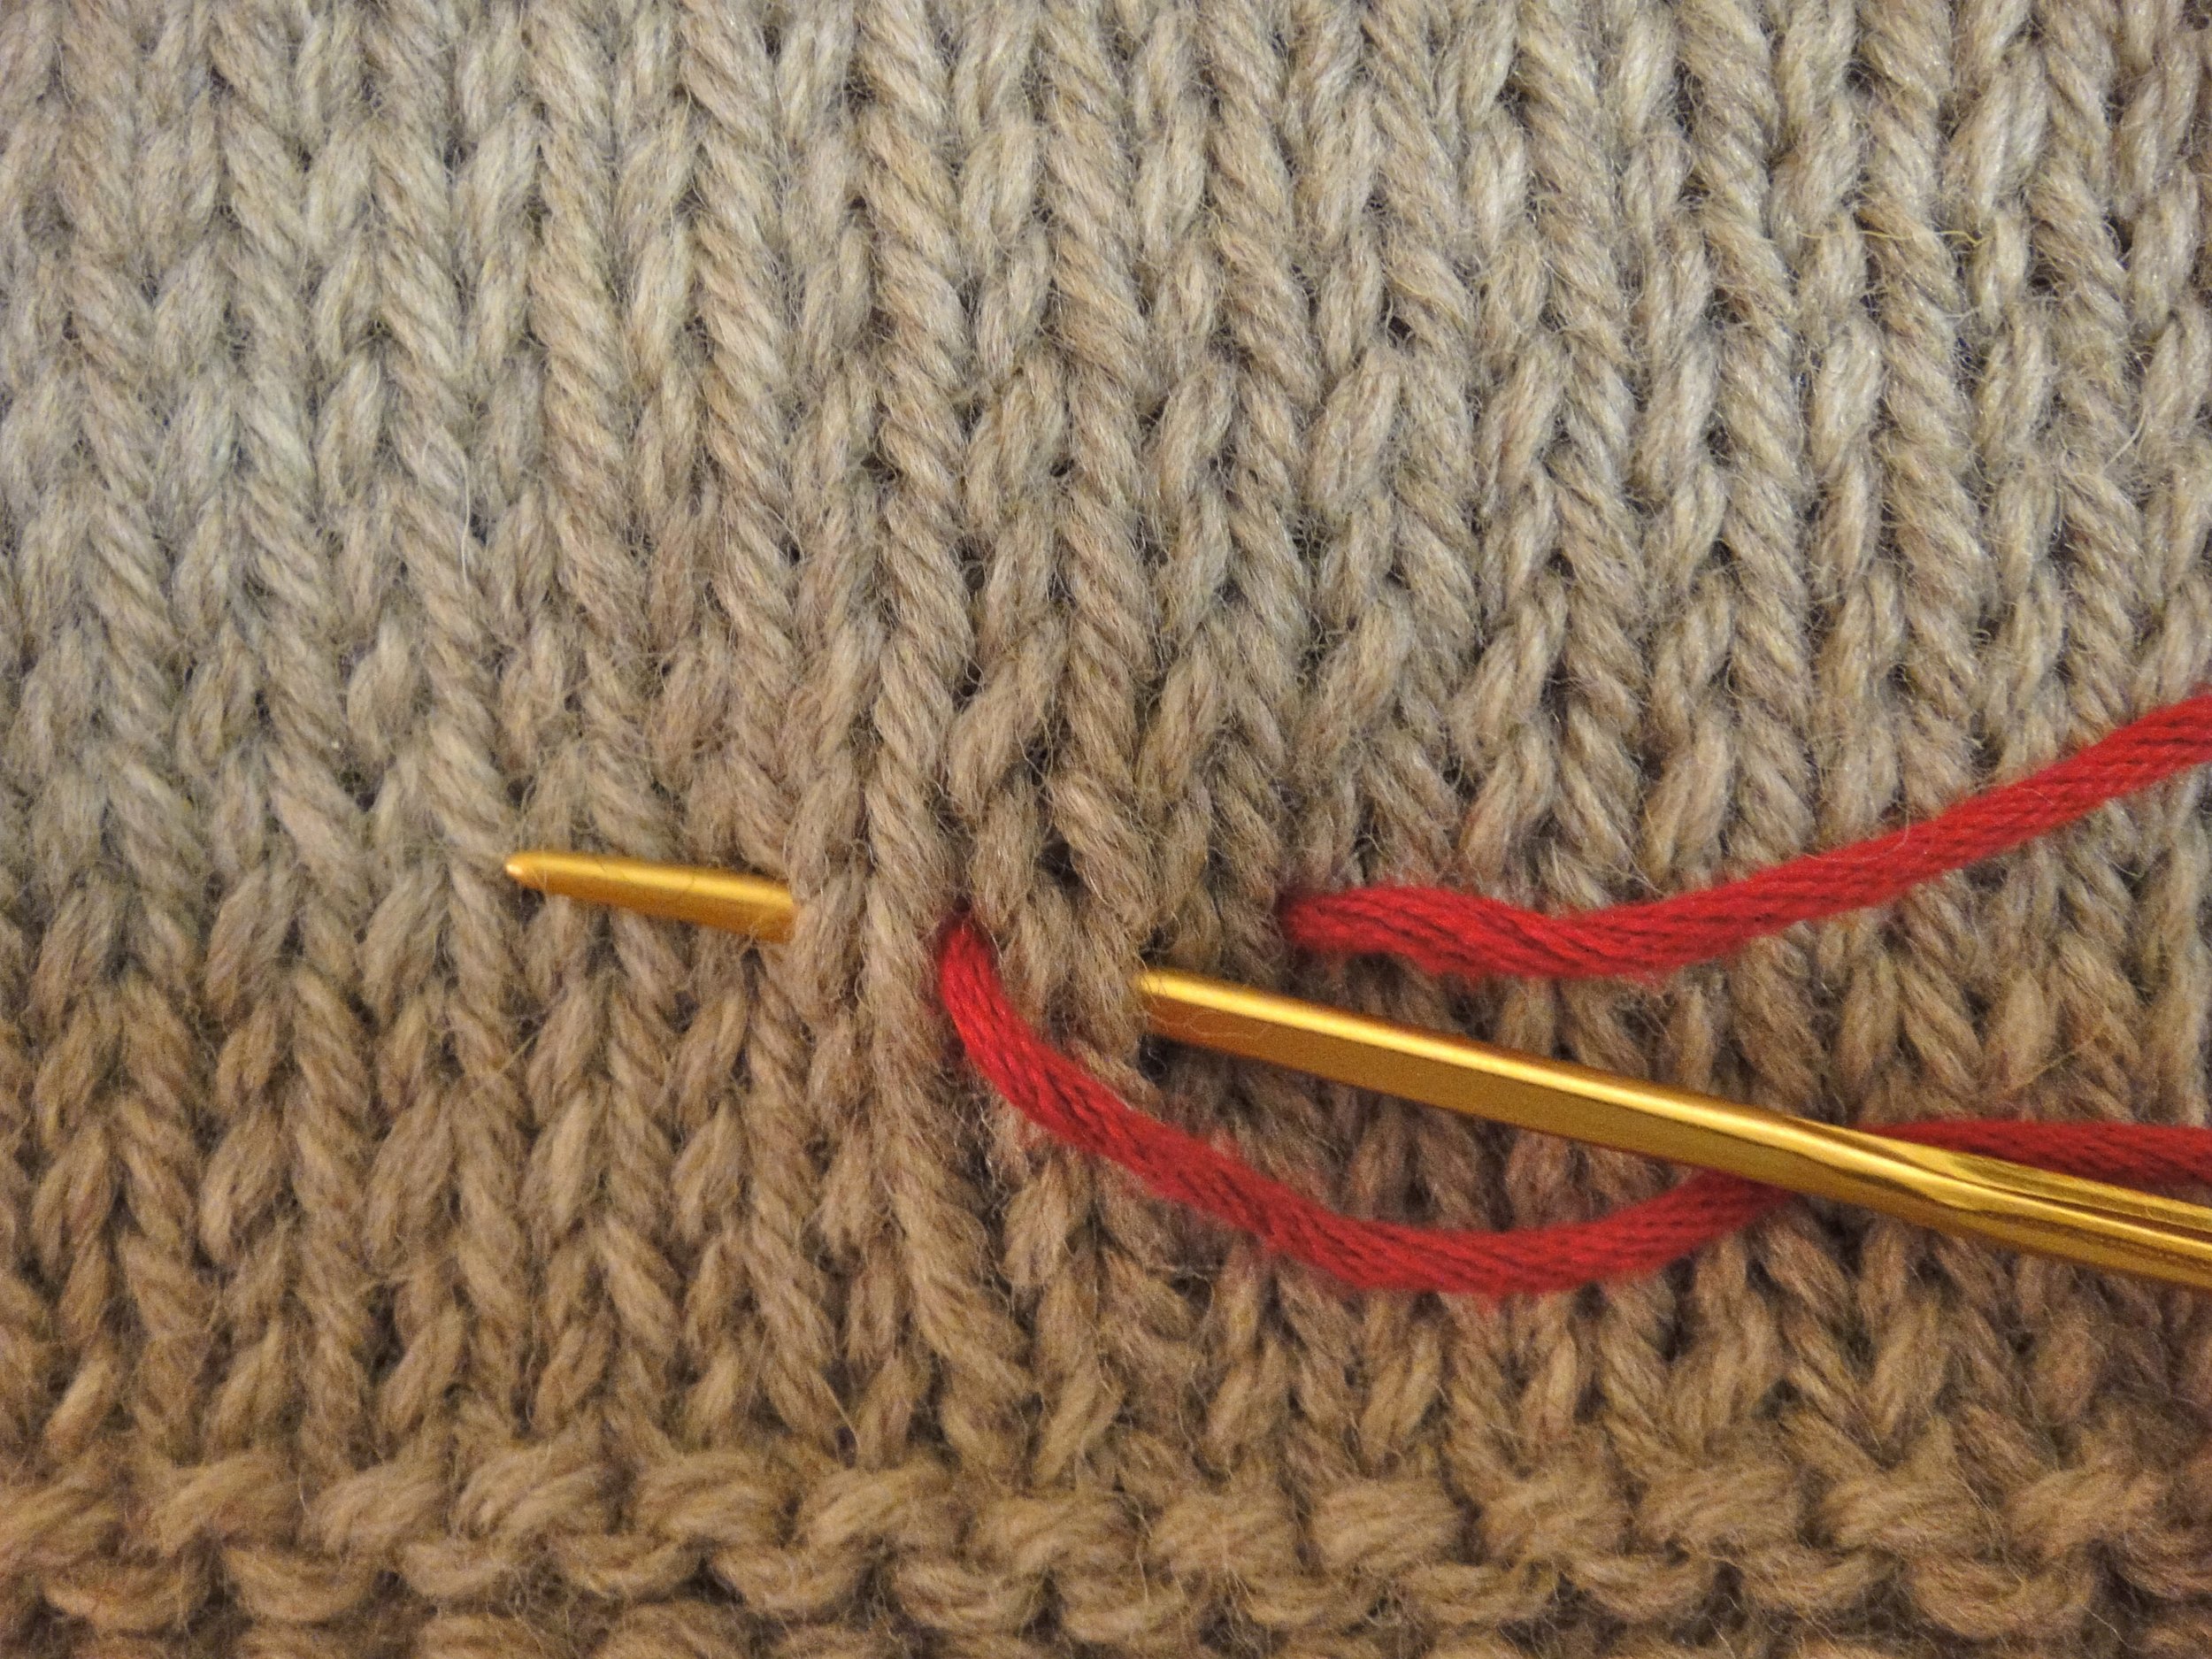
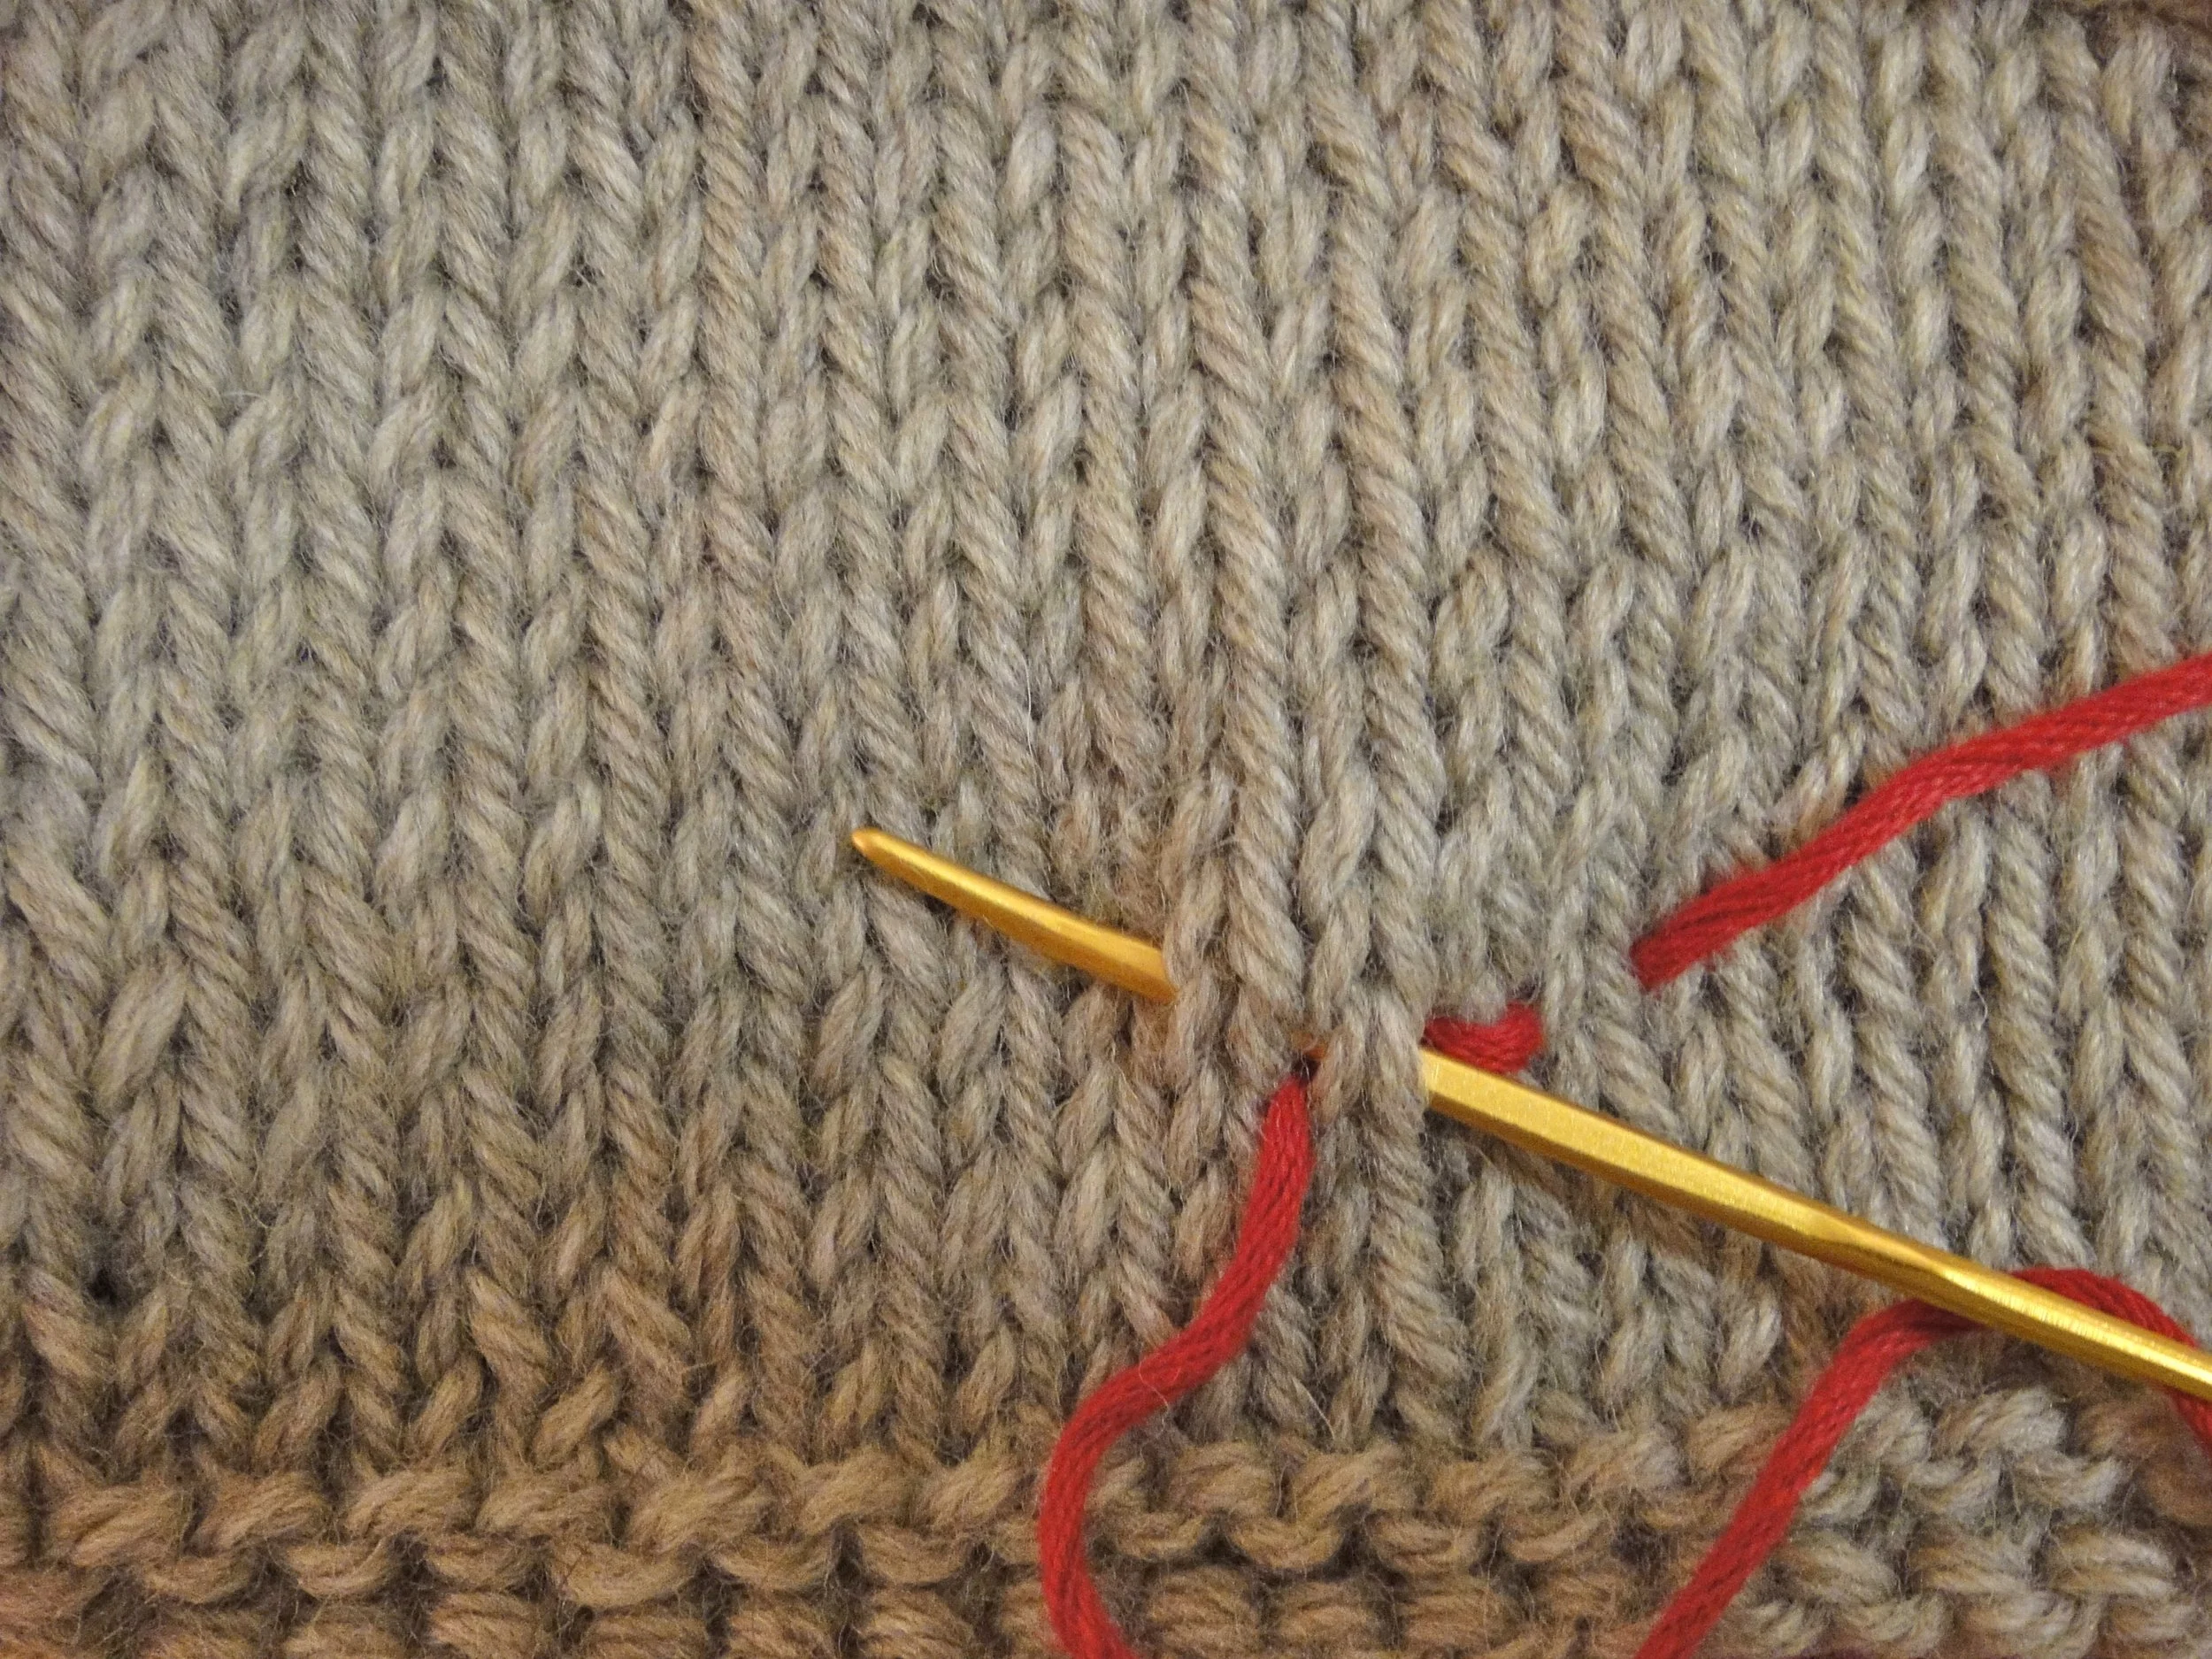
Put the needle through a live collar stitch and a neckline stitch from top to bottom, glide the needle under both layers to the left and bring the needle up through the neckline stitch and collar stitch 2 stitches over.

Pull yarn through.
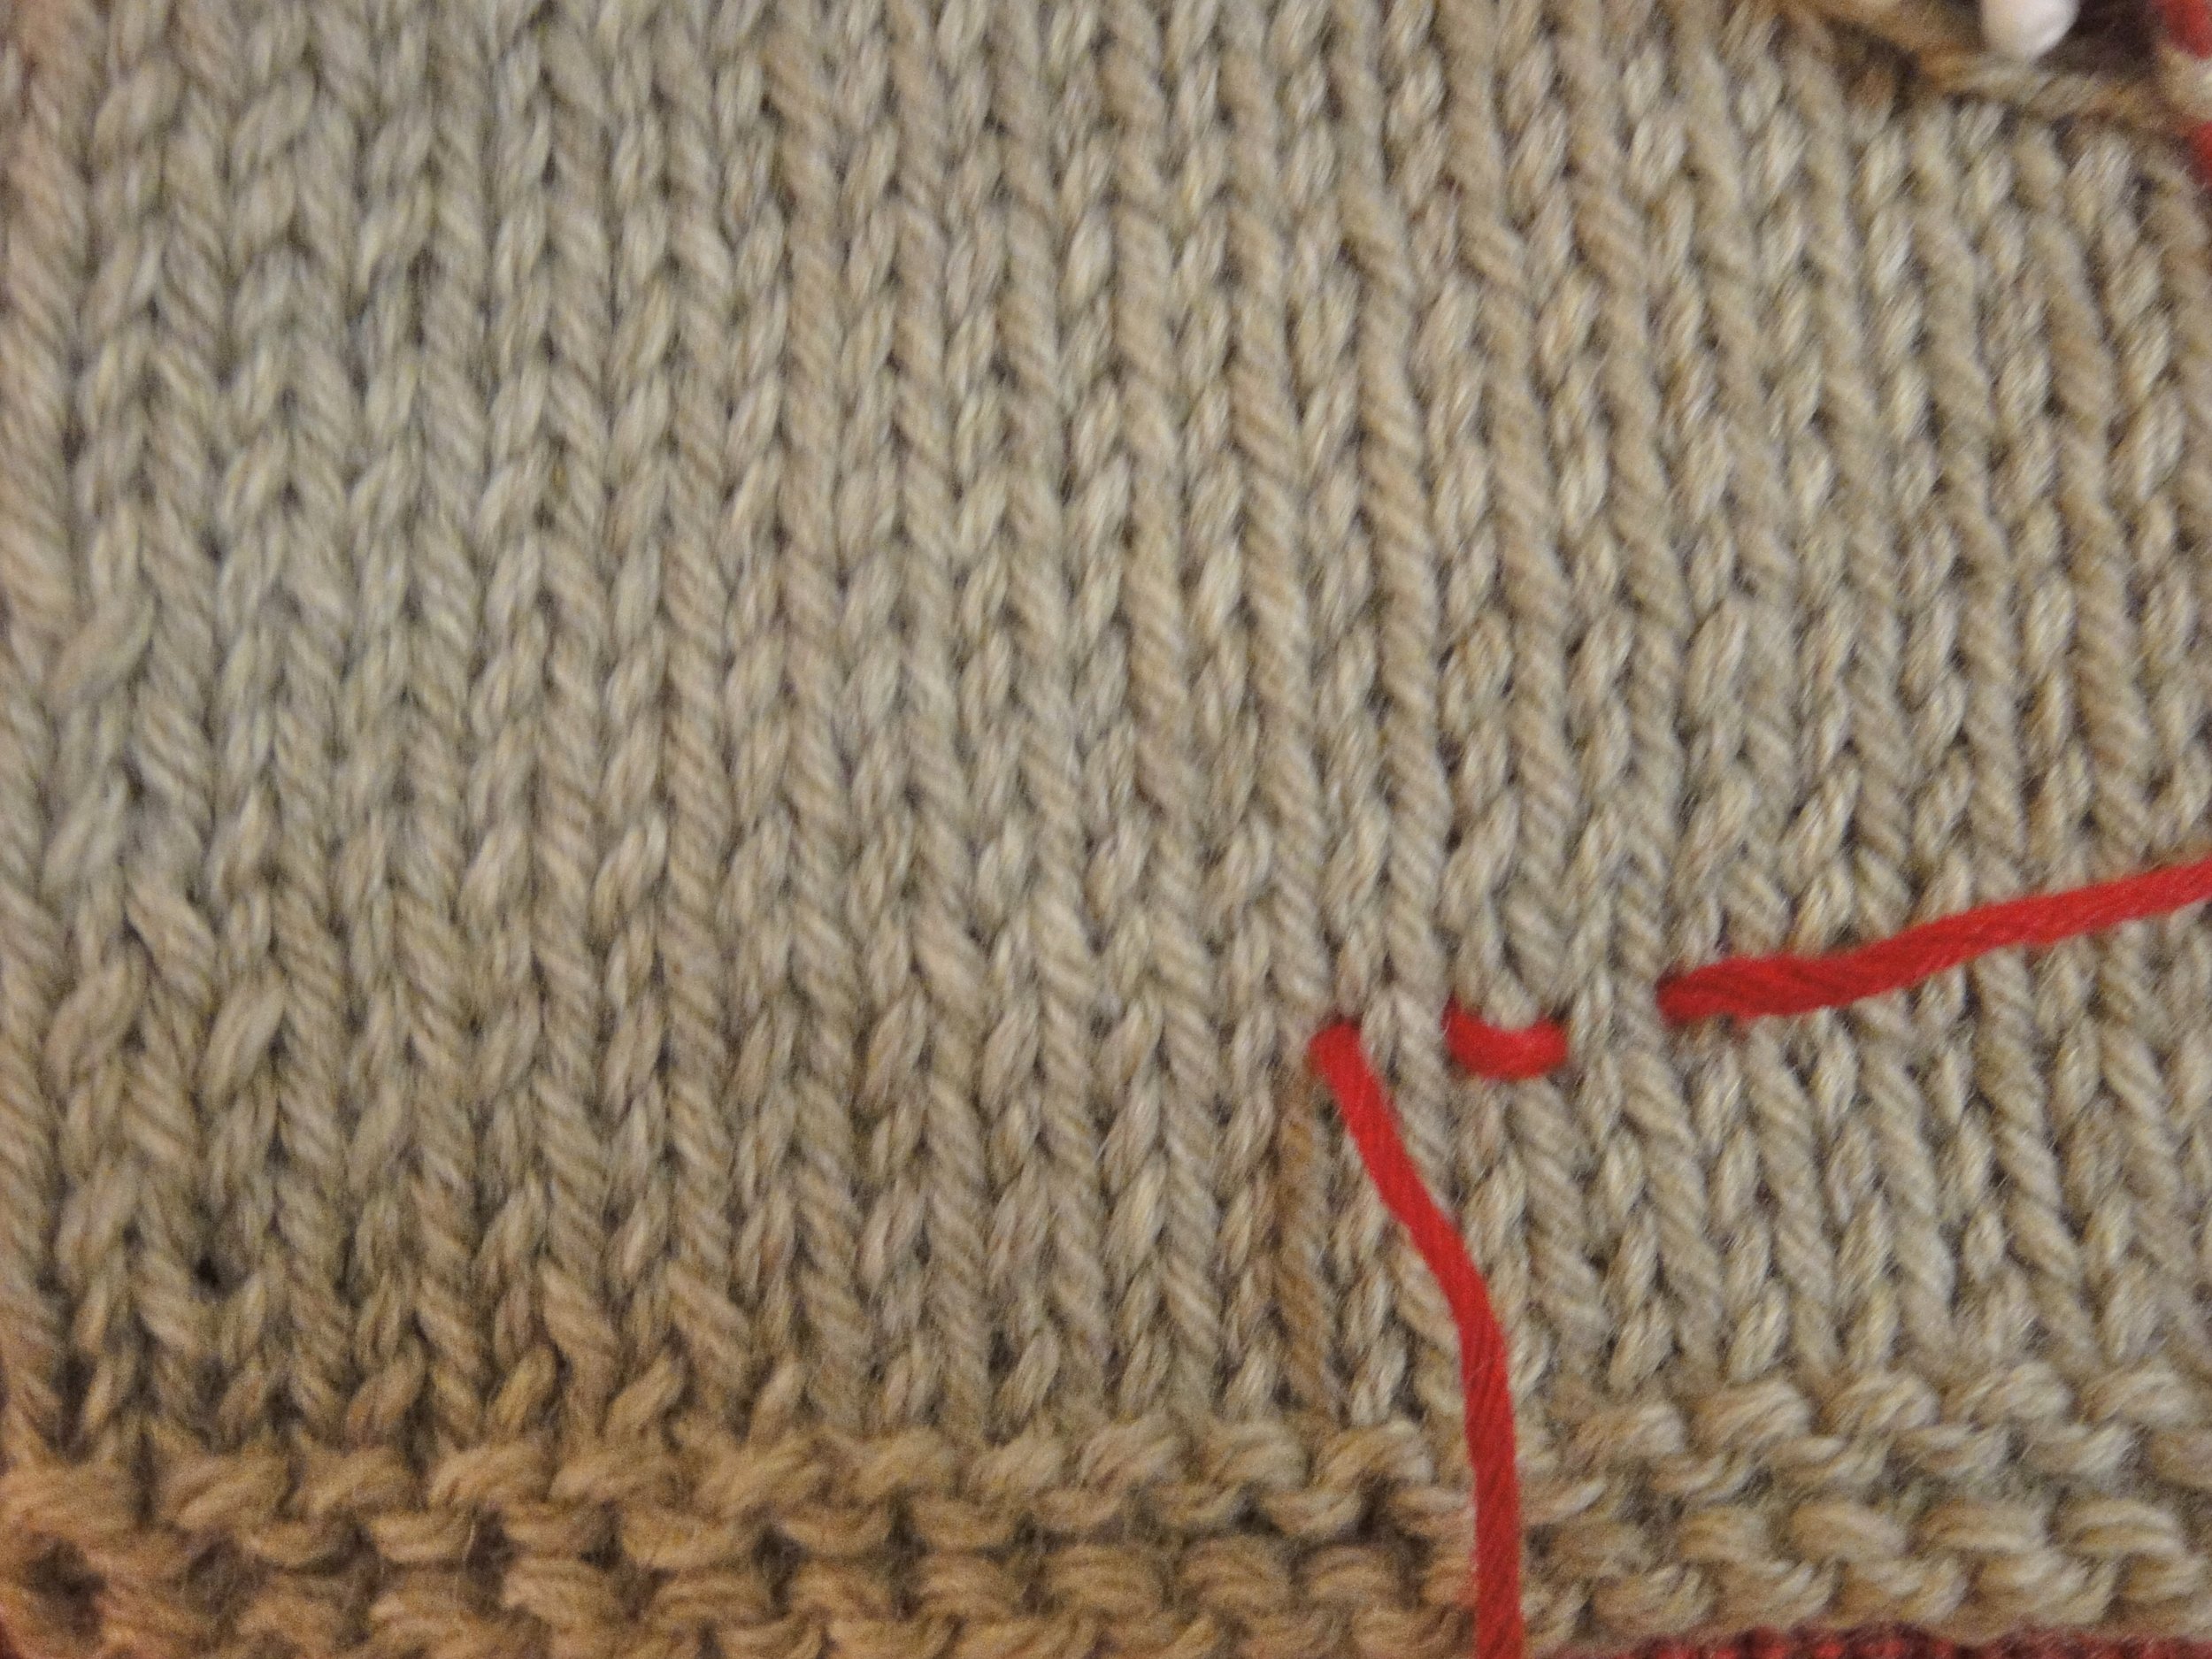
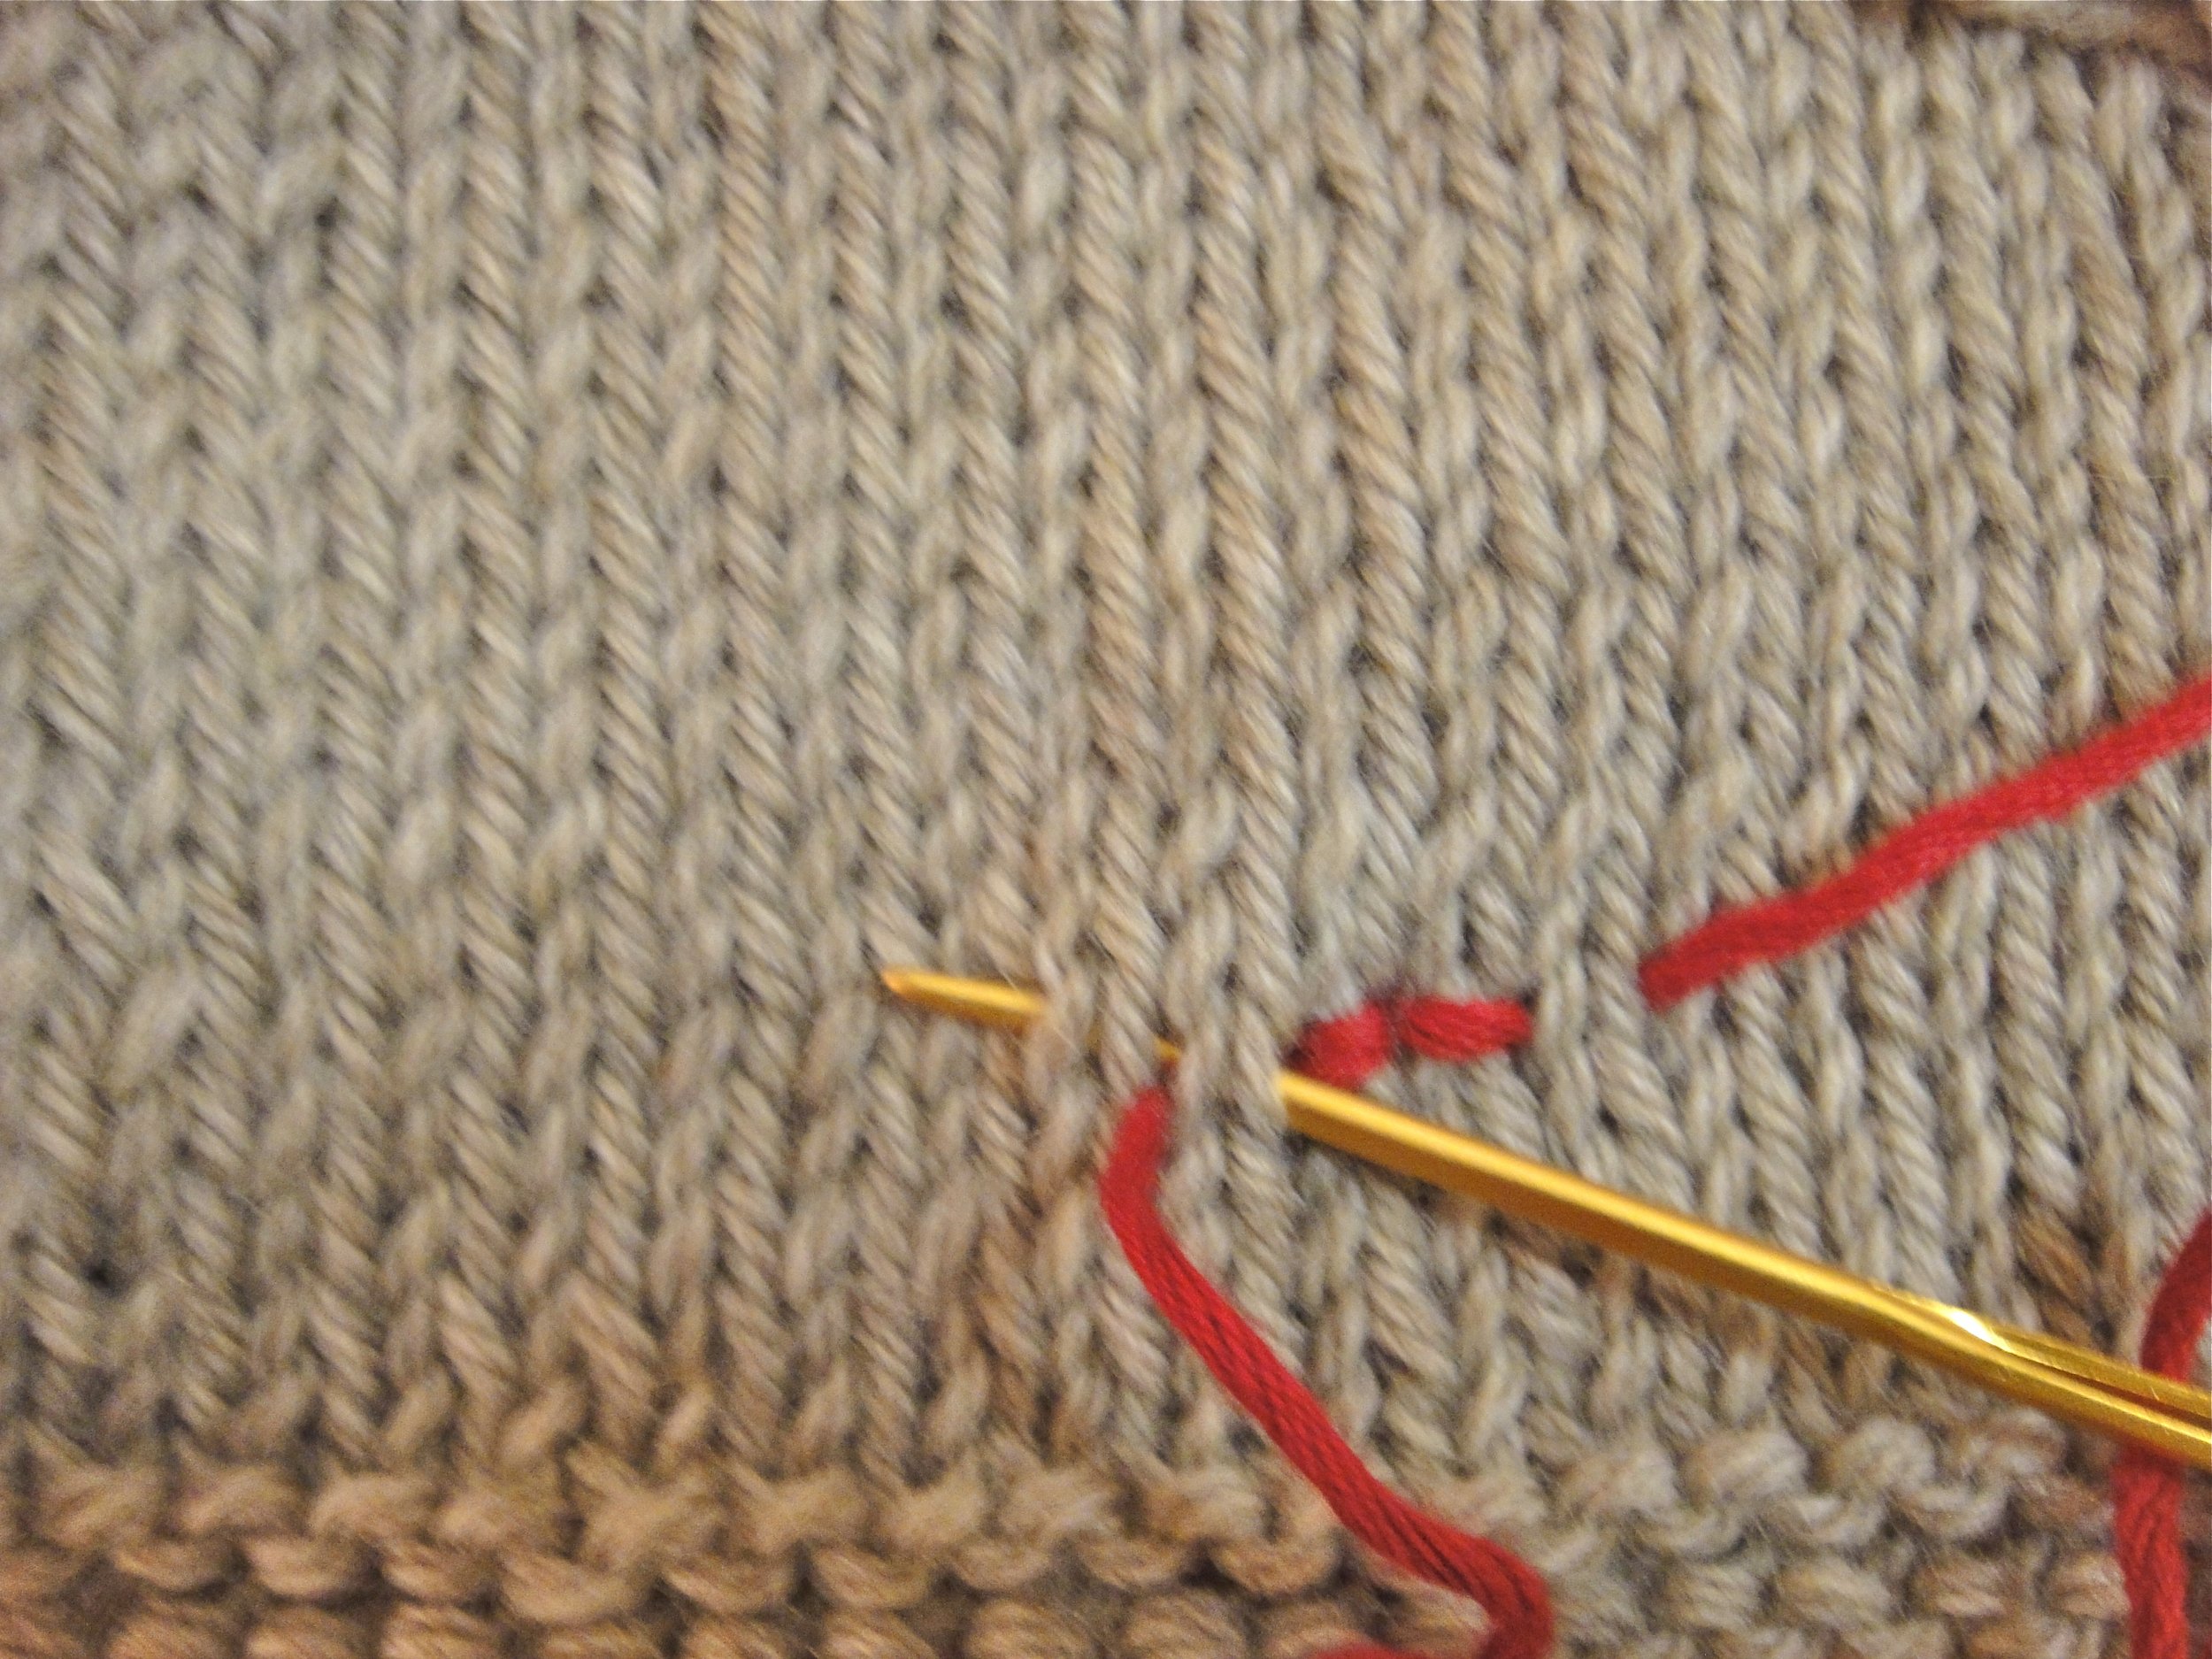
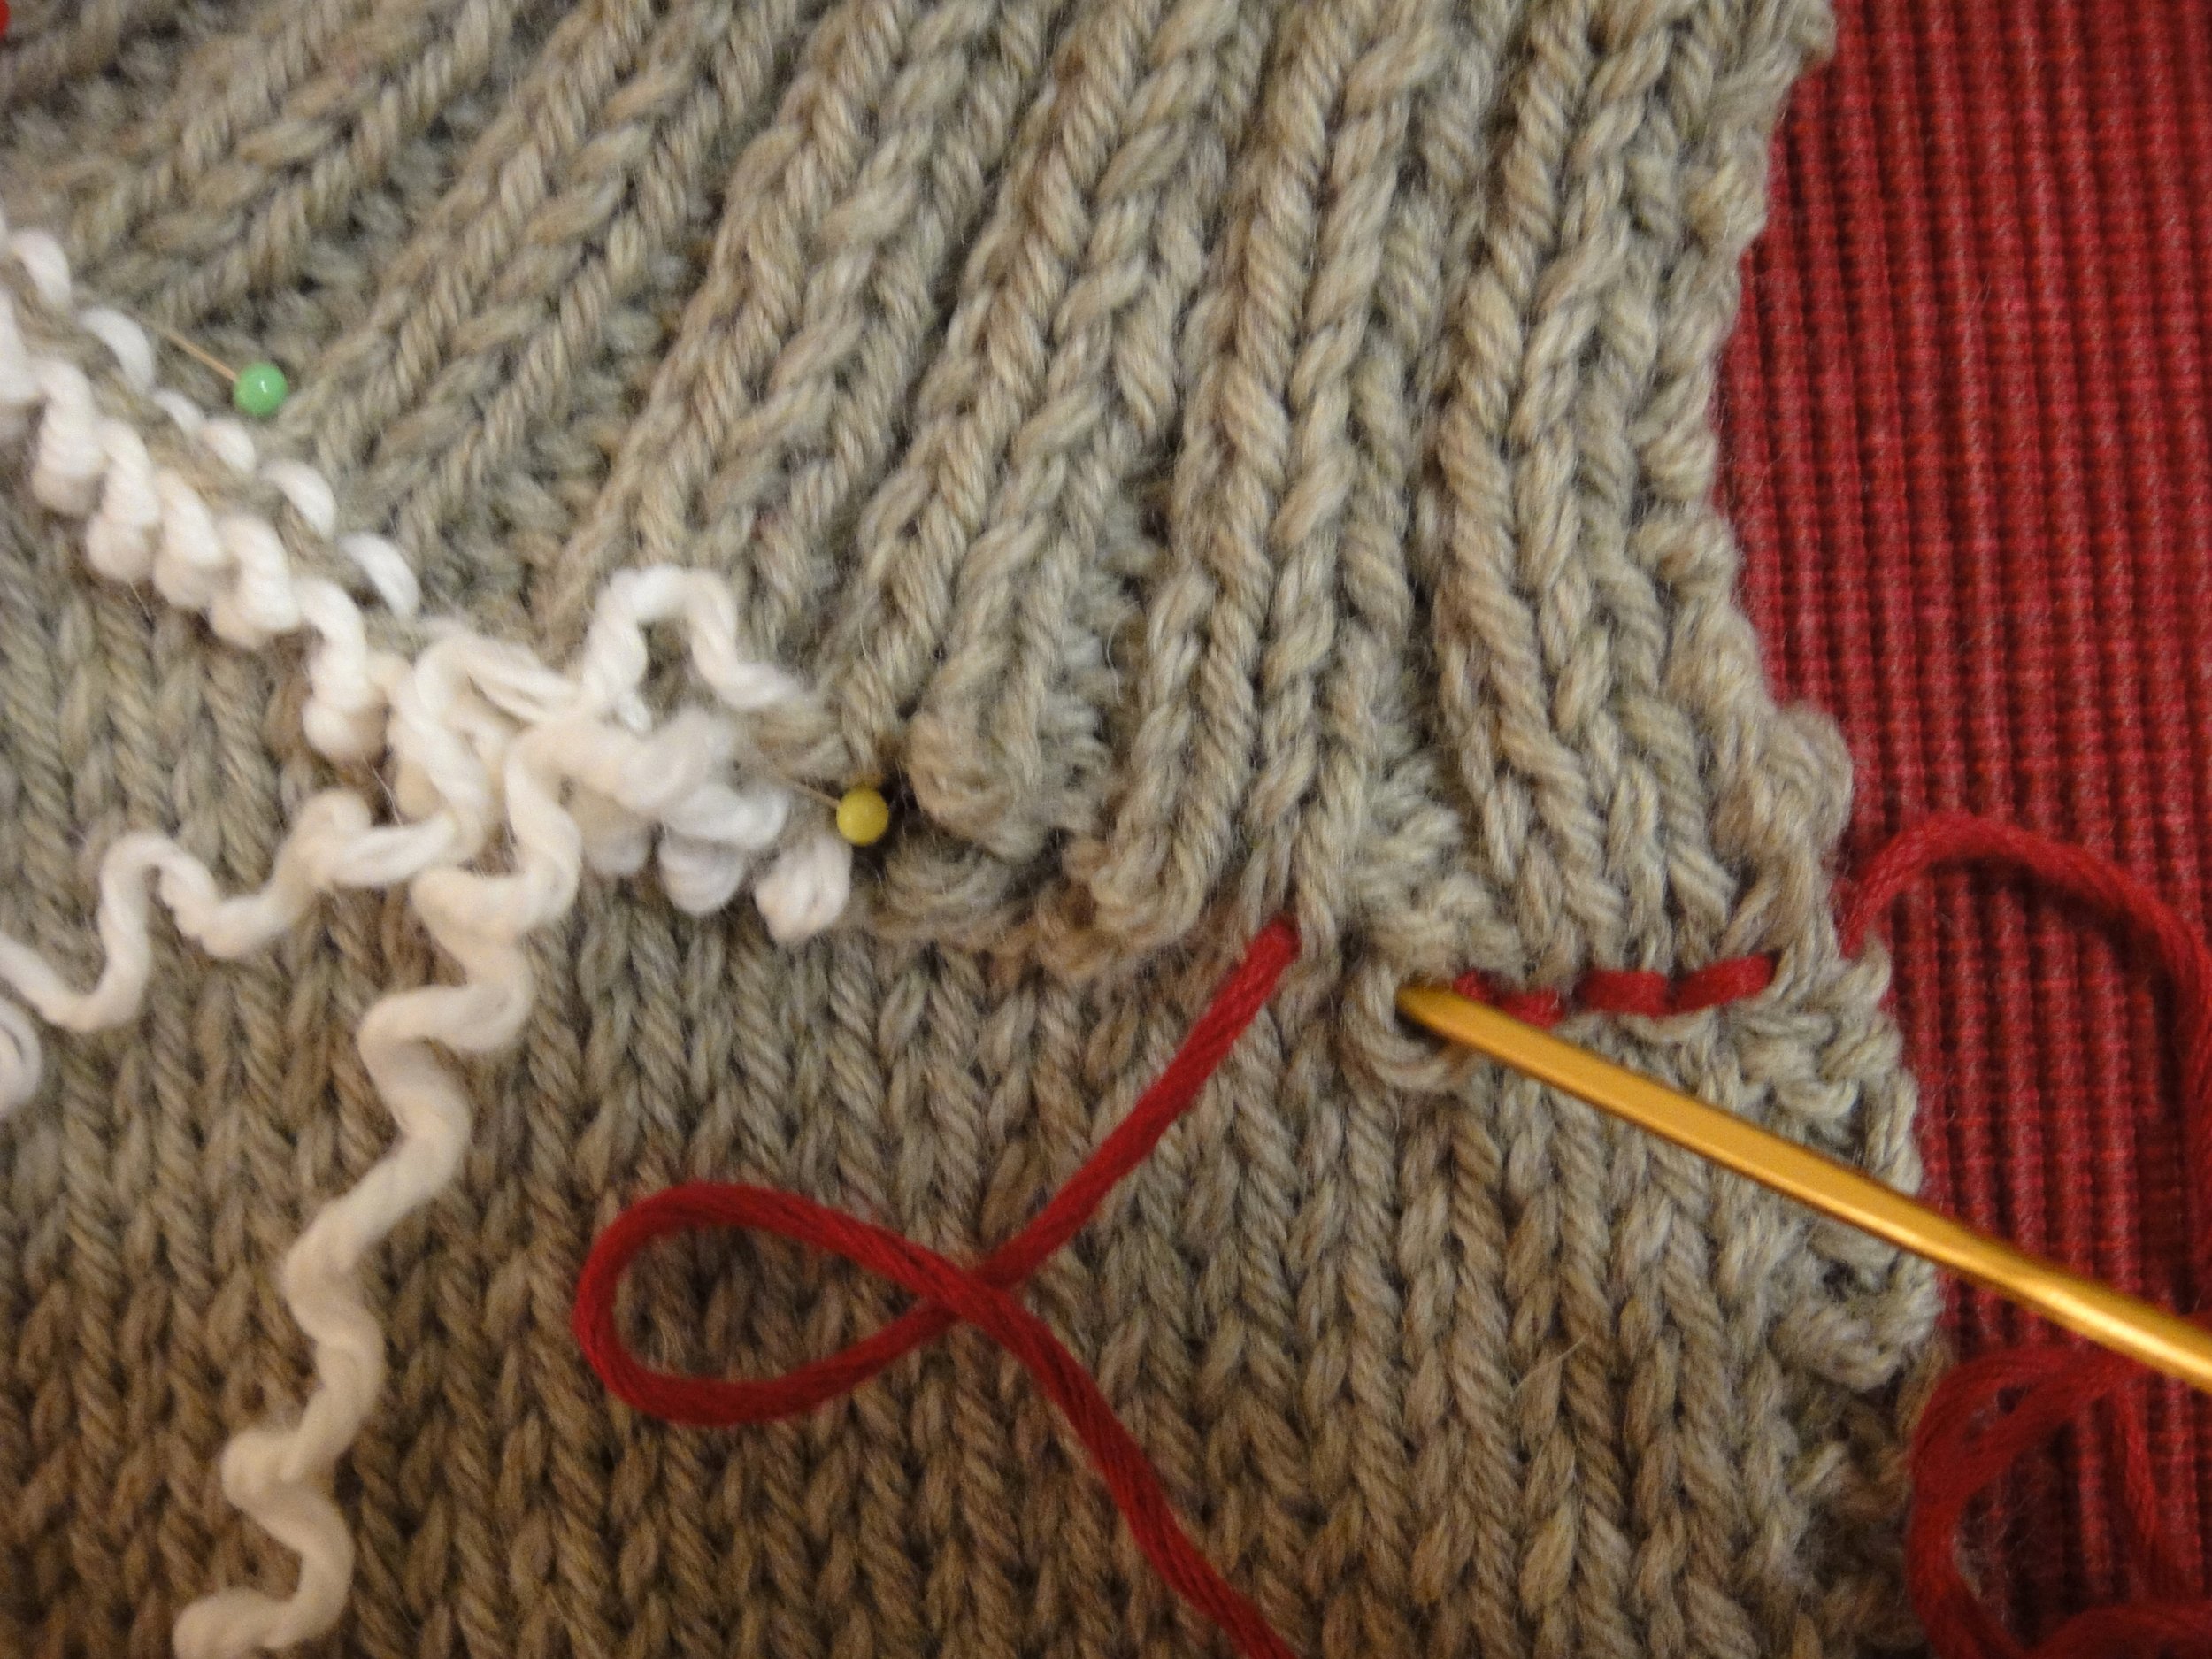
Moving the needle one stitch to the right of where your needle just came up, move needle from top to bottom of fabric layers through a live collar stitch down through a neckline stitch, then glide needle under fabric and come up from underneath through the neckline and a live collar stitch two stitches to the left of where your needle went down.
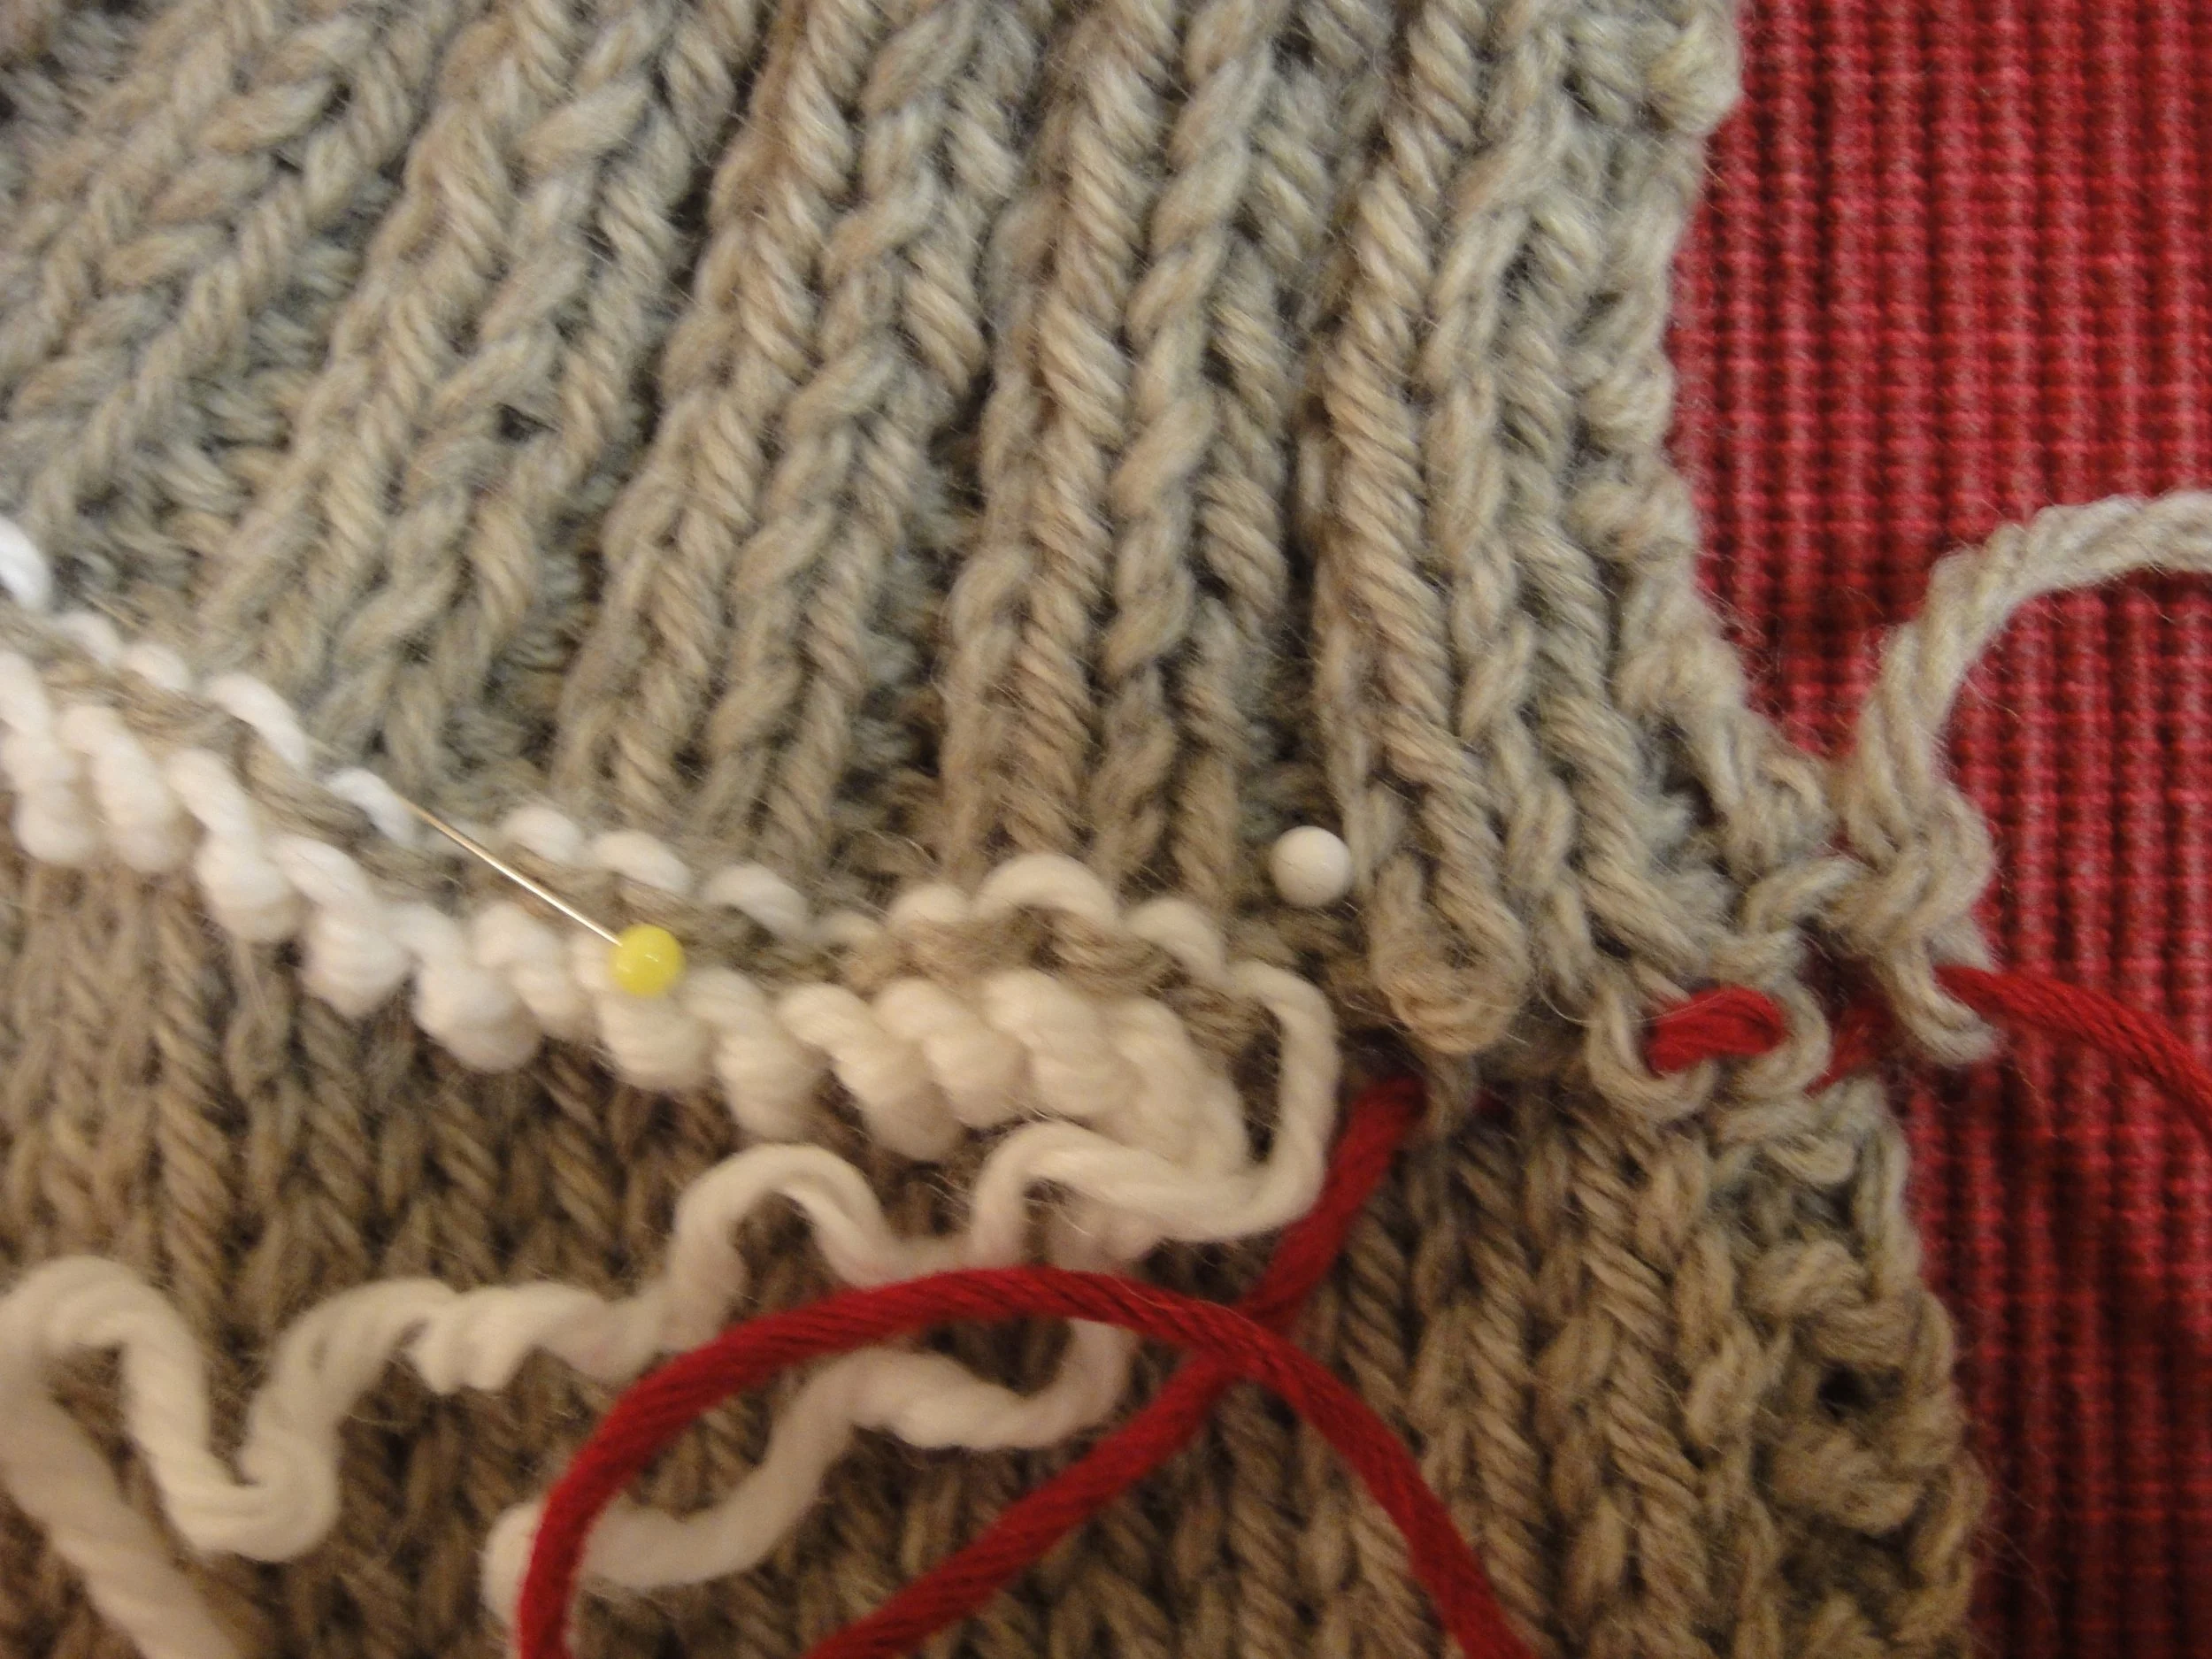
Pull yarn through. Notice that the first stitch of the collar only has the red yarn passed through it once. When actually sewing on a collar you would make the second pass through this stitch at the end of attaching the entire collar.
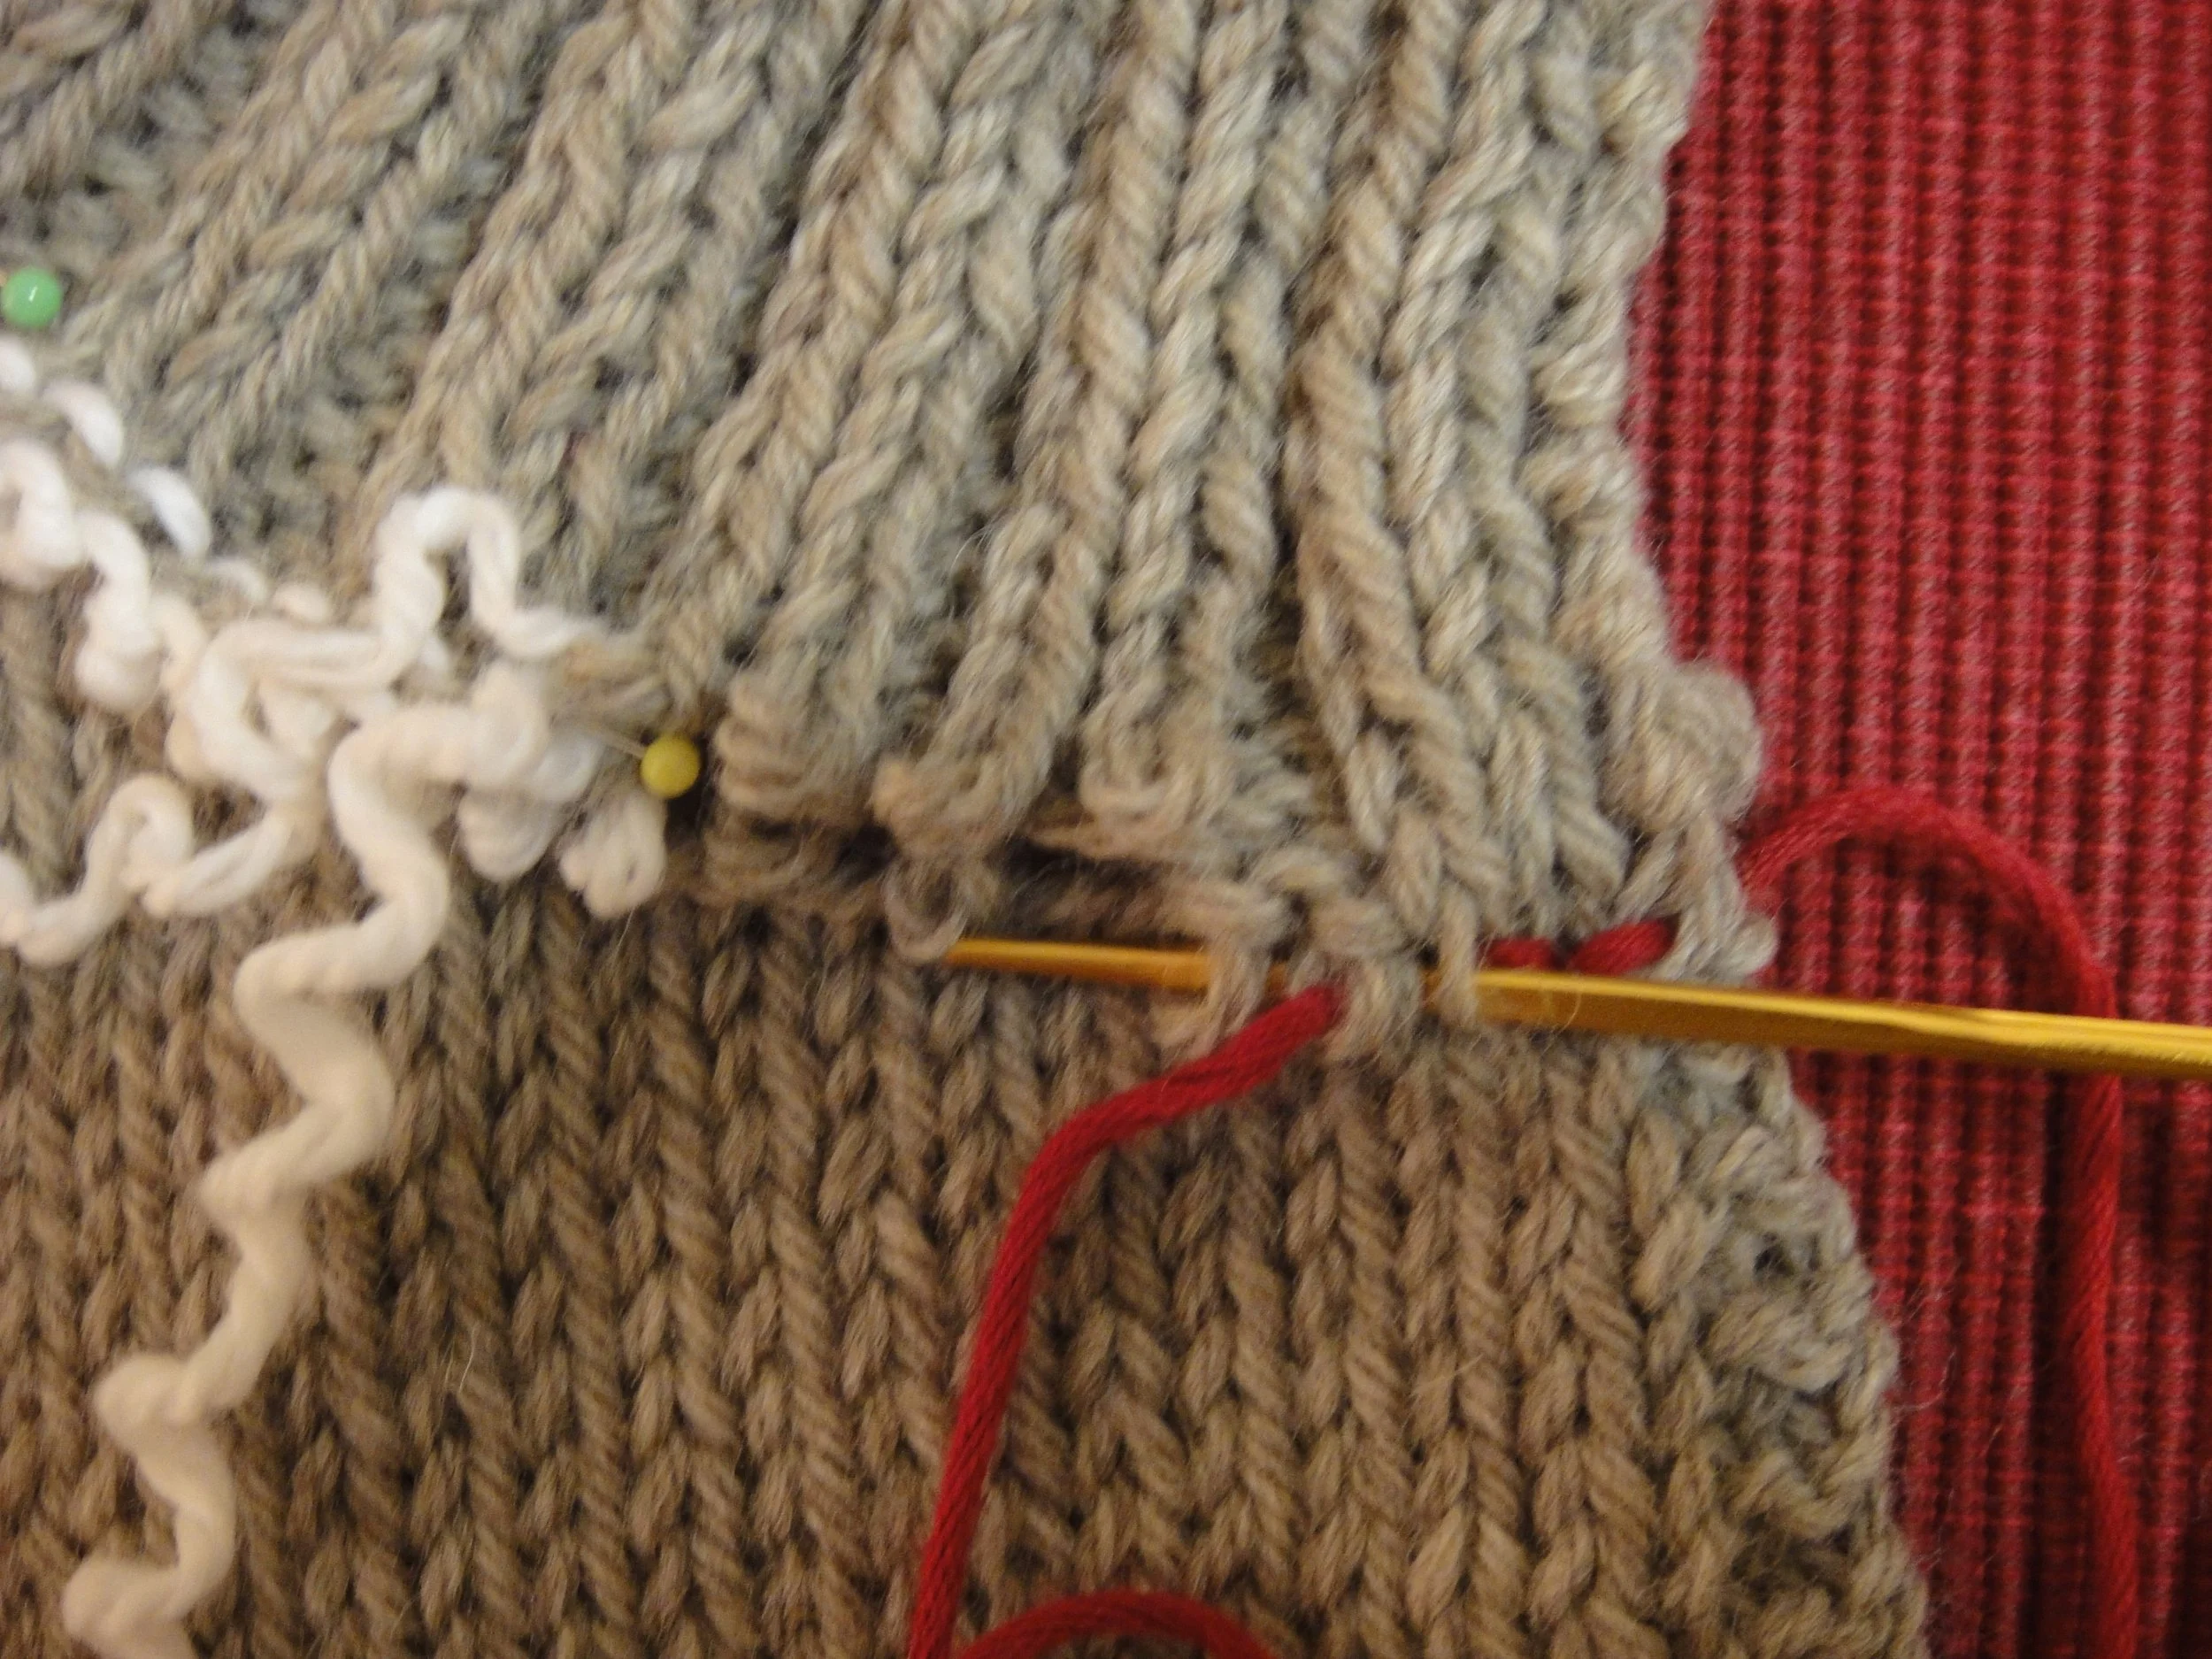
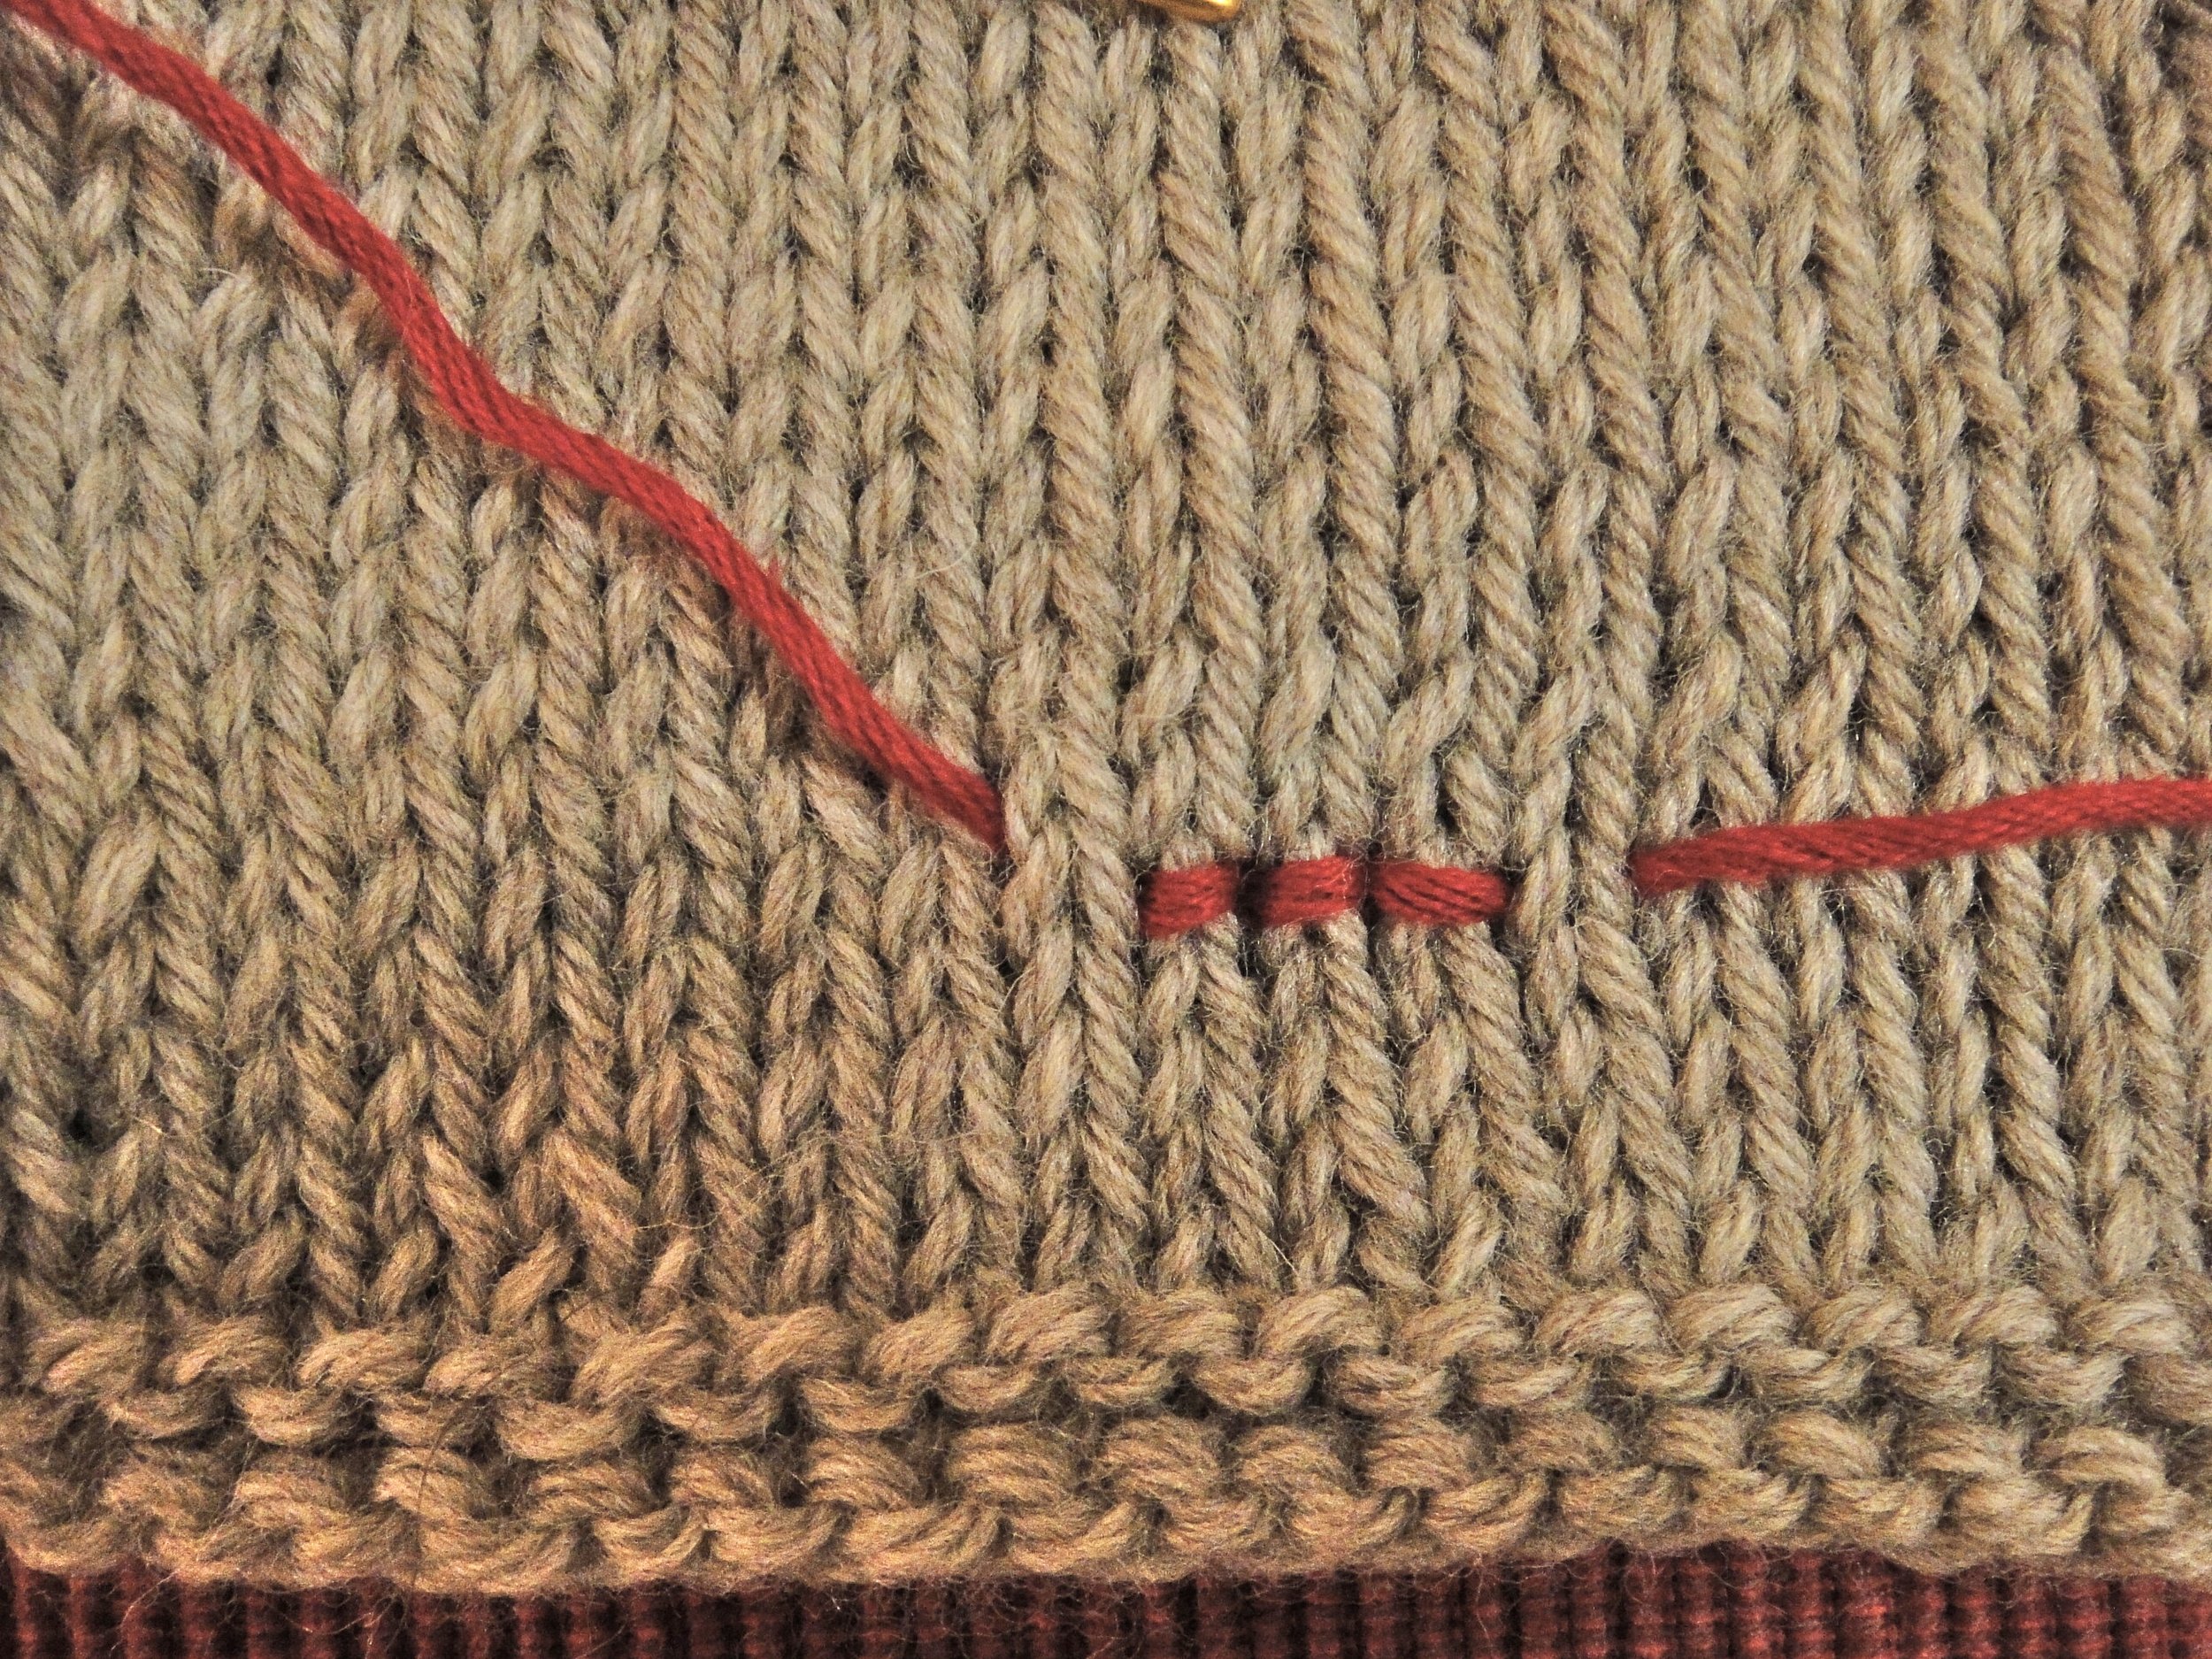
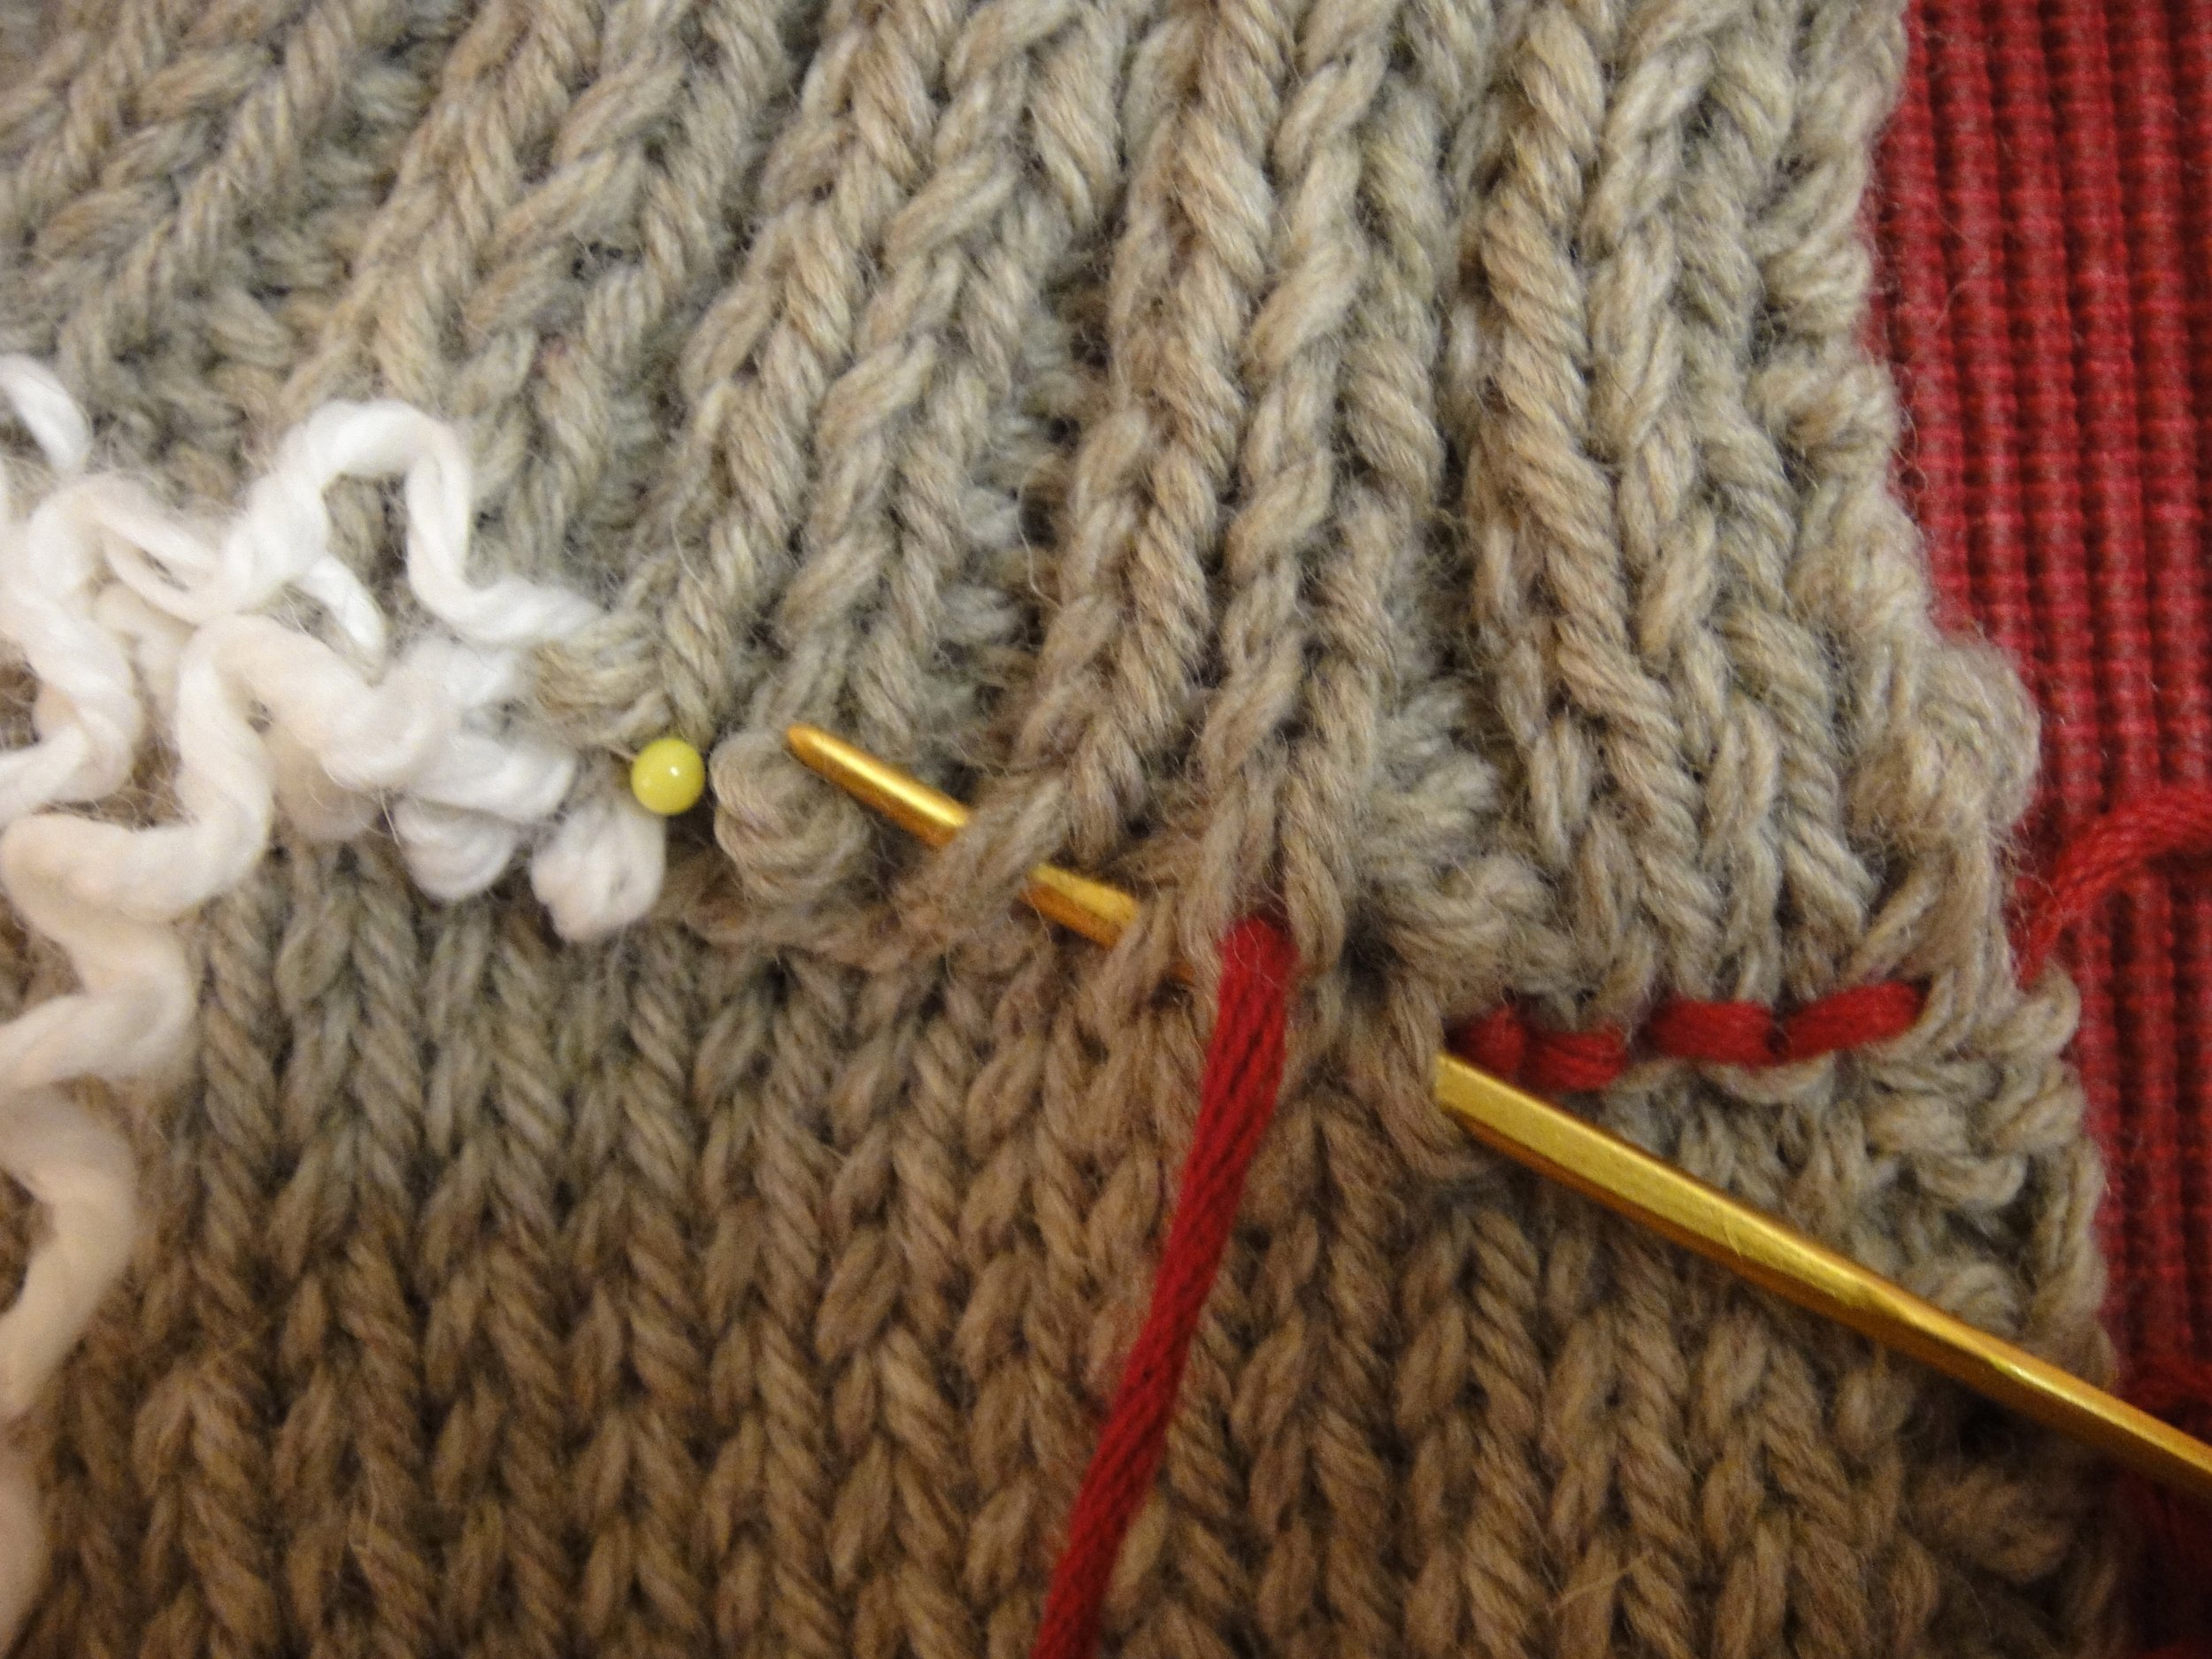
Continue in the same manner. Put your needle down through the fabric one stitch to the right of where you just came up and bring it up two stitches to the left of where your needle went down.
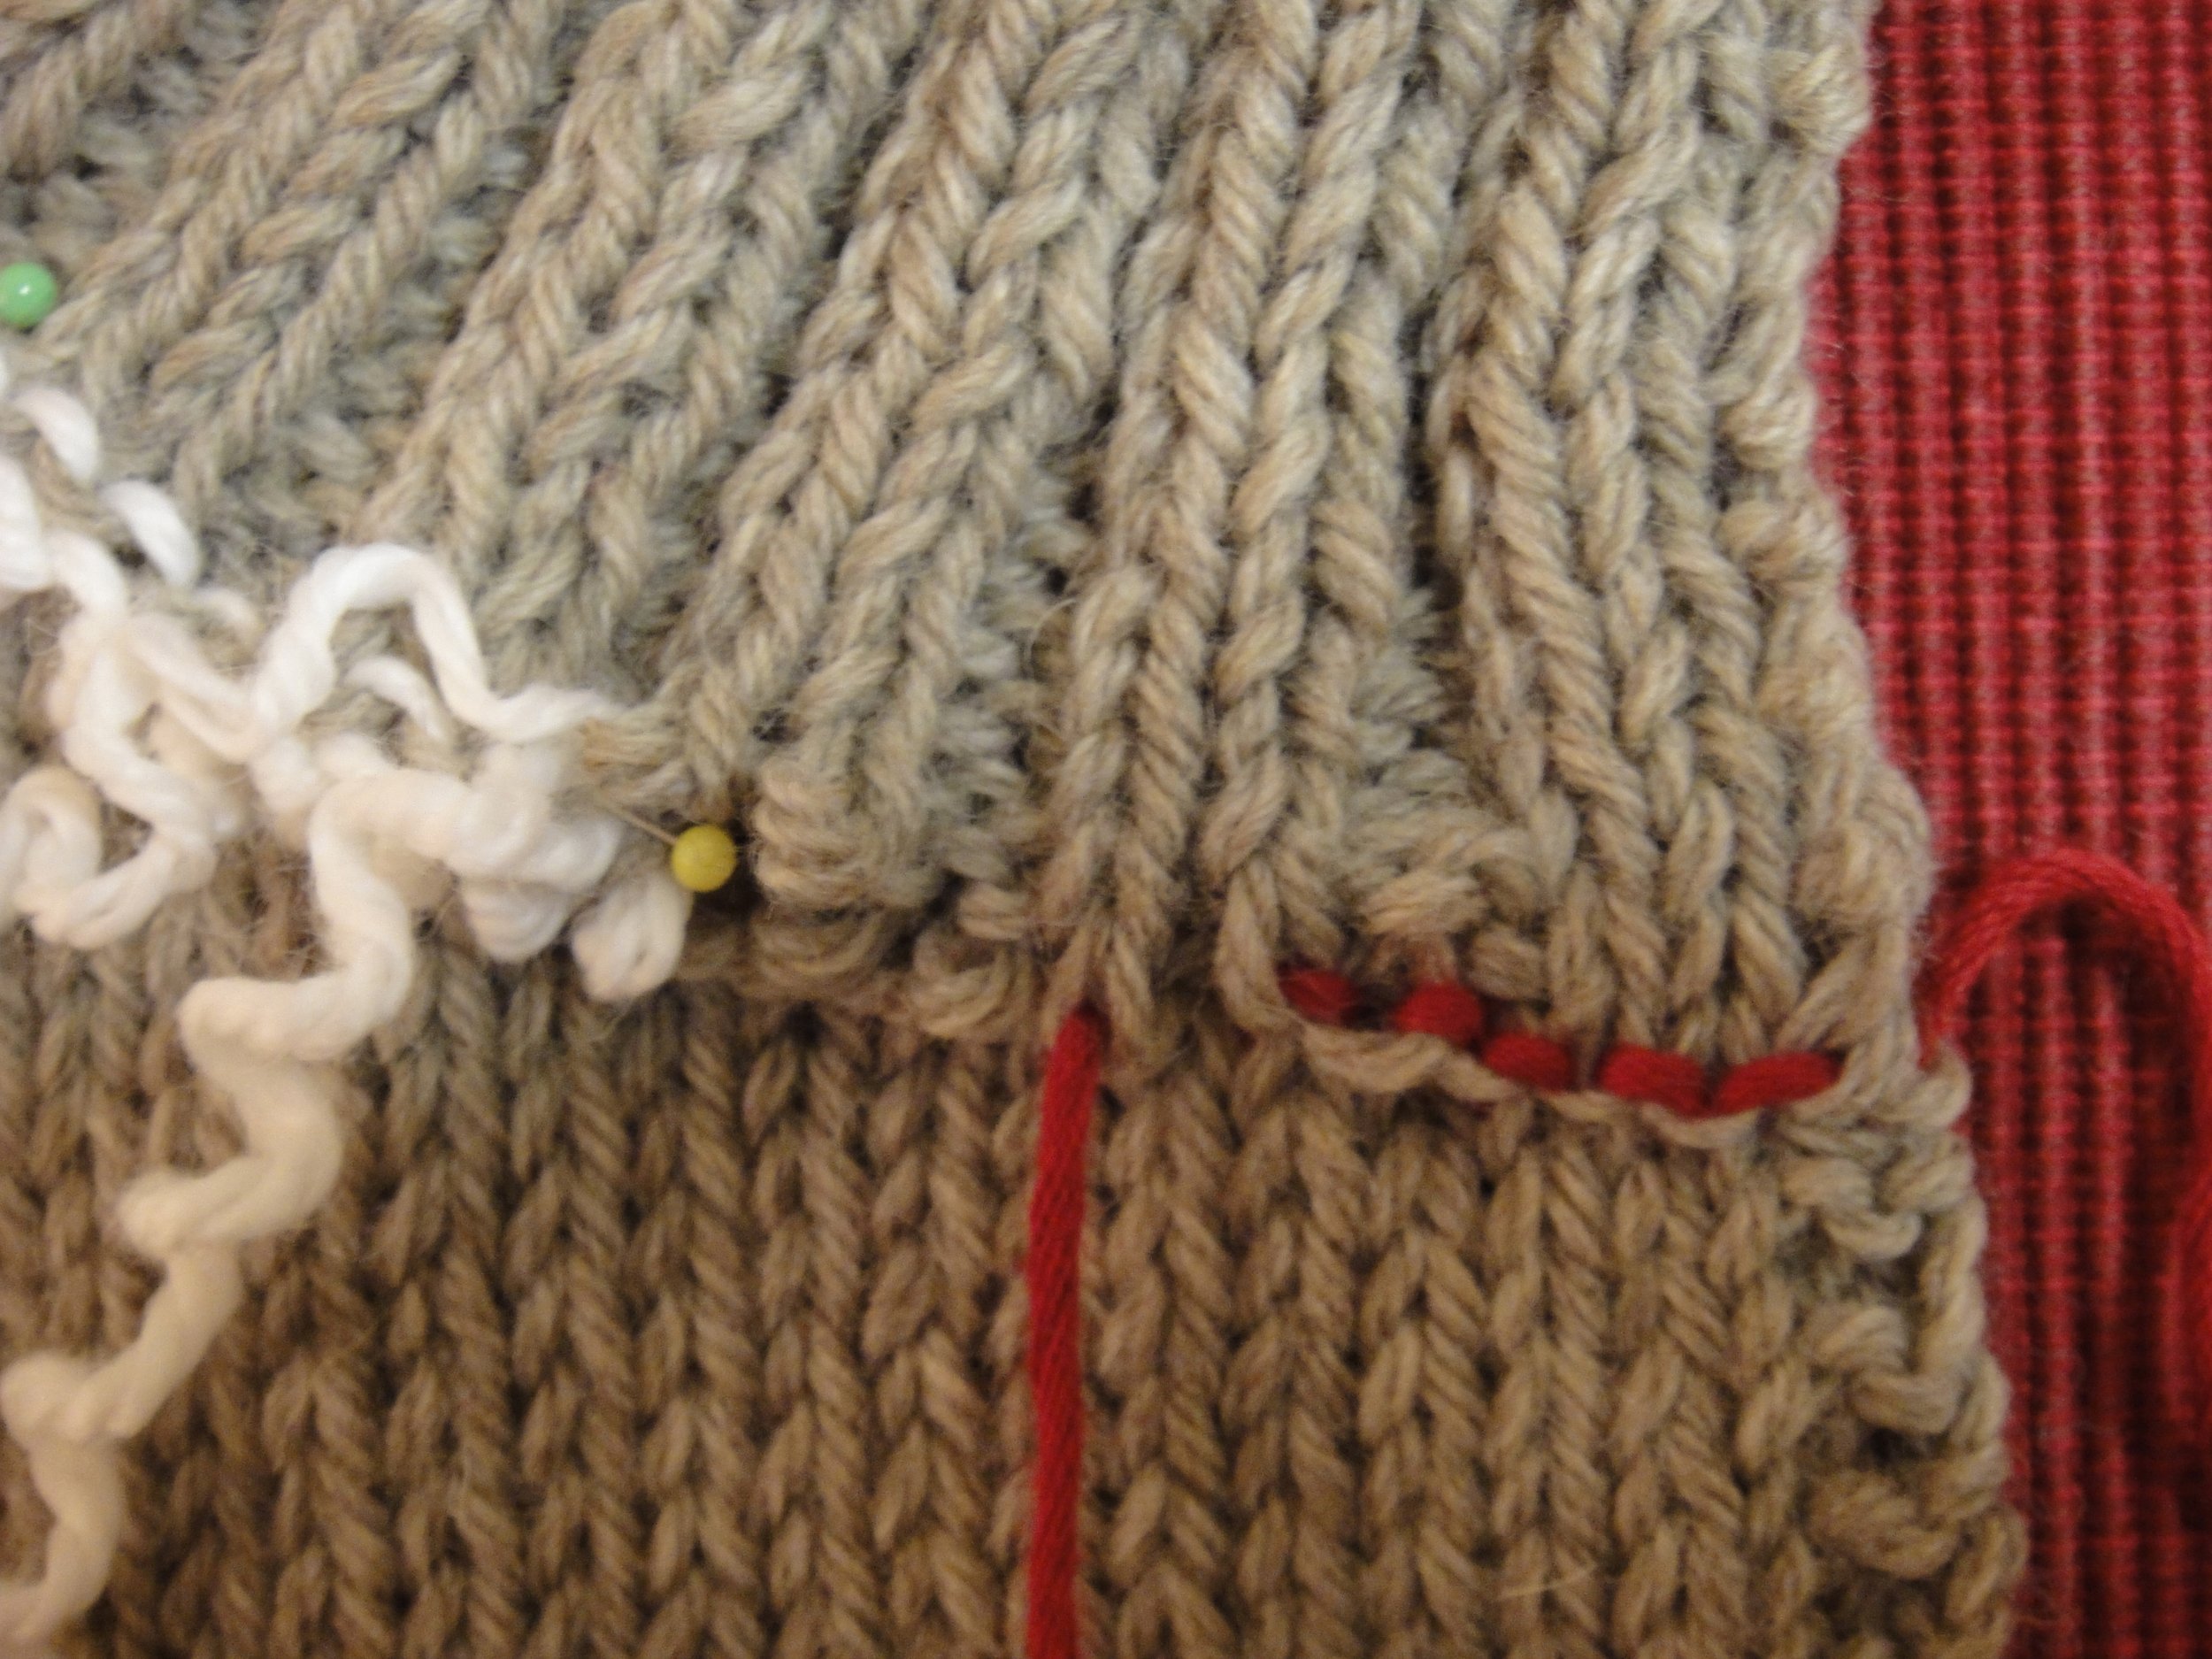
It’s usually clear where to put your needle through the live stitches but sometimes it can be less clear where the needle should go through the neckline stitches. In the example we have here, we are sewing along the center bind off area of the neckline which is completely straight, and the vertical lines of stitches in the sweater front exactly correspond to the vertically oriented collar stitches so the principle of moving your needle one stitch to the right and two the left with each movement will be clear. As you work around the collar and the curve of the neckline shifts, presenting you with the sides of neckline stitches, try to maintain the same rhythm (one to the right, two to the left with regard to the live stitches) and continue to go up and down through the neckline stitches at the same even intervals. In the end, the live stitches of the collar and the backstitches themselves will cover the neckline edge so precisely where you place your needle into the neckline stitches is really not vital, just continue stitching at even intervals in a manner that you find pleasing. It is one of those (many) moments in knitting where you do what looks best to your eye.
Hopefully, you will end up with something like this:
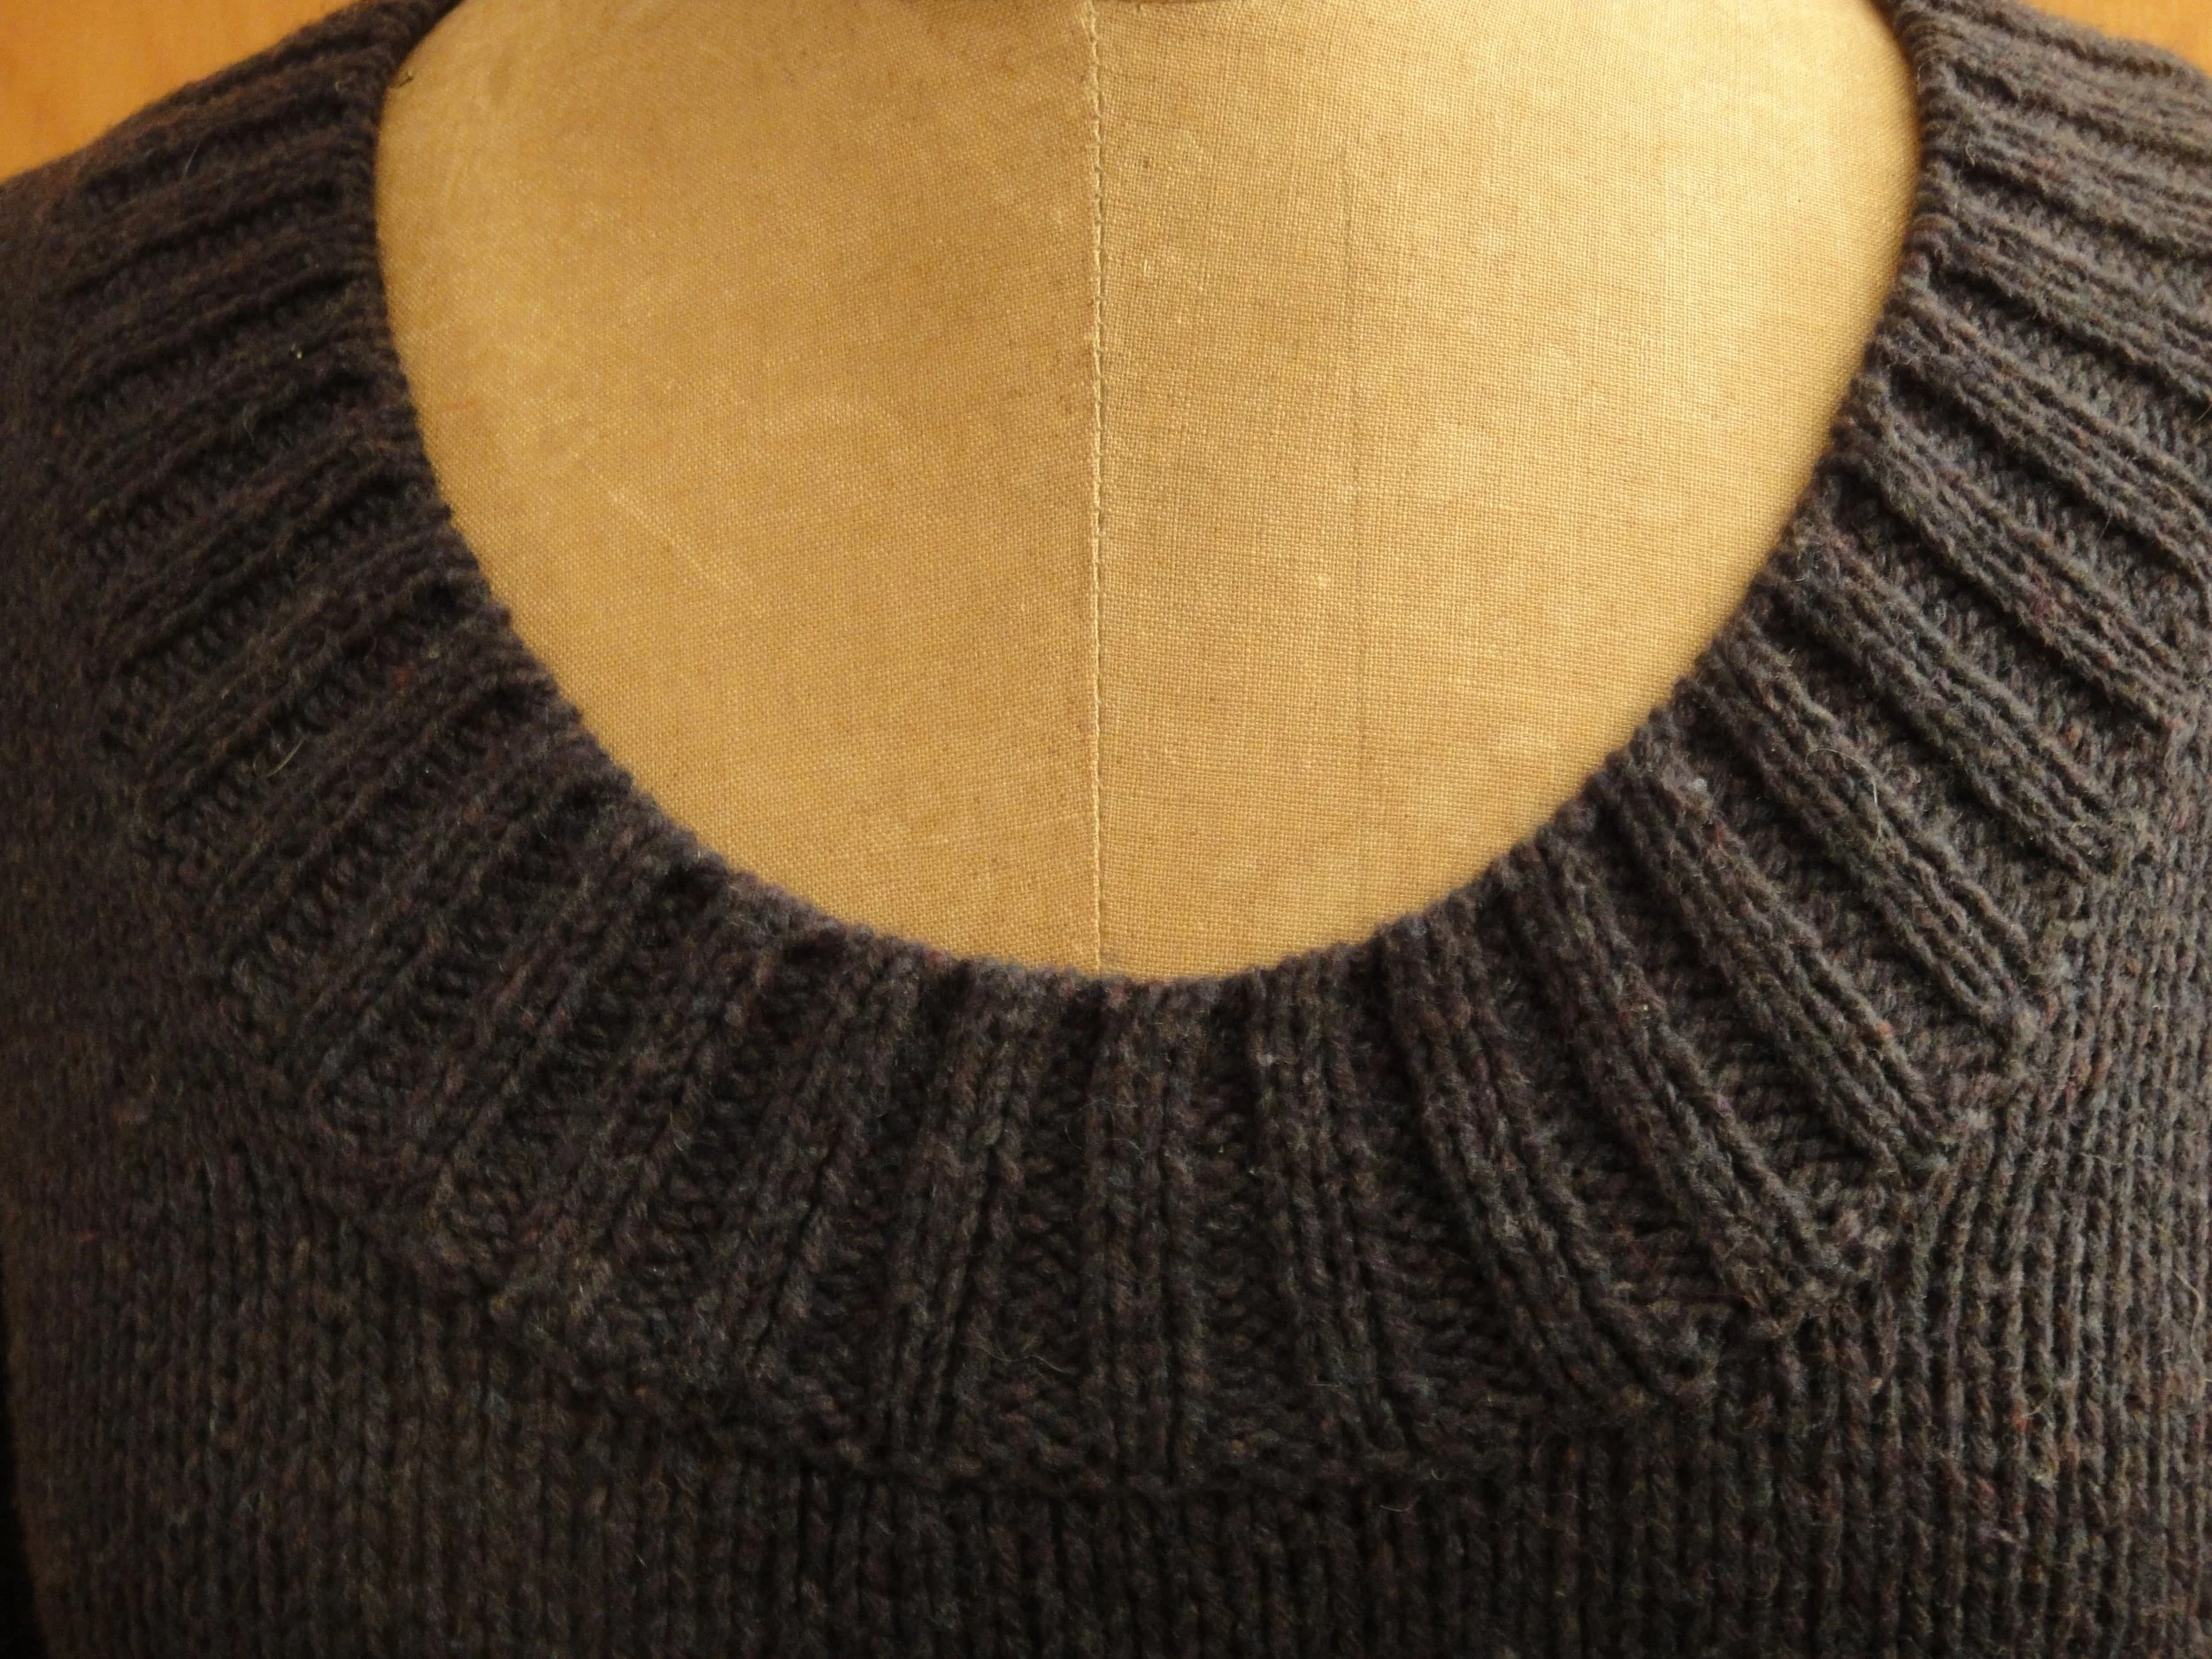
So there you have it; another technique at your disposal. If, like me, you find yourself drawn to drapey fibers that defy your tubular bind-off skills, consider using the backstitch collar.